How to Hang a Climbing Rope

A climbing rope is an important piece of equipment for any climber. Here are some tips on how to hang a climbing rope so that you can get the most out of your climb.
The first thing you need to do is find a sturdy tree or other object to anchor the rope to.
Make sure that the tree is at least twice as tall as you are, and that there are no low-hanging branches that could get in the way. Once you’ve found a good spot, tie a strong knot around the base of the tree.
Next, take the end of the rope and throw it over a high branch.
If there are no high branches available, you can use a rock climbing harness to clip the rope onto a higher point. Once the rope is over the branch, pull it tight so that there is no slack in the line.
How to set up a Climbing Rope
- Choose a climbing rope that is appropriate for the activity you will be using it for
- Inspect the rope to make sure there are no frayed or damaged areas
- Measure the length of rope you will need and cut it to size if necessary
- Tie a sturdy knot at one end of the rope, leaving enough slack to allow for movement and tying additional knots later on if needed
- Attach the other end of the rope to a secure anchor point, such as a carabiner or another climbing rope
- Pull on the rope to test that it is secure before beginning your climb
How to Hang a Climbing Rope from the Ceiling
Climbing ropes are a great way to stay in shape and have fun at the same time. But if you don’t have a lot of space, you might not be able to set up a traditional climbing wall. That’s where hanging a climbing rope from the ceiling comes in handy.
Here’s what you need to do to hang a climbing rope from the ceiling:
1. Find a sturdy beam or other support that can hold your weight. Make sure it is firmly attached to the ceiling so it won’t come loose while you’re climbing.
2. Tie one end of the rope around the support, using a knot that won’t come undone easily.
3. Feed the other end of the rope through an anchor point on the ceiling (such as a hook or ring). This will keep the rope from sliding off the support while you’re climbing.
4. Tie another knot in the end of the rope, making sure it is secure but not too tight so you can adjust it if necessary. This is your belay point – where you will attach your safety harness when you start climbing.
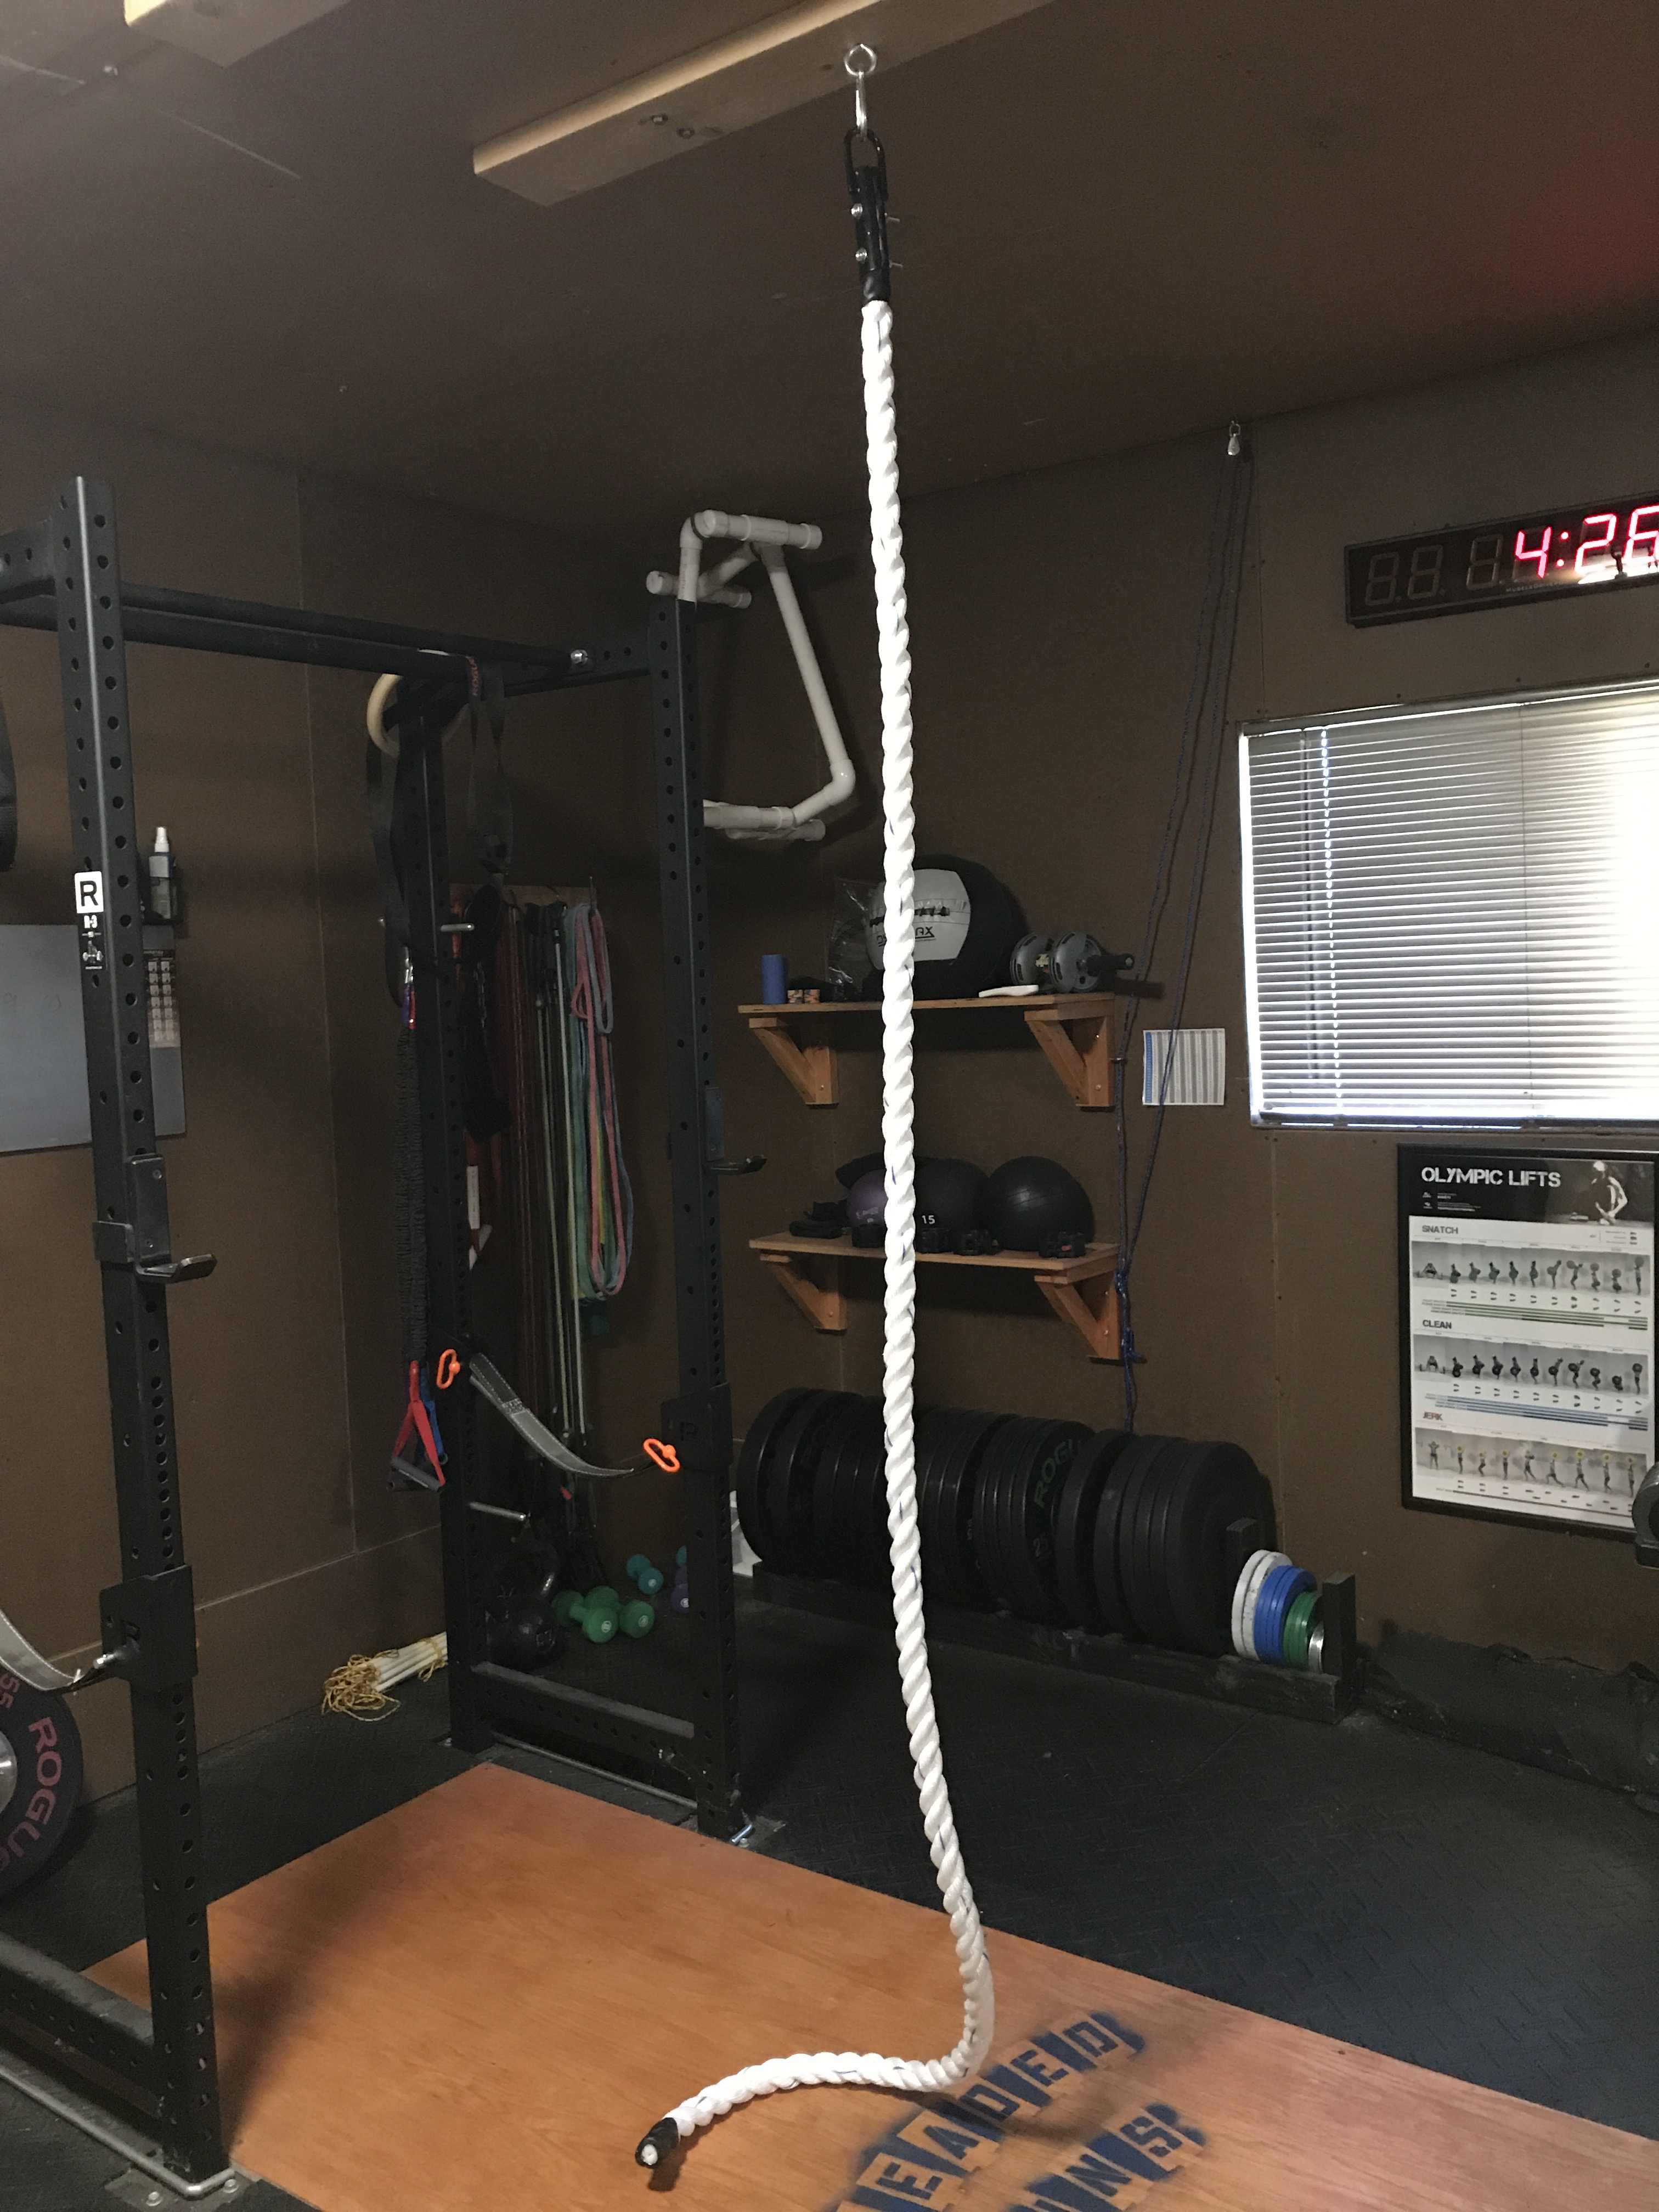
How to Hang a Climbing Rope in Garage
Climbing ropes are an essential piece of equipment for rock climbers, but they can also be a great way to add some extra fitness into your garage workouts. Here’s a step-by-step guide on how to hang a climbing rope in your garage so you can start getting those gains!
First, find a suitable spot in your garage where the rope can hang freely without any obstacles in the way.
Once you’ve found the perfect spot, use a drill to create a hole in the ceiling – this is where you’ll be screwing in an eye hook. Make sure the eye hook is screwed in tight and secure before proceeding to the next step.
Next, take one end of the rope and tie it off around the eye hook using a strong knot.
Once that’s done, feed the other end of the rope through an anchor point (like another eye hook or even a carabiner) until there’s only about 2 feet of rope left. This 2-foot section will be used as your “tail” – tie it off around the anchor point using another strong knot.
Now it’s time to start climbing!
Grab hold of the rope and put your feet against the wall – start walking up slowly and steadily until you reach your desired height. When you want to come back down, simply lower yourself down hand over hand until you reach the ground safely.
That’s all there is to it!
By following these simple steps, you can easily turn your garage into a makeshift climbing gym and get some extra cardio (and strength training) in during your workouts.
Climbing Rope Ceiling Mount
Climbing rope ceiling mounts are a great way to add an extra layer of safety to your home climbing setup. Ceiling mounts allow you to firmly secure your climbing rope at the top of your climb, giving you a more reliable anchor point in case of a fall.
There are a few different ways to go about installing a climbing rope ceiling mount, but the most important thing is to make sure that the mount is securely fastened to a structural support beam in your ceiling.
You’ll also want to take care not to damage any existing ceiling fixtures or drywall when drilling holes for the mount.
Once your ceiling mount is installed, simply thread your climbing rope through the ring and tie it off at the desired height. And that’s all there is to it!
With a little bit of planning and effort, you can turn any room in your house into a safe and fun indoor climbing space.
Climbing Rope Mounting Bracket
When it comes to rock climbing, one of the most important pieces of gear is the rope. The rope is what keeps you safe as you climb up the face of a rock or cliff. Without a good rope, you could easily fall and hurt yourself.
That’s why it’s so important to have a good quality climbing rope, and to know how to properly mount it onto your harness.
There are two main types of climbing ropes: static and dynamic. Static ropes are typically used for rappelling or when belaying another climber.
They’re also often used in rescue situations. Dynamic ropes, on the other hand, are designed to stretch under load. This makes them ideal for lead climbing, where they can help absorb some of the shock if you fall.
No matter what type of rope you’re using, though, you’ll need to attach it to your harness with a Climbing Rope Mounting Bracket (CRMB). A CRMB is essentially a metal ring that goes through the loops on your harness, and that has a screw-locking carabiner attached to it. This carabiner is what actually attaches the rope to your harness.
It’s important to choose the right size CRMB for your particular harness – too small and it won’t fit properly; too large and it will be uncomfortable or even dangerous (it could come loose and allow the rope to slip out). Most CRMBs are made from aluminum or steel, although some companies do make them from plastic as well. Whichever material you choose, just make sure that it’s strong enough to hold up under stress.
Once you’ve got your CRMB in place, threading the rope through is relatively simple. Just feed one end of the rope through the carabiner until it comes out the other side (you may need someone else to help hold onto the end of the rope while you do this). Then tie an overhand knot in order keep the end from slipping back through – be sure not to tie this too tightly, as it needs to be able slide smoothly when dynamic ropes are in use (static ropes can be tied more securely).
Now all that’s left is feedingthe rest ofthe ropethroughthe CRMB – again making sure notto tie any knotsor secureitin any waythat would preventitfrom movingfreelythroughthe device(thisis especiallyimportantwithdynamicropes!).
How to Store Climbing Rope
Climbing rope is an essential piece of gear for any climber, but it can be tricky to store. Here are a few tips on how to store your climbing rope so it stays in good condition and is ready to use when you need it.
1. Keep your rope out of the sun.
UV rays can damage the fibers in your rope and shorten its lifespan. If you have to store your rope outdoors, make sure it’s in a shady spot or covered with a tarp.
2. Avoid storing your rope near chemicals or other harmful substances.
Gasoline, oil, and solvents can all damage climbing rope, so keep it away from these things if possible.
3. Store your rope in a cool, dry place. Heat and humidity can also damage climbing rope, so try to avoid storing it in an attic or bamanly cheeset where these conditions are common.
A closet or other enclosed space that stays relatively cool and dry is ideal.
4. Inspect your rope regularly for signs of wear and tear. Fraying, kinking, or otherwise damaged sections of rope should be replaced before they cause problems while you’re climbing.
How to Hang Rings from Ceiling
If you’re looking for a unique way to hang rings from your ceiling, there are several options available. You can buy special hangers that allow you to suspend the rings from the ceiling, or you can make your own hangers out of wire or ribbon. Whichever method you choose, be sure to take into account the weight of the rings and the material of the ceiling before attaching anything.
Hanging Gymnastic Rings from Ceiling Joist
If you’re looking to add a little bit of gymnastic flair to your home gym, consider hanging some gymnastic rings from your ceiling joists. This is a relatively simple project that can be completed in an afternoon, and it will give you a versatile new piece of equipment to work with. Here’s what you need to know about hanging gymnastic rings from ceiling joists.
The first thing you need to do is determine where your ceiling joists are. If you don’t already know, there are a few ways to find out. You can either measure up from the floor (measure from the top of the baseboard molding), or you can remove a section of drywall and take a look yourself.
Once you’ve located the joists, mark them with a pencil so you know where to drill your holes.
Next, use a drill to create pilot holes in the ceiling at each of your marks. These pilot holes should be slightly smaller than the screws or bolts that you’ll be using to attach the rings.
It’s important not to make these holes too big, as this could cause the wood around them to split when you put in the fasteners.
Now it’s time to install the actual rings. There are two methods for doing this – either screwing or bolting them into place, or using special toggle bolts designed specifically for holding up gymnastic rings (these are available at most hardware stores).
If you’re going with screws or bolts, simply run them through the ring and into the pilot hole in the ceiling until they’re nice and snug; if using toggle bolts, follow directions on package for proper installation.
Once all of your rings are installed, it’s time to start working out! Gymnastic rings offer a great full-body workout and can be used for everything from pull-ups and dips to inverted rows and muscle-ups.
So get creative, have fun, and enjoy your new home gym addition!
Rope Hanging from Ceiling Workout
Hang a rope from the ceiling and use it for a great workout! This type of workout is perfect for those who want to improve their upper body strength. It also works your core muscles, which are responsible for stabilizing your spine.
To do this workout, simply grab the rope with both hands and pull yourself up. You can also add variations to this exercise by doing pull-ups or chin-ups on the rope.
Credit: nick.blog
How Do You Hang a Climbing Rope at Home?
Assuming you would like tips on how to hang a climbing rope at home:
First, you need to purchase a length of rope that is appropriate for the height of your ceiling. You will also need two screw-in anchors and two carabiners.
Once you have all of your materials, follow these steps:
1. Screw the anchors into the ceiling at the desired location for your climbing wall. Make sure that the anchors are screwed in tightly and securely.
2. Attach one end of the rope to each anchor using a carabiner. Again, make sure that the carabiners are clipped in tightly.
3. Tie a knot in the end of each rope so that it cannot slip through the carabiner.
4. Test your setup by gently tugging on the rope to ensure that it is secure before attempting any climbs.
How Do You Attach a Climbing Rope?
Assuming you would like instructions on how to attach a climbing rope:
There are many different ways to attach a climbing rope, and the method you use will depend on the situation. Here are some common methods:
1. Clove hitch – This is a good all-purpose knot for attaching a rope to an anchor point. It’s easy to tie and untie, even when the rope is under tension.
2. Munter hitch – This hitch is often used for belaying (holding the rope for another climber).
It can be tied with one hand, making it handy in emergency situations.
3. Prusik knot – This knot is useful for ascending a fixed line or rappelling (abseiling) down a slope. It’s also helpful if you need to secure yourself to the rope while waiting for rescue.
4. Figure-eight knot – The figure-eight knot is strong and secure, making it ideal for tying off the end of a rope or attaching gear to a climbing harness.
How Do I Attach a Climbing Rope to the Ceiling?
Assuming you would like tips on how to attach a climbing rope to the ceiling:
Climbing ropes are great for indoor rock climbing training, but they can also be used for other creative purposes, like attaching one to the ceiling and using it as a makeshift swing. Here are some things to keep in mind when attaching a climbing rope to the ceiling:
-The most important thing is to make sure that whatever you’re attaching the rope to is secure and will not come loose. The last thing you want is for your rope (and yourself) to come crashing down mid-swing.
-You’ll also want to take into account the height of your ceiling and how much slack you’ll need in the rope.
It’s generally best to err on the side of too much slack rather than too little – you can always adjust accordingly once the rope is in place.
-When actually attaching the rope, there are a few different methods you can use. One is simply tying it off with a strong knot; another is using an anchor system like bolts or carabiners.
-Once you have everything secured, test it out before getting too adventurous! Make sure that both the attachment point and knots are holding firm before trusting your weight (and fun) to them.
How Do You Hang a Climbing Rope from a Tree?
When it comes to hanging a climbing rope from a tree, there are several different ways that you can go about doing it. The most important thing is to make sure that the rope is secure and will not come loose while you are climbing. Here are a few different methods that you can use to hang a climbing rope from a tree:
1. Use A Climbing Harness
The first method is to use a climbing harness. This is the most common way that climbers hang their ropes from trees.
To do this, simply wrap the rope around the tree trunk and then thread it through your harness. Make sure that the harness is tight and secure before starting to climb.
2. Use A Webbing Sling
Another option for hanging your climbing rope from a tree is to use a webbing sling. This method is similar to using a harness, but instead of wrapping the rope around your body, you will wrap it around the tree trunk and then secure it with a webbing sling. Once again, make sure that everything is tight and secure before starting to climb.
3. Use A Prusik Knot System
A third option for hanging your climbing rope from a tree is to use a prusik knot system. This system uses two ropes – one fixed and one movable – which are tied together using knots.
To set up this system, tie one end of the fixed rope around the tree trunk and then tie the other end of the fixed rope to your belay device (such as an ATC or GriGri). Next, tie one end of the movable rope around your waist and thread it through your belay device. Finally, tie the other end of the movable rope onto the fixed rope above your belay device (this forms what’s called a “prusik loop”).
To use this system, simply pull on the movable rope until the prusik loop tightenens aroundthe fixedrope – this will stop you from falling if you slip while climbing.
Conclusion
Hanging a climbing rope is a relatively simple process that can be done in just a few minutes. The first step is to find a sturdy tree or other object to anchor the rope to. Once you have your anchor, tie one end of the rope around it securely.
Next, toss the other end of the rope over the limb or other object you want to climb, and pull it tight. Finally, tie a loop in the end of the rope and clip your carabiner into it. You’re now ready to start climbing!