How to Exit 3D Mode Photoshop
To exit 3D mode in Photoshop, go to the main “Photoshop” drop-down menu, choose “Preferences,” then “General.” When working in Photoshop, navigating through various settings and modes becomes essential to streamline the design process efficiently.
However, as you delve into the 3D mode for unique creations, knowing how to exit this mode is equally crucial for a seamless workflow. By following a few simple steps, you can easily switch back to the default 2D environment in Adobe Photoshop.
This guide will walk you through the process of exiting 3D mode, ensuring you can transition effortlessly between different modes and settings to enhance your digital design experience.
Credit: community.adobe.com
Basic Navigation In 3d Mode
When working with 3D designs in Photoshop, it’s essential to understand the basic navigation controls to move around and manipulate your workspace effectively. This section will cover the different ways you can navigate in 3D mode, including rotating the 3D workspace and moving and zooming in.
Rotating The 3d Workspace
Rotating the 3D workspace allows you to view your design from different angles, giving you a better understanding of its three-dimensional depth. To rotate the 3D workspace in Photoshop, follow these steps:
- Select the 3D object you want to rotate.
- Click and hold the left mouse button while moving the cursor to rotate the object.
- For more precise control, hold down the Shift key while rotating.
Moving And Zooming In 3d
Moving and zooming in 3D mode allows you to navigate around your design and zoom in for more detailed work. Here’s how you can move and zoom in the 3D workspace:
- Click and hold the middle mouse button to pan across the workspace.
- Scroll up or down with the mouse wheel to zoom in and out.
- Alternatively, you can use the keyboard shortcuts:
| Action | Shortcut |
|---|---|
| Pan | Hold the spacebar and drag the mouse |
| Zoom | Hold Alt (Windows) or Option (Mac) and scroll up or down |
Mastering the basic navigation controls in 3D mode will greatly enhance your ability to work with three-dimensional designs in Photoshop. Whether you’re rotating your workspace to gain a different perspective or zooming in for detailed editing, these techniques will help you navigate with ease.
Changing 3d Mode Settings
To exit 3D mode in Photoshop, go to the main “Photoshop” drop-down menu, select “Preferences,” then “General. ” Choose the “3D” option and uncheck the box. This simple process allows users to deactivate 3D mode and return to standard editing settings seamlessly.
Accessing Workspace And Preferences
Before changing your 3D mode settings in Photoshop, navigate to the Workspace and Preferences settings.
Adjusting 3d Workspace Layout
Customize your 3D workspace layout for a more efficient workflow.
Exiting 3d Mode
When working in Photoshop’s 3D mode, it’s essential to know how to exit back to the standard 2D mode. Whether you’re done with 3D editing or simply need a break, smoothly transitioning between these modes is crucial for a seamless workflow.
Returning To 2d Mode
Follow these simple steps to exit 3D mode and return to the familiar 2D workspace:
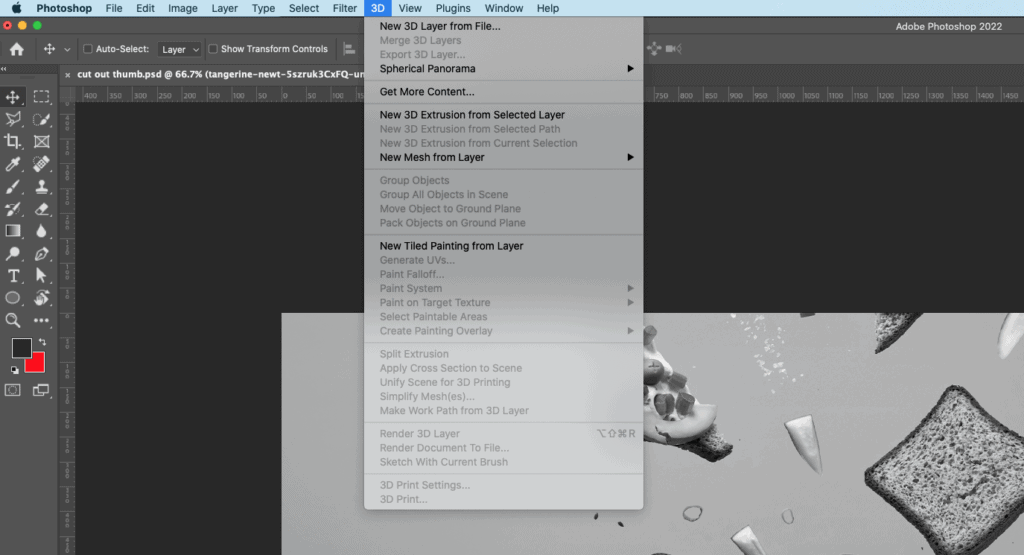
- Click on the “3D” menu option in the top toolbar.
- Select “Exit 3D Mode” from the dropdown menu.
- Voila! You’re back in the 2D editing environment.
Resetting Workspace To Default
If you want to reset your workspace to its default settings after exiting 3D mode, you can do so by:
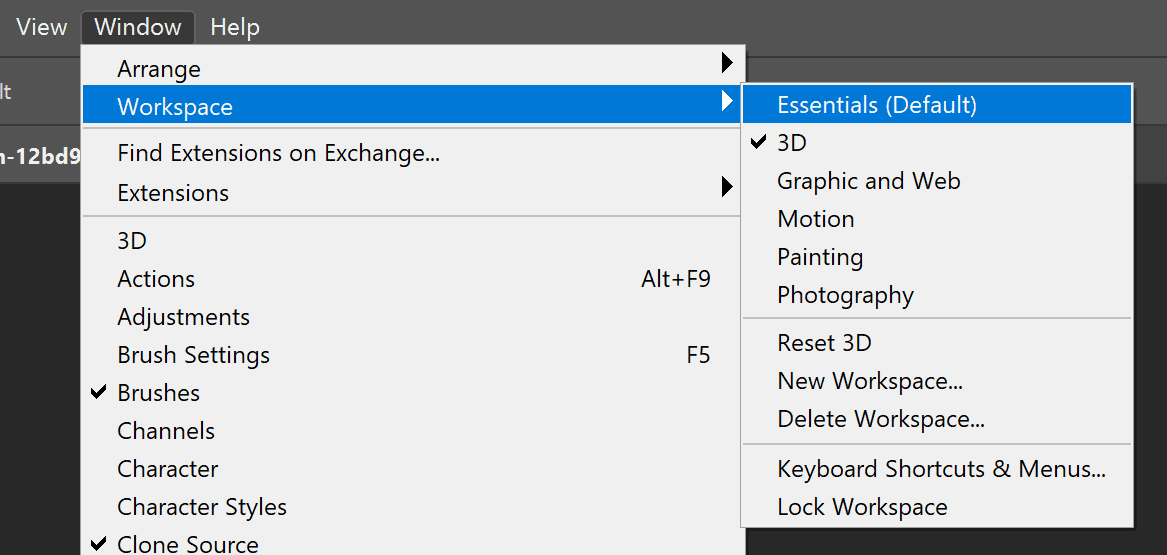
- Go to the “Window” menu at the top.
- Select “Workspace.”
- Choose “Essentials” from the dropdown options.
By following these instructions, you’ll be able to seamlessly switch from 3D to 2D mode in Photoshop and reset your workspace with ease. Mastering these functions will help you improve your editing efficiency and overall workflow.
Credit: m.youtube.com
Further Customizations
Once you have finished working in 3D mode in Photoshop, there are several further customizations you can make to enhance your workflow. In this section, we will explore how to utilize 2D features after exiting 3D and how to save custom workspace settings.
Utilizing 2d Features After Exiting 3d
When you exit 3D mode in Photoshop, you can still take advantage of various 2D features to enhance and refine your design. Here are some key features to consider:
- Layers: After exiting 3D mode, you can continue to work with layers, adjusting their opacity, blending modes, and layer styles to add depth and texture to your design.
- Filters: Apply various filters to your 2D layers to add special effects, enhance colors, or create interesting textures. Experiment with filters like Blur, Sharpen, and Distort to achieve the desired look.
- Brushes: Utilize Photoshop’s extensive range of brushes to paint and blend colors, add details, or create unique textures. Experiment with different brush types and settings to achieve the desired effects.
Saving Custom Workspace Settings
Customizing your workspace in Photoshop allows you to arrange panels, tools, and windows according to your preferences and work style. After exiting 3D mode, you can save your customized workspace settings for future use. Here’s how:
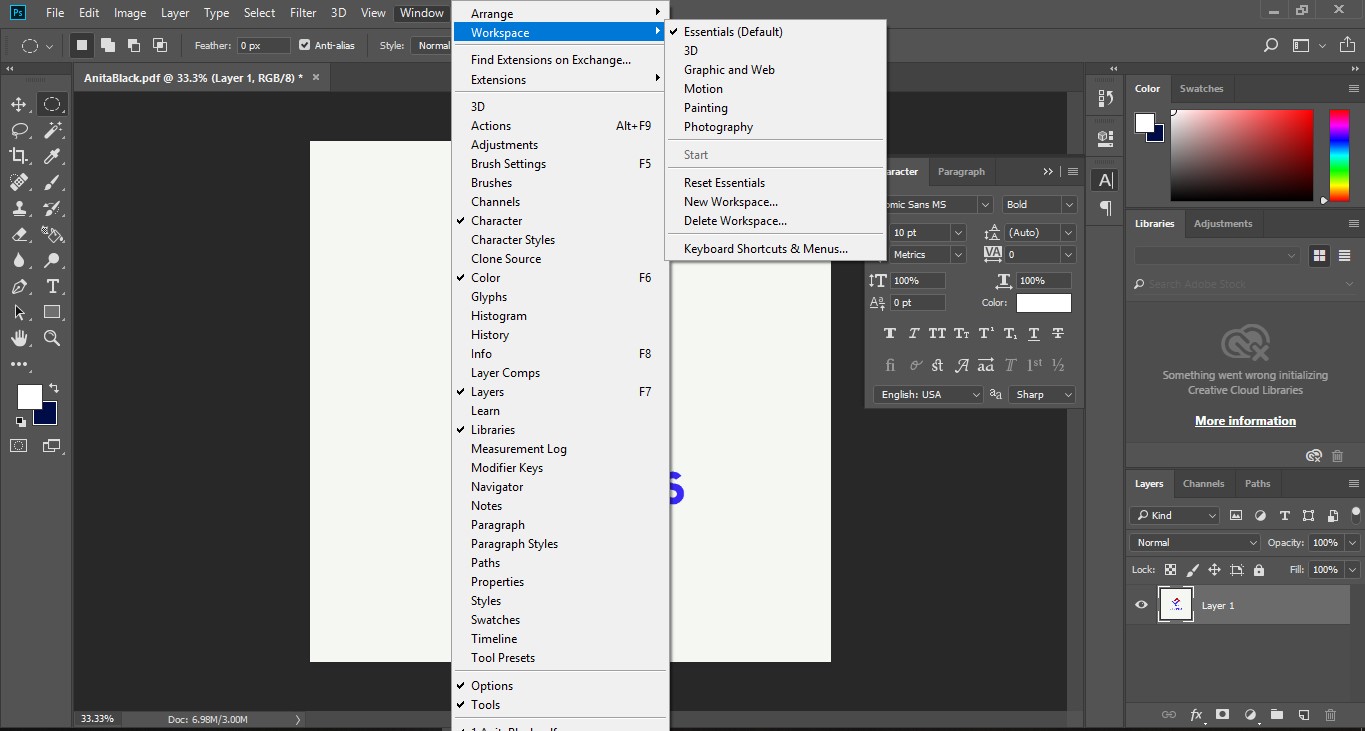
- Go to Window > Workspace: Click on the “Window” menu at the top of the screen and select “Workspace.”
- Select the Essentials workspace: In the drop-down menu, choose the “Essentials” workspace, which provides a basic and balanced set of panels and tools.
- Customize your workspace: Rearrange and resize panels, add or remove tools, and adjust the layout to suit your preferences.
- Save your custom workspace: Once you have customized your workspace, go back to the “Window” menu, select “Workspace,” and click on “New Workspace.” Give your custom workspace a name and click “Save.”
By saving your custom workspace, you can easily switch between different workspace setups depending on the type of project you are working on, streamlining your workflow and improving efficiency.
Credit: pixelandbracket.com
Frequently Asked Questions For How To Exit 3d Mode Photoshop
How Do I Get Out Of 3d Mode?
To exit 3D mode in Photoshop, go to Window > Workspace and select the Essentials workspace. Then click on the main “Photoshop” drop down menu, select “Preferences” and choose “General. “
How Do I Close 3d In Photoshop?
To close 3D in Photoshop, go to Window > Workspace and select the Essentials workspace. Then, click on the main “Photoshop” drop-down menu (to the left of File), select “Preferences,” and choose “General. “
How Do I Turn Off 3d Grid In Photoshop?
To turn off the 3D grid in Photoshop, go to Window > Workspace and choose Essentials. Then click on the main Photoshop menu, select Preferences, and then General.
How Do I Remove 3d Effects In Photoshop?
To remove 3D effects in Photoshop, go to Window > Workspace and select Essentials. Click on the main “Photoshop” drop down menu, choose “Preferences,” then select “General. “
Conclusion
To exit 3D mode in Photoshop, simply go to the “Window” tab, select “Workspace,” and choose the “Essentials” workspace option. This will bring you back to the regular editing mode. Don’t let 3D mode hinder your workflow anymore. With this simple solution, you can seamlessly transition back to your usual editing process.
Say goodbye to the complexities of 3D mode and hello to a smoother Photoshop experience. Start creating stunning designs with ease today.