Water Well Cap Removal How to

If your water well cap is no longer functioning properly, you may need to remove it. This can be a difficult task, but with the proper tools and instructions, it can be done. Here are some tips on how to remove a water well cap:
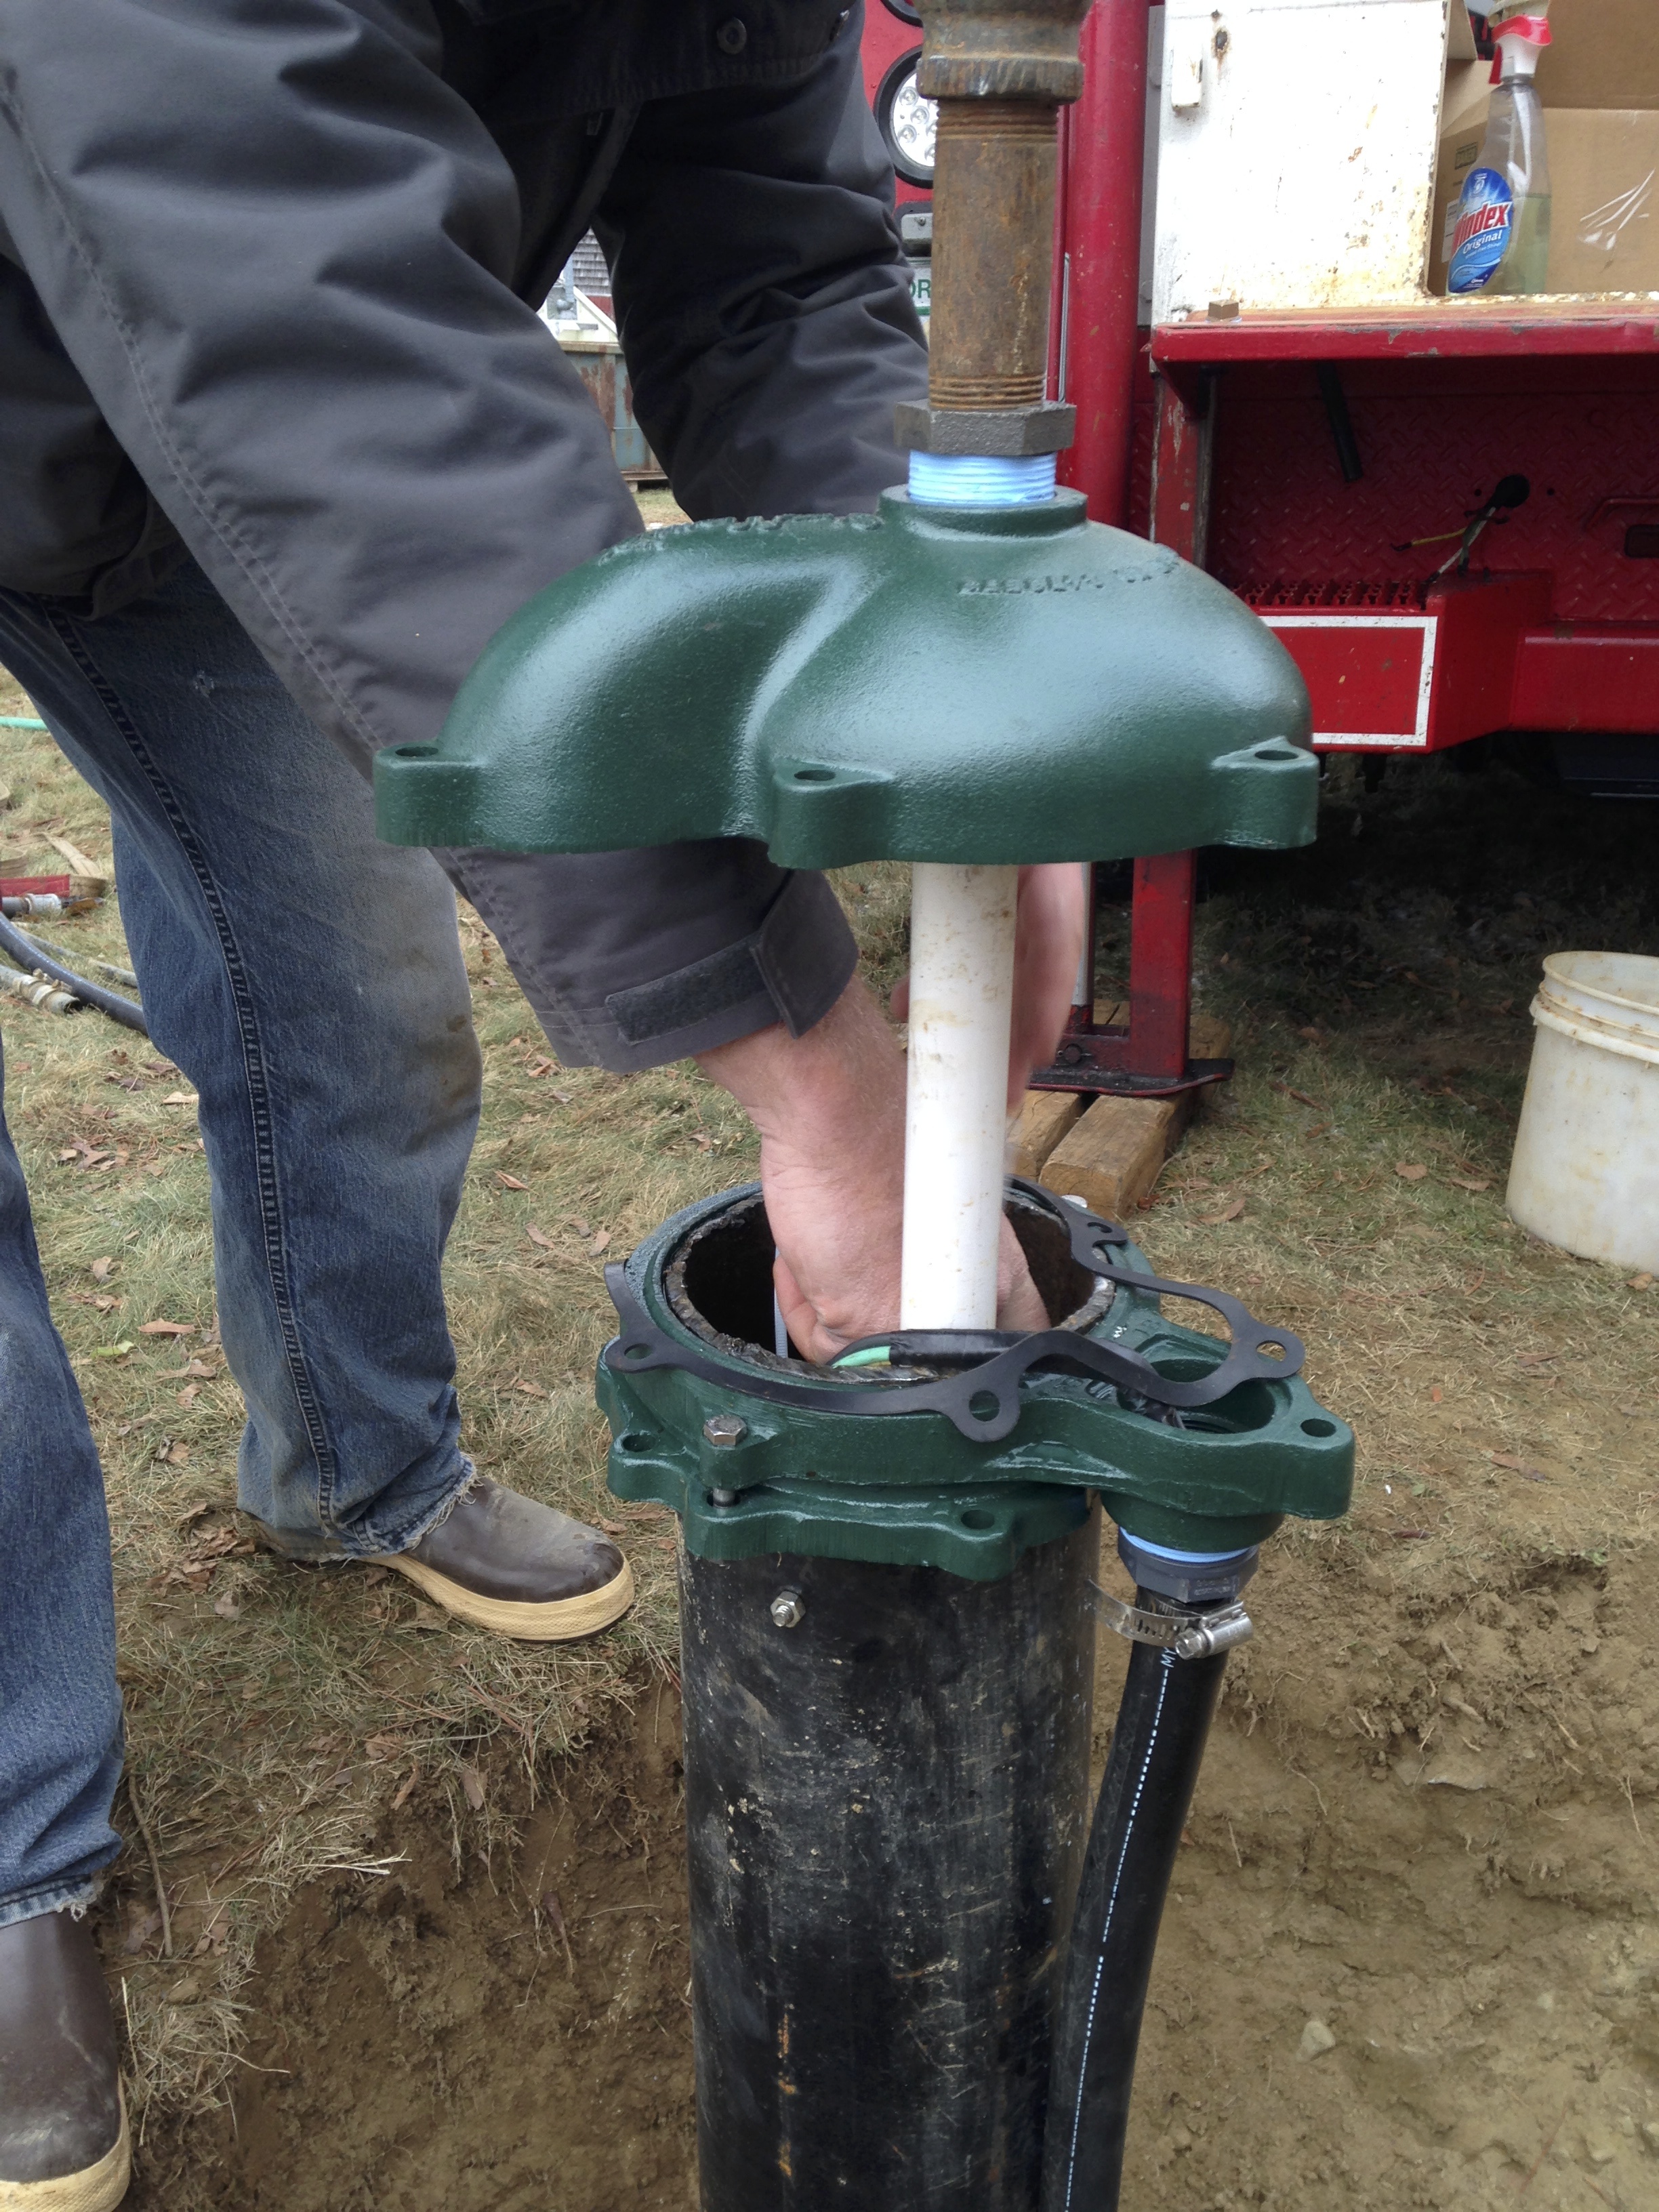
First, you will need to gather the proper tools. You will need a wrench or pliers to loosen the bolts on the cap, and a hammer to tap the cap off of the well. You may also need a pry bar to help remove the cap if it is stuck.
Once you have gathered your tools, locate the bolts that hold the cap in place. Using your wrench or pliers, loosen these bolts until they are loose enough to be removed by hand. If any of the bolts are stripped or broken, you may need to use a drill to remove them.
Once all of the bolts are removed, gently tap around the edge of the cap with your hammer until it pops off of the well. If it is stuck, insert your pry bar between the cap and well and gently lever it off. Be careful not to damage either the cap or well as you do this.
With the water wellcap now removed, you can inspect for any damage and make repairs as needed before replacing it with a new one. Be sure to follow these same steps when removing and installing your new water wellcap so that it functions properly and lasts for many years.
Well Seals and Well Caps: Explaining their Functionality and How to Remove
Most people don’t know that water well caps can be removed without professional help. With a few simple tools, you can remove your water well cap and inspect the condition of your well. This is a great way to ensure that your well is in good working order and to spot any potential problems early on.
Here’s what you’ll need:
– A wrench or pliers (depending on the type of cap)
– A flashlight
– A bucket (optional)
Once you have your tools gathered, follow these steps:
1. Locate the water well cap.
It should be near the top of the well, close to where the pipe enters the ground. If you’re not sure where it is, ask a neighbor or look for a diagram of your well online.
Split Well Cap Removal
If your well cap is leaking, damaged, or needs to be replaced, you’ll need to remove it. This can be a tricky process, especially if the well cap is stuck on tight. But with a little patience and the right tools, you should be able to get the job done.
Start by disconnecting any pipes or wires that are attached to the well cap. Then, use a wrench to loosen the bolts that hold the cap in place. Once the bolts are loose, you should be able to lift the cap off of the well.
If the well cap is still stuck, you may need to use a hammer or other tool to gently tap it loose. Be careful not to damage the threads on the well casing. Once you’ve removed the well cap, clean any debris out of the opening before replacing it with a new one.
Removing Old Well Cap
If you have an old well on your property, it’s important to make sure the cap is in good condition. A well cap helps to keep debris and animals out of the water, and it also prevents contaminants from entering the water supply. If the cap is old or damaged, it needs to be replaced.
The first step is to locate the wellhead. This is usually a metal pipe that protrudes from the ground near where the water line enters your home. Once you’ve found the wellhead, you’ll need to remove any debris or vegetation that’s obscuring it.
Next, use a wrench to loosen the bolts that hold the well cap in place. Be careful not to over-tighten the bolts – just loosen them enough so that they can be removed by hand. Once all of the bolts are loosened, carefully lift off the old well cap and set it aside.
Now it’s time to install the new well cap. Start by lining up the bolt holes with those on the new cap. Then thread each bolt through both layers and hand-tighten them in place.
Finally, use a wrench to tighten each bolt until it’s snug against both pieces of metal – but don’t overdo it!
Your new well cap should now be installed and ready to do its job!
How to Remove Well Seal
If you are in the process of decommissioning a well, one of the final steps is to remove the well seal. The well seal is a metal or plastic cap that covers the top of the well and protects it from contamination. Depending on the type of seal, there may be a few different ways to remove it.
Here are some tips on how to remove a well seal:
If the seal is screwed into place, use an appropriate sized wrench or socket to loosen and remove it. Be careful not to strip the threads.
If the seal is welded in place, you will need to use a torch to heat up the weld and then break it apart. You may also need to use a chisel or other tool to help pry it off.
Once the seal has been removed, clean up any debris or contaminants that may be present before proceeding with decommissioning your well.
Sanitary Well Cap Installation
If you have a well on your property, it is important to ensure that it is properly sealed with a sanitary well cap. This will help to keep contaminants out of your water supply and protect against any potential health hazards. While there are many different types of well caps available on the market, choosing the right one for your needs can be a bit daunting.
Here is a quick guide to help you select the best sanitary well cap for your installation:
Sanitary Well Cap Installation Guide
1. Start by measuring the diameter of your well casing.
This will determine the size of cap you need to purchase.
2. Then, select a material that is durable and weather-resistant. Stainless steel or polyethylene are both good choices.
3. Once you have chosen a material, decide whether you want a screw-on or slip-on type cap. Screw-on caps provide a more secure seal, while slip-on caps are easier to install (but may not be as snug).
4. Finally, make sure that the cap you choose has been certified by NSF International – this ensures that it meets strict quality and safety standards.
Well Cap Replacement
If your well cap is more than 20 years old, it’s time to replace it. A new well cap will keep your water safe from contaminants and help ensure that your pump continues to work properly.
Here are the steps you’ll need to take to replace your well cap:
1. Turn off the power to your pump. This is important for safety reasons. You don’t want the pump to turn on while you’re working on the well cap.
2. Remove the old well cap. You may need a wrench or pliers to do this. Be careful not to damage the threads on the pipe when you remove the old cap.
3. Clean the threads on the pipe with a wire brush. This will help ensure a tight seal when you install the new well cap.
4 .
Install the new well cap by screwing it onto the threads of the pipe clockwise . Again, be careful not to damage the threads . Make sure that the new cap is screwed on tightly so that there’s no risk of contaminants getting into your water supply .
Concrete Well Cap
If your home has a concrete well cap, it’s important to keep it in good repair. Not only is the well cap a vital part of keeping your water supply safe from contamination, but it also helps to prevent accidents. Here are some tips for maintaining your concrete well cap:
1. Check the condition of the cap regularly. If you see any cracks or damage, have it repaired as soon as possible.
2. Make sure the cap is properly sealed.
A tight seal will help to keep out contaminants and pests.
3. Keep the area around the well cap clear of debris and vegetation. This will help to prevent accidental damage to the cap and make it easier to inspect regularly.
Well Caps And Covers
Most people are familiar with the term “well cap,” but fewer know about “well covers.” Well caps are typically placed atop wells to keep out debris and animals. Well covers, on the other hand, are placed over the entire wellhead–including the valve box–to provide an extra layer of protection.
Well caps and covers serve an important purpose: they protect your well from contamination. A well that is not properly protected can become contaminated with bacteria, viruses, and other harmful organisms that can make you sick. In addition, debris and animals can fall into an unprotected well, clogging it or damaging equipment.
Well caps and covers come in a variety of sizes and materials to suit different needs. The most important factor in choosing a well cap or cover is making sure it fits snugly over your wellhead. A loose-fitting cap or cover can easily be dislodged or blown off in strong winds, leaving your well vulnerable to contamination.
There are two main types of well caps: solid caps and screenedcaps. Solid caps are made of solid material–usually plastic or metal–and fit tightly over the top of the wellhead to keep out debris and animals. Screenedcaps have a screen mesh that allows water to pass through while keeping out larger particles of dirt and debris.
Which type of cap you choose will depend on your specific needs and preferences. If you live in an area with a lot of wildlife, for example, you may want to choose a solid cap to keep out small animals like rodents and birds.
Pvc Well Cap
If you have a well on your property, it’s important to have a well cap in place. A well cap helps to keep debris and animals out of your water supply. It also helps to prevent backflow into your well, which can contaminate your water.
PVC well caps are a popular option because they’re durable and cost-effective.
When choosing a PVC well cap, make sure that it’s the right size for your well. You’ll also want to make sure that the cap is rated for the appropriate pressure.
If you’re not sure what size or pressure rating you need, ask a professional before making your purchase.
Installing a PVC well cap is relatively straightforward. First, remove the old cap from your wellhead.
Next, clean the threads on thewellhead so that the new cap will screw on easily. Finally, screw on the newcap and tighten it down with a wrench. That’s all there is to it!
PVC well caps are an essential part of owning a well. They help to keep your water supply safe and clean by preventing contamination and keeping animals out. When choosing a PVC well cap, make sure to get the right size and pressure rating for your needs.
Installing one is easy – simply remove the old cap, clean off the threads on thewellhead, and screw on the new one!
Credit: www.usgs.gov
How Do You Take a Well Cap Off?
Assuming you are talking about a water well cap:
To remove a water well cap, first locate the bolts that secure the lid to the rest of the casing. There will typically be four bolts, one in each corner of the square or rectangular lid.
Using a wrench, loosen each bolt until it can be removed by hand. Carefully lift the lid off of the casing, being careful not to drop it and damage either the lid or the casing. If there is any water left in the well, it will now begin to flow out.
Be sure to have a bucket or some other container ready to catch this water.
How Do You Open a Well?
Opening a well can be done with a few simple steps. First, locate the water table. The water table is the level at which water saturates the soil.
This can be found by digging a hole and measuring the depth of the water in the hole. Second, find an aquifer. An aquifer is a layer of rock or sediment that holds groundwater.
Aquifers are often found near rivers or lakes.Third, drill a hole into the aquifer. A well driller will use a drilling rig to drill a hole into the aquifer. fourth, install a pump.
A submersible pump is installed in the well and pumps water from the aquifer to the surface fifth, construct a well house. The well house protects the pump from weather and keeps debris out of the well.
Opening a well requires some careful planning and preparation, but with these steps it can be done relatively easily!
Where is My Well Cap?
If you’re wondering where your well cap is, it’s likely located near the top of your well. The well cap is a metal or plastic cover that sits atop the well and protects the opening from debris and animals. It’s an important part of your well system, so it’s important to know where it is and how to keep it in good condition.
If you have any questions about your well cap, be sure to contact a professional for more information.
How Does a Well Cap Work?
A well cap, also called a well head or well house, is the structure that sits atop a well to protect the opening. It may also include a valve or other mechanism to control the flow of water from the well. The term can also refer to any protective cover over an underground opening, such as a manhole cover.
The main purpose of a well cap is to keep people and animals from accidentally falling into the well. In some cases, it may also be used to collect water for irrigation or other purposes. A well cap typically has an open bottom so that water can enter the well, and it may have one or more ports for attaching pipes or hoses.
Most well caps are made of metal, concrete, plastic, or another durable material. They are often custom-made to fit the specific dimensions of the well they will be covering.
Conclusion
If your water well is capped, it’s important to know how to remove the cap correctly. This blog post provides detailed instructions on how to do just that. First, locate the handle on the top of the cap and give it a quarter turn to loosen.
Then, use both hands to unscrew the cap until it’s completely removed. If you’re having trouble loosening the cap, try using a wrench or other tool. Finally, be sure to inspect the condition of the gasket before screwing the cap back on – if it’s damaged, you’ll need to replace it before sealing up your well again.