Water Leak Dection And Repair: The Ultimate Guide to Fixing Leaks Fast
Water leak detection and repair is the process of identifying and fixing any water leaks in a residential or commercial building. It is a crucial maintenance task that helps prevent water damage, mold growth, and high water bills.
Additionally, timely repairs can save significant amounts of water and reduce environmental impact. Water leaks can occur in various areas such as plumbing pipes, faucets, toilets, and water heaters. Detecting leaks often requires the use of specialized equipment, including moisture sensors and thermal imaging cameras.
Once a leak is detected, prompt repairs should be carried out by qualified professionals to ensure proper resolution and prevent further damage. Overall, water leak detection and repair is a vital aspect of building maintenance that should not be overlooked.
Credit: www.bluebot.com
Importance Of Water Leak Detection
Water leak detection is crucial for timely repair, preventing major damages. Detecting leaks early helps conserve water, save costs, and maintain the integrity of the plumbing system.
:
Water leak detection is a critical aspect of any property maintenance plan. Detecting water leaks early can save both time and money by preventing potential damage and costly repairs. In this section, we will discuss the common causes of water leaks, the potential damage they can cause, and why early detection is crucial.
Common Causes Of Water Leaks:
- Pipe corrosion: Over time, pipes can corrode, leading to small cracks or leaks.
- High water pressure: Excessive water pressure can strain pipes and cause them to leak.
- Faulty plumbing installation: Poorly installed plumbing fixtures and fittings can result in leaks.
- Tree root intrusion: Tree roots can infiltrate underground pipes, causing leaks and blockages.
- Freezing temperatures: In cold climates, water inside pipes can freeze and cause them to burst.
Potential Damage Caused By Water Leaks:
Water leaks can wreak havoc on properties, causing extensive damage if left unnoticed. Here are some potential consequences:
- Structural damage: Leaks can weaken the structural integrity of buildings, leading to costly repairs.
- Mold growth: Excess moisture from leaks creates an ideal environment for mold and mildew to flourish.
- Damage to personal belongings: Water leaks can ruin furniture, electronics, documents, and other valuables.
- Increased water bills: Undetected leaks can result in significant water wastage, leading to higher bills.
Why Early Detection Is Crucial:
Detecting water leaks early is of utmost importance due to several reasons:
- Prevents further damage: Addressing leaks promptly can mitigate the risk of extensive damage to structures and personal belongings.
- Minimizes repair costs: By identifying leaks early on, you can avoid costly repairs that may arise from prolonged water damage.
- Reduces water wastage: Early detection helps minimize water wastage, which is not only beneficial for the environment but also reduces utility expenses.
- Preserves indoor air quality: Timely leak detection prevents mold growth, ensuring healthier indoor air quality for occupants.
- Enhances property value: A well-maintained property with no history of water leaks is more appealing to potential buyers or tenants.
By understanding the common causes of water leaks, the potential damage they can cause, and the significance of detecting them early, you can prioritize regular water leak inspections and implement preventative measures to safeguard your property.
Remember, proactive leak detection can save you from unnecessary expenses and alleviate potential headaches in the long run. Stay vigilant and address any signs of water leaks promptly to maintain a dry and damage-free environment.
Signs Of A Water Leak
Detecting water leaks is crucial to prevent extensive damage. Look out for signs like damp walls, musty odors, increased water bills, and mold growth to identify and repair leaks promptly.
Water leaks can cause significant damage to your property if not detected and repaired in a timely manner. By keeping an eye out for certain signs, you can identify a potential water leak early on and prevent further damage. Here are a few indicators that may suggest a water leak in your home or business:
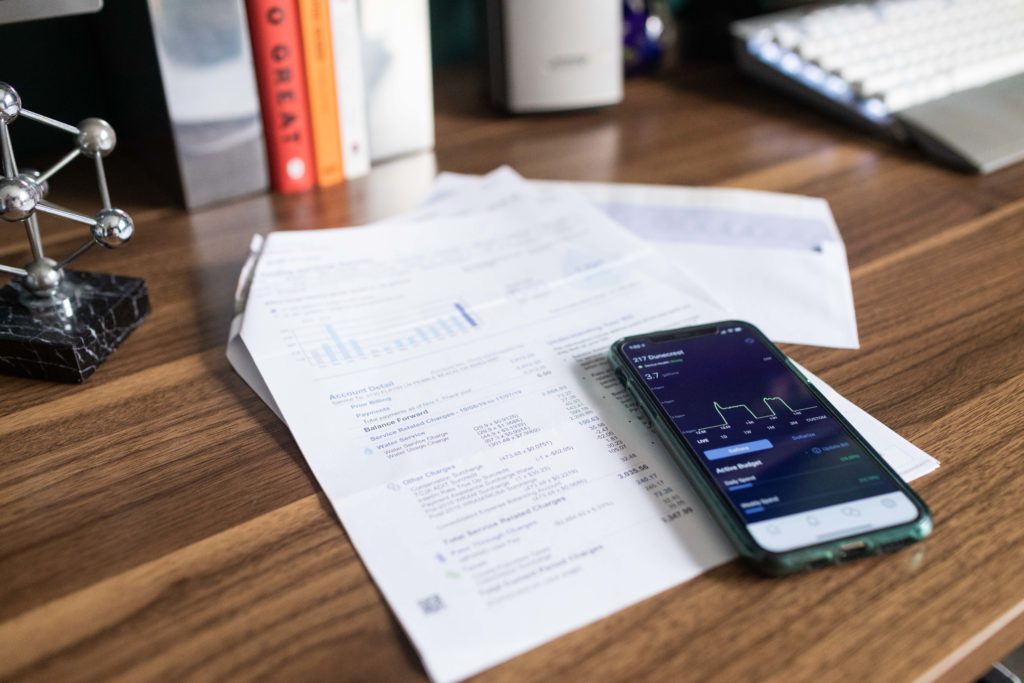
High Water Bills:
- Sudden increases in your water bill without any changes in usage could indicate a water leak.
- Unexplained spikes in water consumption may be a sign of an underlying issue that requires immediate attention.
- Monitoring your water bills can help you catch leaks early and save money in the long run.
Water Stains Or Discoloration:
- Discolored or stained walls, floors, or ceilings may be a result of water leakage.
- Brown or yellowish stains, especially near pipes or fixtures, suggest ongoing water damage.
- Pay close attention to damp spots or water ring formations, which may indicate a hidden leak.
Mold Or Mildew Growth:
- The presence of mold or mildew in your home could be a sign of water leakage.
- Increased humidity levels caused by a hidden water leak can create a suitable environment for mold growth.
- Musty odors or a persistent dampness could also suggest the presence of mold due to a water leak.
Unusual Water Sounds Or Odors:
- The sound of running water when faucets or appliances are off may indicate a leak.
- Prolonged dripping or hissing sounds can also be signs of a hidden water leak.
- Foul odors, such as a sewer smell, could be a result of a leaking pipe or drain.
Detecting and repairing water leaks early can save you from extensive damage and costly repairs. If you notice any of these signs, it is recommended to seek professional assistance to investigate and fix the issue promptly.
Diy Leak Detection Methods
Detect and repair water leaks with these effective DIY methods. Discover simple yet efficient techniques to identify and fix leaks, saving time and money.
Water leaks can be a major nuisance, causing damage to your home and resulting in high water bills. Detecting and repairing leaks promptly is crucial to avoid these issues. In this section, we will explore some DIY leak detection methods that can help you identify and address leaks before they become a bigger problem.
Checking Water Meter:
- Start by turning off all water sources in your home, including faucets, showers, and appliances that use water.
- Locate your water meter, usually found outside your home or in a basement/utility room.
- Take note of the water meter reading and wait for about an hour without using any water.
- After the hour has passed, check the water meter reading again. If it has changed, it indicates a potential leak in your plumbing system.
Conducting A Visual Inspection:
- Inspect visible pipes and fixtures for any signs of leaks, such as damp spots, water stains, or puddles.
- Check under sinks, around toilets, and behind appliances that use water, such as dishwashers and washing machines.
- Look for any dripping faucets or toilets that continue to run even when not in use.
- Pay attention to any unusual sounds, like hissing or dripping water, which could indicate a hidden leak.
Conducting A Dye Test:
- To detect hidden leaks in your toilet tank, you can perform a simple dye test.
- Add a few drops of food coloring into the tank and wait for about 15 minutes without flushing.
- If the color appears in the toilet bowl, it means there is a leak in the flapper valve, which requires repair or replacement.
Using A Moisture Meter:
- A moisture meter is a handy tool that can help identify water intrusion or hidden leaks in walls, ceilings, or floors.
- Follow the manufacturer’s instructions to use the moisture meter correctly.
- Place the moisture meter against walls, near plumbing fixtures, or on any suspicious areas.
- If the moisture meter detects an elevated moisture level, it suggests a possible leak that needs investigation.
By utilizing these DIY leak detection methods, you can save money, prevent water damage, and address leaks promptly. Remember to consult a professional plumber if you encounter a complex or persistent leak that requires expert assistance. Stay proactive and keep your home leak-free!
Professional Leak Detection Services
We provide professional leak detection services for water leaks in homes and commercial buildings. Our expert team uses advanced technology to quickly identify and repair leaks, ensuring minimal disruption and water conservation. Trust us to safeguard your property and prevent further damage.
Overview Of Professional Leak Detection Services
When it comes to water leaks, it’s crucial to address them promptly before they cause extensive damage to your property. Professional leak detection services offer the expertise and technology needed to detect and repair leaks efficiently. These services utilize advanced techniques to identify leaks, ensuring a thorough and accurate assessment.
By hiring professionals, you can have peace of mind knowing that any leak issues will be handled professionally and effectively.
Benefits Of Hiring A Professional:
- Experience and expertise: Professionals in leak detection have extensive knowledge and experience in identifying and repairing leaks. They are trained to handle different types of leaks and have the necessary skills to solve complex issues.
- Time and cost efficiency: Professional leak detection services can save you precious time and money. Their expertise allows them to pinpoint the exact location of the leak and efficiently repair it, minimizing any potential damage and reducing the need for costly repairs in the future.
- Advanced technology: Professionals utilize advanced technology and tools to detect leaks that may not be visible to the naked eye. These advanced techniques include thermal imaging, moisture sensors, and acoustic equipment, ensuring a comprehensive assessment of your property.
- Preventive measures: Apart from detecting and repairing leaks, professionals can also provide valuable insights on preventing future leaks. They can identify potential vulnerabilities in your plumbing system and offer recommendations to avoid future leaks.
- Peace of mind: Hiring professionals for leak detection can provide you with peace of mind. Knowing that trained experts are handling the issue gives you the assurance that the problem will be resolved efficiently, minimizing any disruptions to your daily life.
How Professionals Use Technology To Detect Leaks:
- Thermal imaging: Professionals use thermal imaging cameras to detect temperature variations, which can indicate the presence of hidden leaks behind walls or floors.
- Moisture sensors: These sensors are used to measure moisture levels in different areas of your property. They can detect even the smallest amounts of moisture, helping professionals identify hidden leaks.
- Acoustic equipment: Leak detection professionals use cutting-edge acoustic equipment to listen for the sound of water escaping from pipes or fittings. This method allows them to pinpoint the exact location of the leak without causing damage to your property.
- Pressure testing: Professionals may also conduct pressure tests to determine if there are any leaks in your plumbing system. By pressurizing the pipes and monitoring the pressure levels, they can identify any drops or fluctuations that indicate a leak.
By utilizing these technologies, leak detection professionals can quickly and accurately identify leaks, allowing for timely repairs and minimizing any potential damage to your property.
Remember, when it comes to water leaks, hiring professionals for detection and repair is essential to ensure a thorough assessment and efficient resolution. Their expertise, advanced technology, and preventive measures can save you time, money, and give you peace of mind.
So, don’t hesitate to seek professional help when faced with any water leak issues.
Common Types Of Water Leaks
Discover the common types of water leaks and the importance of efficient water leak detection and repair. From faucet leaks to hidden pipe leaks, understanding the different types can help prevent further damage to your property and save on water bills.
Water leaks can be a nuisance, causing damage to your property and wasting precious resources. Detecting and repairing these leaks is crucial to maintaining a healthy and functional plumbing system. In this blog post, we will explore the common types of water leaks that homeowners often encounter.
Faucet Leaks
- Dripping faucets are not only annoying but also wasteful. Even a small leak can add up to gallons of wasted water over time.
- Common causes of faucet leaks include worn-out washers, damaged seals, or faulty cartridges.
- To detect a faucet leak, simply check for any water dripping from the spout or handle.
- Repairing a faucet leak usually involves replacing the faulty component, such as the washer or cartridge.
Toilet Leaks
- Toilet leaks are silent culprits that can go unnoticed for a long time. They can waste a significant amount of water without you even realizing it.
- Some common causes of toilet leaks include a malfunctioning flapper valve, worn-out tank components, or a faulty fill valve.
- To detect a toilet leak, add a few drops of food coloring to the tank and wait for a few minutes. If the color appears in the bowl, you have a leak.
- Repairing a toilet leak may involve replacing the flapper valve, adjusting or replacing the fill valve, or fixing any damaged tank components.
Pipe Leaks
- Pipe leaks can occur in both visible and hidden pipes, leading to water damage and high water bills.
- Common causes of pipe leaks include corrosion, frozen pipes, high water pressure, or improper installation.
- To detect a pipe leak, look for signs of water stains, dampness, mold, or hissing sounds near your pipes.
- Repairing a pipe leak often requires the help of a professional plumber who will locate and fix the damaged section of the pipe.
Slab Leaks
- Slab leaks are among the most severe types of water leaks, as they occur under the concrete foundation of a building.
- Common causes of slab leaks include shifting soil, corrosion, or excessive pressure on the pipes.
- Signs of a slab leak include warm spots on the floor, wet carpets, unusually high water bills, or the sound of running water when no fixtures are in use.
- Repairing a slab leak typically involves breaking through the concrete, locating the damaged pipe, and either repairing or replacing it.
Water leaks, regardless of their type, require prompt attention and repair. Ignoring these leaks can lead to significant damage to your property and unnecessary expenses. Whether it’s a dripping faucet, a concealed pipe leak, or a troublesome slab leak, addressing the issue right away will help you avoid more extensive repairs in the future.
So, keep a close eye on your plumbing system and don’t hesitate to seek professional assistance when needed.
Step-By-Step Guide To Fixing Faucet Leaks
Learn how to fix faucet leaks with this comprehensive step-by-step guide. Discover effective techniques for water leak detection and repair, helping you save water and prevent further damage to your plumbing system.
Is your faucet leaking? Don’t worry, we’ve got you covered with this easy step-by-step guide on fixing faucet leaks. By following these simple instructions, you can save money on your water bill and prevent further damage to your plumbing system.
Let’s get started!
Gathering Necessary Tools:
To fix a faucet leak, you’ll need a few basic tools. Make sure you have the following items on hand:
- Adjustable wrench: This tool will help you loosen and tighten nuts and bolts.
- Screwdriver: You’ll need a screwdriver to remove screws and disassemble the faucet.
- Replacement parts: Depending on the type of leak, you may need to replace faulty components, such as washers, O-rings, or cartridges.
Shutting Off The Water Supply:
Before you begin any repairs, it’s important to turn off the water supply to your faucet. Here’s how:
- Locate the water shutoff valve: Look under your sink for a valve that controls the water flow to your faucet.
- Turn off the valve: Use a clockwise motion to shut off the water supply. This will prevent any water from flowing while you work on the faucet.
Disassembling The Faucet:
Now that the water supply is turned off, you can start disassembling the faucet to access the faulty components. Follow these steps:
- Remove the decorative cap: Look for a cap on the top of the faucet handle and gently pry it off.
- Unscrew the handle: Use a screwdriver to remove the screw holding the handle in place. Once the screw is out, carefully lift off the handle.
- Take apart the faucet: Depending on the type of faucet you have, there may be additional screws or nuts that need to be removed. Take note of the order in which you remove the components, as you’ll need to reassemble them later.
Replacing Faulty Components:
With the faucet disassembled, it’s time to identify and replace the faulty components causing the leak. Here’s what you need to do:
- Inspect the components: Look for worn-out washers, damaged O-rings, or faulty cartridges. These are common culprits of faucet leaks.
- Remove the faulty part: Use your wrench or pliers to loosen and remove the component causing the leak.
- Replace with new parts: Install the new washer, O-ring, or cartridge, making sure it fits properly. Tighten it securely with your wrench or pliers.
Testing The Repaired Faucet:
Now that you’ve replaced the faulty components, it’s time to test your handiwork. Follow these final steps:
- Reassemble the faucet: Carefully put all the components back together in the reverse order of disassembly. Make sure everything is aligned properly.
- Turn on the water supply: Slowly turn on the water supply by turning the valve counterclockwise. Watch for any signs of leaks.
- Check for leaks: Let the water run for a few moments and inspect the faucet for any remaining leaks. If everything looks good, congratulations – you’ve successfully fixed your faucet leak!
By following this step-by-step guide, you can tackle faucet leaks like a pro. Remember, if you’re unsure or uncomfortable with the repair process, it’s always best to consult a professional plumber.
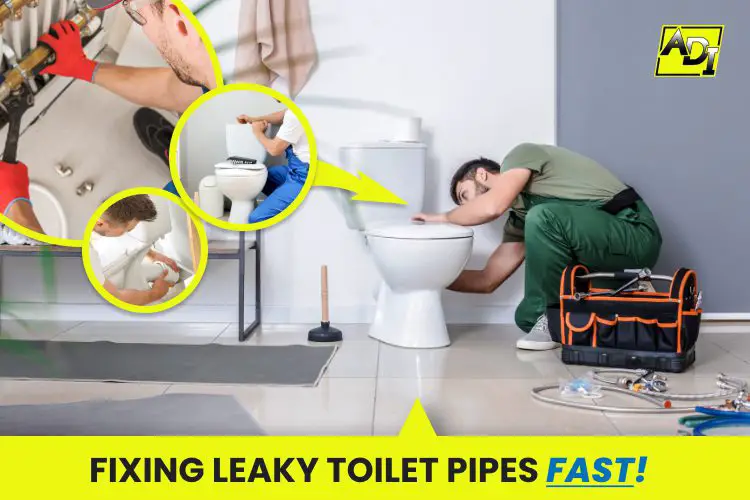
Step-By-Step Guide To Fixing Toilet Leaks
Fixing toilet leaks is easy with this step-by-step guide. Discover effective water leak detection and repair methods to keep your bathroom dry and save on water bills.
Identifying The Type Of Leak
- When you hear the sound of water running in your toilet even when it’s not being used, it’s a clear indication of a leak.
- Another sign is if you notice water pooling around the base of the toilet.
- To determine the type of leak, you can conduct a dye test. Drop a dye tablet or a few drops of food coloring into the tank and wait for a few minutes. If the water in the bowl changes color, it means there’s a leak between the tank and bowl.
Replacing The Flapper Valve
- The flapper valve is responsible for sealing the toilet tank and preventing water from continuously flowing into the bowl.
- To replace the flapper valve, start by turning off the water supply to the toilet.
- Remove the tank lid and empty the water from the tank.
- Disconnect the old flapper valve from the flush handle and chain.
- Install the new flapper valve by attaching it to the flush handle and chain.
- Turn on the water supply and let the tank fill up.
Adjusting The Water Level
- A faulty water level in your toilet can cause leaks.
- Start by turning off the water supply to the toilet.
- Remove the tank lid and locate the fill valve.
- Adjust the water level by turning the adjustment screw or moving the float up or down.
- Turn on the water supply and check if the water level is at the appropriate level, about ½ inch below the top of the overflow tube.
Replacing The Flush Valve Assembly
- If the leak is coming from the bottom of the toilet tank, it may be due to a faulty flush valve assembly.
- Turn off the water supply and drain the tank.
- Disconnect the water supply line and unscrew the nuts that hold the flush valve assembly in place.
- Install the new flush valve assembly by securing it with the nuts and reconnecting the water supply line.
- Turn on the water supply and let the tank fill up.
Testing The Repaired Toilet
- After completing the necessary repairs, it’s important to test the toilet to ensure that the leaks have been fixed.
- Flush the toilet and observe if any water is leaking from the tank or the base.
- Check if the water level remains constant and does not rise or fall unexpectedly.
- Listen for any sounds of water running when the toilet is not in use.
- If everything looks and sounds normal, congratulations! You’ve successfully fixed the toilet leaks.
Step-By-Step Guide To Fixing Pipe Leaks
Discover a comprehensive step-by-step guide on effectively detecting and fixing pipe leaks. Learn how to efficiently repair water leaks with this informative resource.
Water Leak Detection And Repair:
Water leaks can cause significant damage to your property if left unaddressed. It’s essential to act quickly to minimize any potential harm and costly repairs. Fixing pipe leaks may seem daunting, but with the right knowledge and approach, it can be a straightforward process.
In this step-by-step guide, we will walk you through the process of locating the source of the leak, shutting off the water supply, patching small leaks, replacing damaged pipes, and testing the repaired pipe.
Locating The Source Of The Leak:
- Perform a visual inspection of your property, looking for signs of water damage, such as wet spots, mold growth, or peeling paint.
- Check areas prone to leaks, such as under sinks, near toilets, and around water heaters.
- Listen for the sound of running water or hissing, as it may indicate a hidden leak.
- Use a water leak detection tool or moisture meter to pinpoint the exact location of the leak.
Shutting Off The Water Supply:
- Locate the main water shut-off valve in your home. It is usually found near the water meter.
- Turn the shut-off valve clockwise to stop the water supply to your property.
- Open a faucet to release any remaining water in the pipes and relieve pressure.
Patching Small Leaks:
- Clean the area around the leak thoroughly to ensure proper adhesion of the patch.
- Use a suitable waterproof patching material, such as epoxy putty or pipe repair tape.
- Apply the patching material directly onto the leak, following the manufacturer’s instructions.
- Press the patch firmly to ensure a secure seal.
- Allow the patch to cure completely before turning the water supply back on.
Replacing Damaged Pipes:
- If the leak is caused by a damaged or corroded pipe, replacement may be necessary.
- Turn off the water supply and drain the pipes completely.
- Cut out the damaged section of the pipe using a pipe cutter or hacksaw.
- Measure and cut a new section of pipe to fit the gap.
- Use pipe connectors or soldering techniques to join the new section of pipe to the existing ones.
- Ensure proper sealing and alignment of the connections.
Testing The Repaired Pipe:
- Turn on the water supply and check for any signs of leakage.
- Inspect the patched area or replaced pipe for any water seepage.
- Monitor the repaired section for a period of time to ensure its stability and effectiveness.
- If no leaks are detected, the repair is successful.
Fixing pipe leaks can be manageable and cost-effective if approached systematically. By locating the source of the leak, shutting off the water supply, patching small leaks, replacing damaged pipes, and testing the repairs thoroughly, you can minimize the impact of water leaks on your property.
Always remember to adhere to safety precautions when working with water and plumbing systems.
Step-By-Step Guide To Fixing Slab Leaks
This step-by-step guide provides a comprehensive solution for detecting and repairing water leaks in slabs. Follow these instructions to effectively address slab leaks and prevent further damage.
Understanding Slab Leaks And Their Causes
Slab leaks can be a homeowner’s nightmare, causing extensive damage if left untreated. These types of leaks occur when there is a break or leak in the water pipes underneath the concrete foundation of a building. Understanding their causes and learning how to fix them is essential for every homeowner.
Here are some key points to understand about slab leaks:
- Age and corrosion of pipes: Over time, pipes can deteriorate due to age or corrosive elements in the water supply, leading to leaks.
- Shifting foundation: Changes in soil conditions or earthquakes can cause the foundation to shift, placing stress on the pipes and causing leaks.
- High water pressure: Excessive water pressure can result in pipes being under constant strain, leading to potential leaks.
- Poor installation: Faulty installation of pipes during construction can create weak points that are prone to leaks.
Conducting A Slab Leak Detection Test
Identifying a slab leak early is crucial to avoid significant damage. Here’s a step-by-step guide on how to conduct a slab leak detection test:
- Turn off all faucets and appliances that use water in your home.
- Locate the water meter and note the reading.
- Ensure no water is being used in your home for a specific period, typically 1-2 hours.
- Recheck the water meter reading. If it has increased despite no water usage, it indicates a potential slab leak.
- Perform a visual inspection for any signs of water damage on floors, walls, or the foundation.
Determining The Best Repair Method
Once you’ve confirmed a slab leak, it’s essential to determine the best repair method. Here are the available options:
- Repiping: In severe cases, where multiple leaks are present or the entire system is compromised, repiping may be the best solution. This involves replacing all the pipes in the affected area.
- Pipe relining: If the leak is isolated to a small section, pipe relining can be a cost-effective and less invasive option. It involves inserting a flexible lining into the existing pipe, sealing off the leaks.
- Epoxy restoration: This method is suitable for minor slab leaks. A specialized epoxy coating is applied to the inside of the pipe, creating a new, leak-free surface.
Repairing The Slab Leak
Repairing a slab leak should be left to professionals for optimal results. Here’s an overview of the process:
- Isolate the leak: The first step is locating the exact point of the leak using specialized equipment and techniques.
- Access the pipe: Access points are created by removing a small section of flooring or through the foundation slab.
- Repair the pipe: Depending on the severity of the leak and the chosen repair method, the pipe is either replaced, relined, or coated with epoxy.
- Restore the area: Once the repair is complete, the access points are sealed, and the flooring or slab is restored.
Preventing Future Slab Leaks
Prevention is key to avoiding future slab leaks. Here are some measures you can take:
- Regular maintenance: Schedule annual inspections of your plumbing system to catch any potential issues before they escalate.
- Monitor water pressure: Install a pressure regulator to manage and reduce excessive water pressure in your home.
- Proper installation: Ensure pipes are correctly installed during construction or remodeling to minimize the risk of future leaks.
By understanding the causes, conducting tests, determining the best repair method, and taking preventative measures, homeowners can effectively deal with slab leaks and protect their homes from further damage. Remember, swift action is essential when it comes to slab leaks to avoid costly repairs.
Preventive Measures For Water Leak Detection
Protect your home from costly damage by taking preventive measures for water leak detection. Regular inspections, monitoring water bills, and installing leak detection devices can help you identify and repair leaks early, ensuring a safe and efficient water system.
Water leaks can cause significant damage to your home, leading to costly repairs and potential health hazards. To prevent these issues, it’s essential to take proactive measures for water leak detection. By regularly checking for leaks, monitoring water usage, insulating pipes, maintaining plumbing fixtures, and performing regular plumbing inspections, you can minimize the risk of leaks and ensure the safety of your property.
Let’s explore these preventive measures in more detail:
Regularly Checking For Leaks
- Inspect areas prone to water leaks such as under sinks, around toilets, and behind appliances.
- Look for signs of moisture, water stains, or discoloration on walls, ceilings, and floors.
- Check for dripping faucets or visible water puddles in and around your home.
- Examine your water meter periodically to monitor any unusual fluctuations in water usage, which may indicate hidden leaks.
Monitoring Water Usage
- Keep track of your water bills to identify unexpected spikes in consumption that could be caused by leaks.
- Compare your water usage to normal household average consumption to detect any significant deviations.
- Use water monitoring devices that can provide real-time notifications about abnormal water usage patterns.
Insulating Pipes
- Insulate exposed pipes, especially in unheated areas like basements, attics, and crawl spaces, to prevent freezing and potential pipe bursts.
- Ensure proper insulation around hot water pipes to maintain temperature and minimize heat loss.
- Use pipe sleeves or heat tape to protect pipes from extreme weather conditions.
Maintaining Plumbing Fixtures
- Perform regular maintenance on plumbing fixtures such as faucets, toilets, and showers.
- Replace worn-out washers, gaskets, or any malfunctioning components to prevent potential leaks.
- Check for signs of corrosion, rust, or mineral buildup that can compromise the integrity of your plumbing system.
Performing Regular Plumbing Inspections
- Hire a professional plumber to conduct thorough inspections of your pipes, fixtures, and water supply system.
- Focus on identifying any hidden leaks, cracks, or faulty connections that may not be visible to the naked eye.
- Address any detected issues promptly to avoid further damage or extensive repairs.
By following these preventive measures, you can stay one step ahead of potential water leaks and protect your home from unnecessary damage. Remember, early detection and proactive maintenance are key to ensuring the longevity and efficiency of your plumbing system.
Frequently Asked Questions On Water Leak Detection And Repair
How Much Does It Cost To Have A Leak Detected?
The cost of leak detection varies depending on factors such as location and the type of leak.
Is Leak Detection Worth It?
Yes, leak detection is worth it for identifying and fixing potential plumbing issues.
How Can Leakage Of Water Be Detected?
Water leakage can be detected through various methods, such as visual inspection, water meter readings, infrared technology, and specialized leak detection equipment.
What Are The Two Most Common Leak Detection Tests?
The two most common leak detection tests are pressure testing and smoke testing.
Conclusion
Water leak detection and repair is a crucial endeavor for homeowners. By promptly identifying and addressing leaks, individuals can prevent significant damage to their properties and save on costly repairs. It is important to remember that even small, seemingly insignificant leaks can lead to mold growth, structural deterioration, and increased utility bills over time.
As such, being proactive in detecting leaks, whether through visual inspections or investing in professional leak detection services, is paramount. Additionally, regular maintenance and upkeep of plumbing systems can help prevent leaks from occurring in the first place. By implementing these preventative measures, homeowners can ensure the longevity and efficiency of their plumbing systems, while also conserving water and lowering their environmental impact.
Ultimately, by prioritizing water leak detection and repair, individuals can protect their homes, their wallets, and the planet for years to come.