Scatterplot Google Sheets
To create a scatterplot in Google Sheets, go to the Insert menu and select Chart. Choose “Scatter” from the options and customize the chart as per your requirements.
Scatterplots are a vital tool for visualizing relationships between two variables. In Google Sheets, creating a scatterplot is a simple process that involves selecting your data and creating a chart. By adding trendlines, error bars, and labels, you can enhance your scatterplot to effectively communicate your data’s insights.
Using the features offered by Google Sheets, you can easily create, customize, and interpret scatterplots to better understand the relationship between your data points. With these steps, you can effectively utilize scatterplots in Google Sheets to analyze and present your data.
Credit: www.youtube.com
How To Create A Scatter Plot In Google Sheets
Creating a scatter plot in Google Sheets is a powerful way to visualize data relationships. Let’s explore three methods to create scatter plots in Google Sheets.
Using Superchart
To create a scatter plot using Superchart:
- Begin by entering your data into Google Sheets.
- Click on the “Insert” menu and select “Chart”.
- Choose “Scatter” from the chart types.
- Customize your scatter plot using Superchart features.
Using Simple Sheets
To create a scatter plot using Simple Sheets:
- Input your data sets into Google Sheets.
- Access the “Insert” menu and select “Chart”.
- Opt for the “Scatter” chart option from the list.
- Adjust the settings to personalize your scatter plot.
Using Ben Collins
To create a scatter plot using Ben Collins’ method:
| Steps | Description |
|---|---|
| 1 | Prepare your data in Google Sheets. |
| 2 | Navigate to “Insert” and choose “Chart”. |
| 3 | Select “Scatter” as the chart type. |
| 4 | Customize your scatter plot with Ben Collins’ tips. |
Making A Scatter Graph And Line Of Best Fit In Google Sheets
Making a Scatter Graph and Line of Best Fit in Google Sheets can provide valuable insights into the relationship between two variables. By visualizing data points on a scatterplot and adding a trendline, you can analyze the correlation and predict future trends. In this guide, we’ll explore the steps to create a scatter graph and line of best fit in Google Sheets.
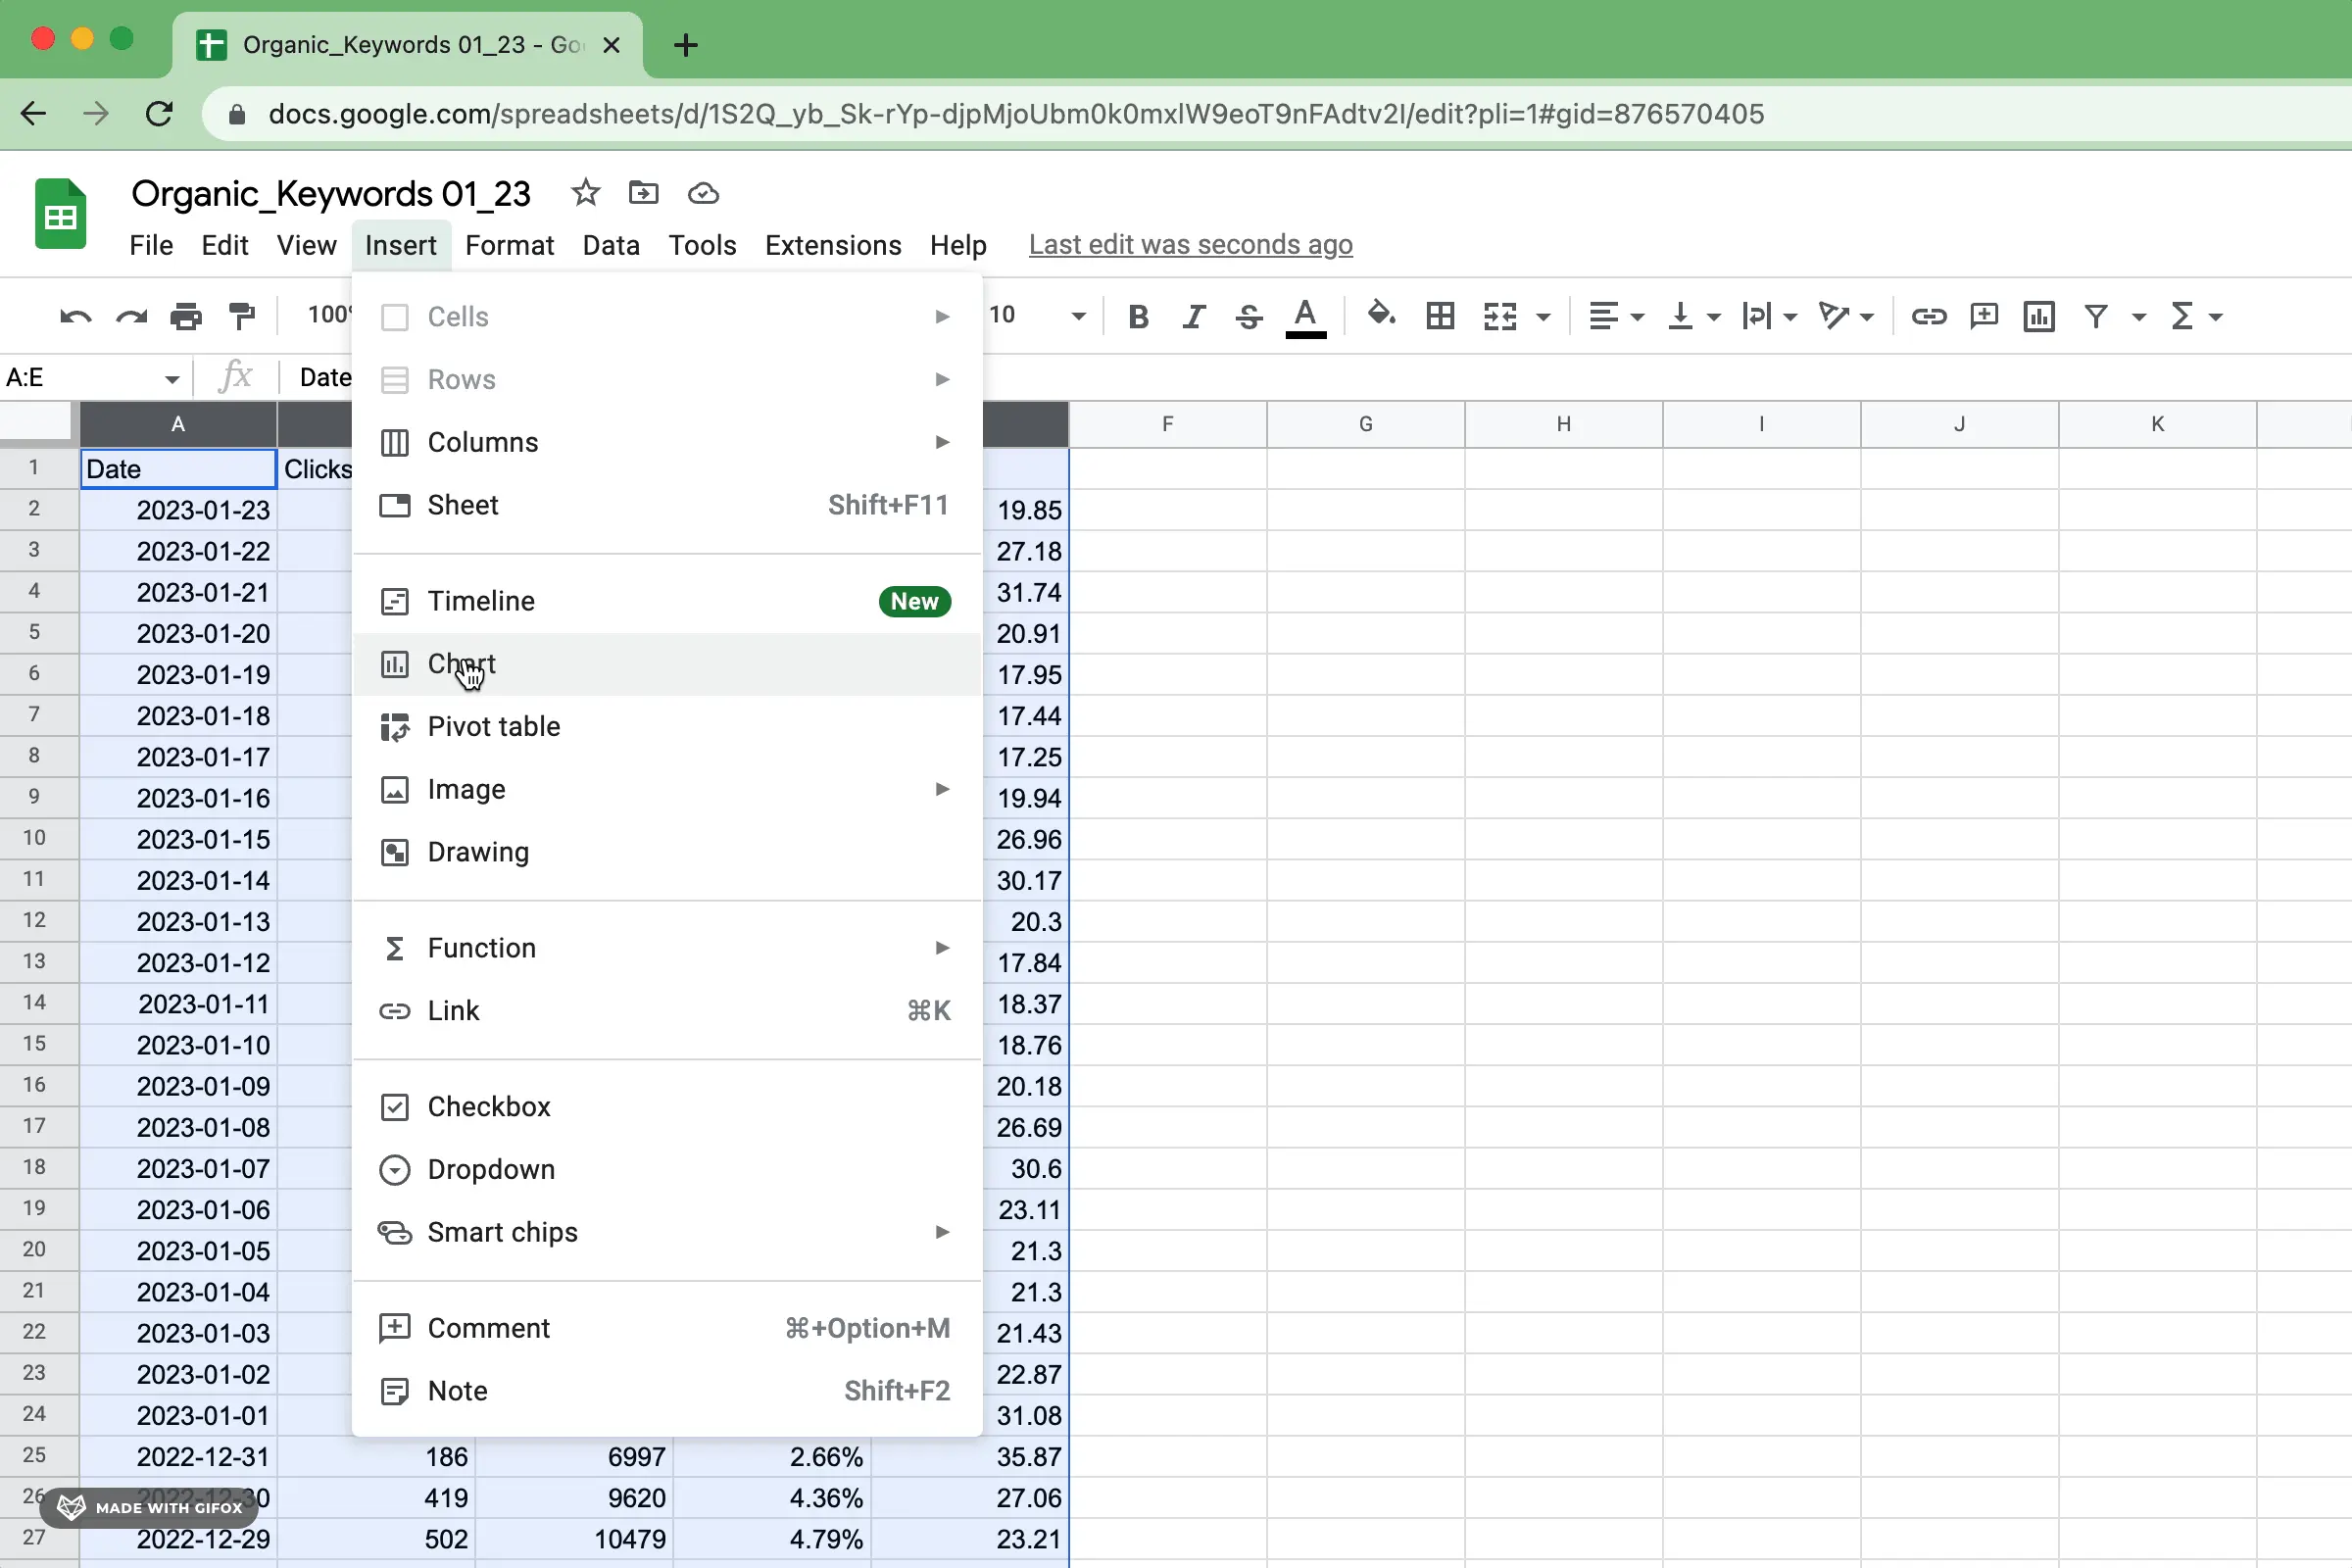
Inserting A Chart
To insert a scatter graph in Google Sheets, follow these simple steps:
- Open your Google Sheets document and select the data points you want to include in the scatterplot.
- Navigate to the “Insert” menu at the top of the window.
- Click on “Chart” from the dropdown list.
- Choose “Scatter chart” from the options provided.
- Customize the appearance and style of your scatter graph as needed.
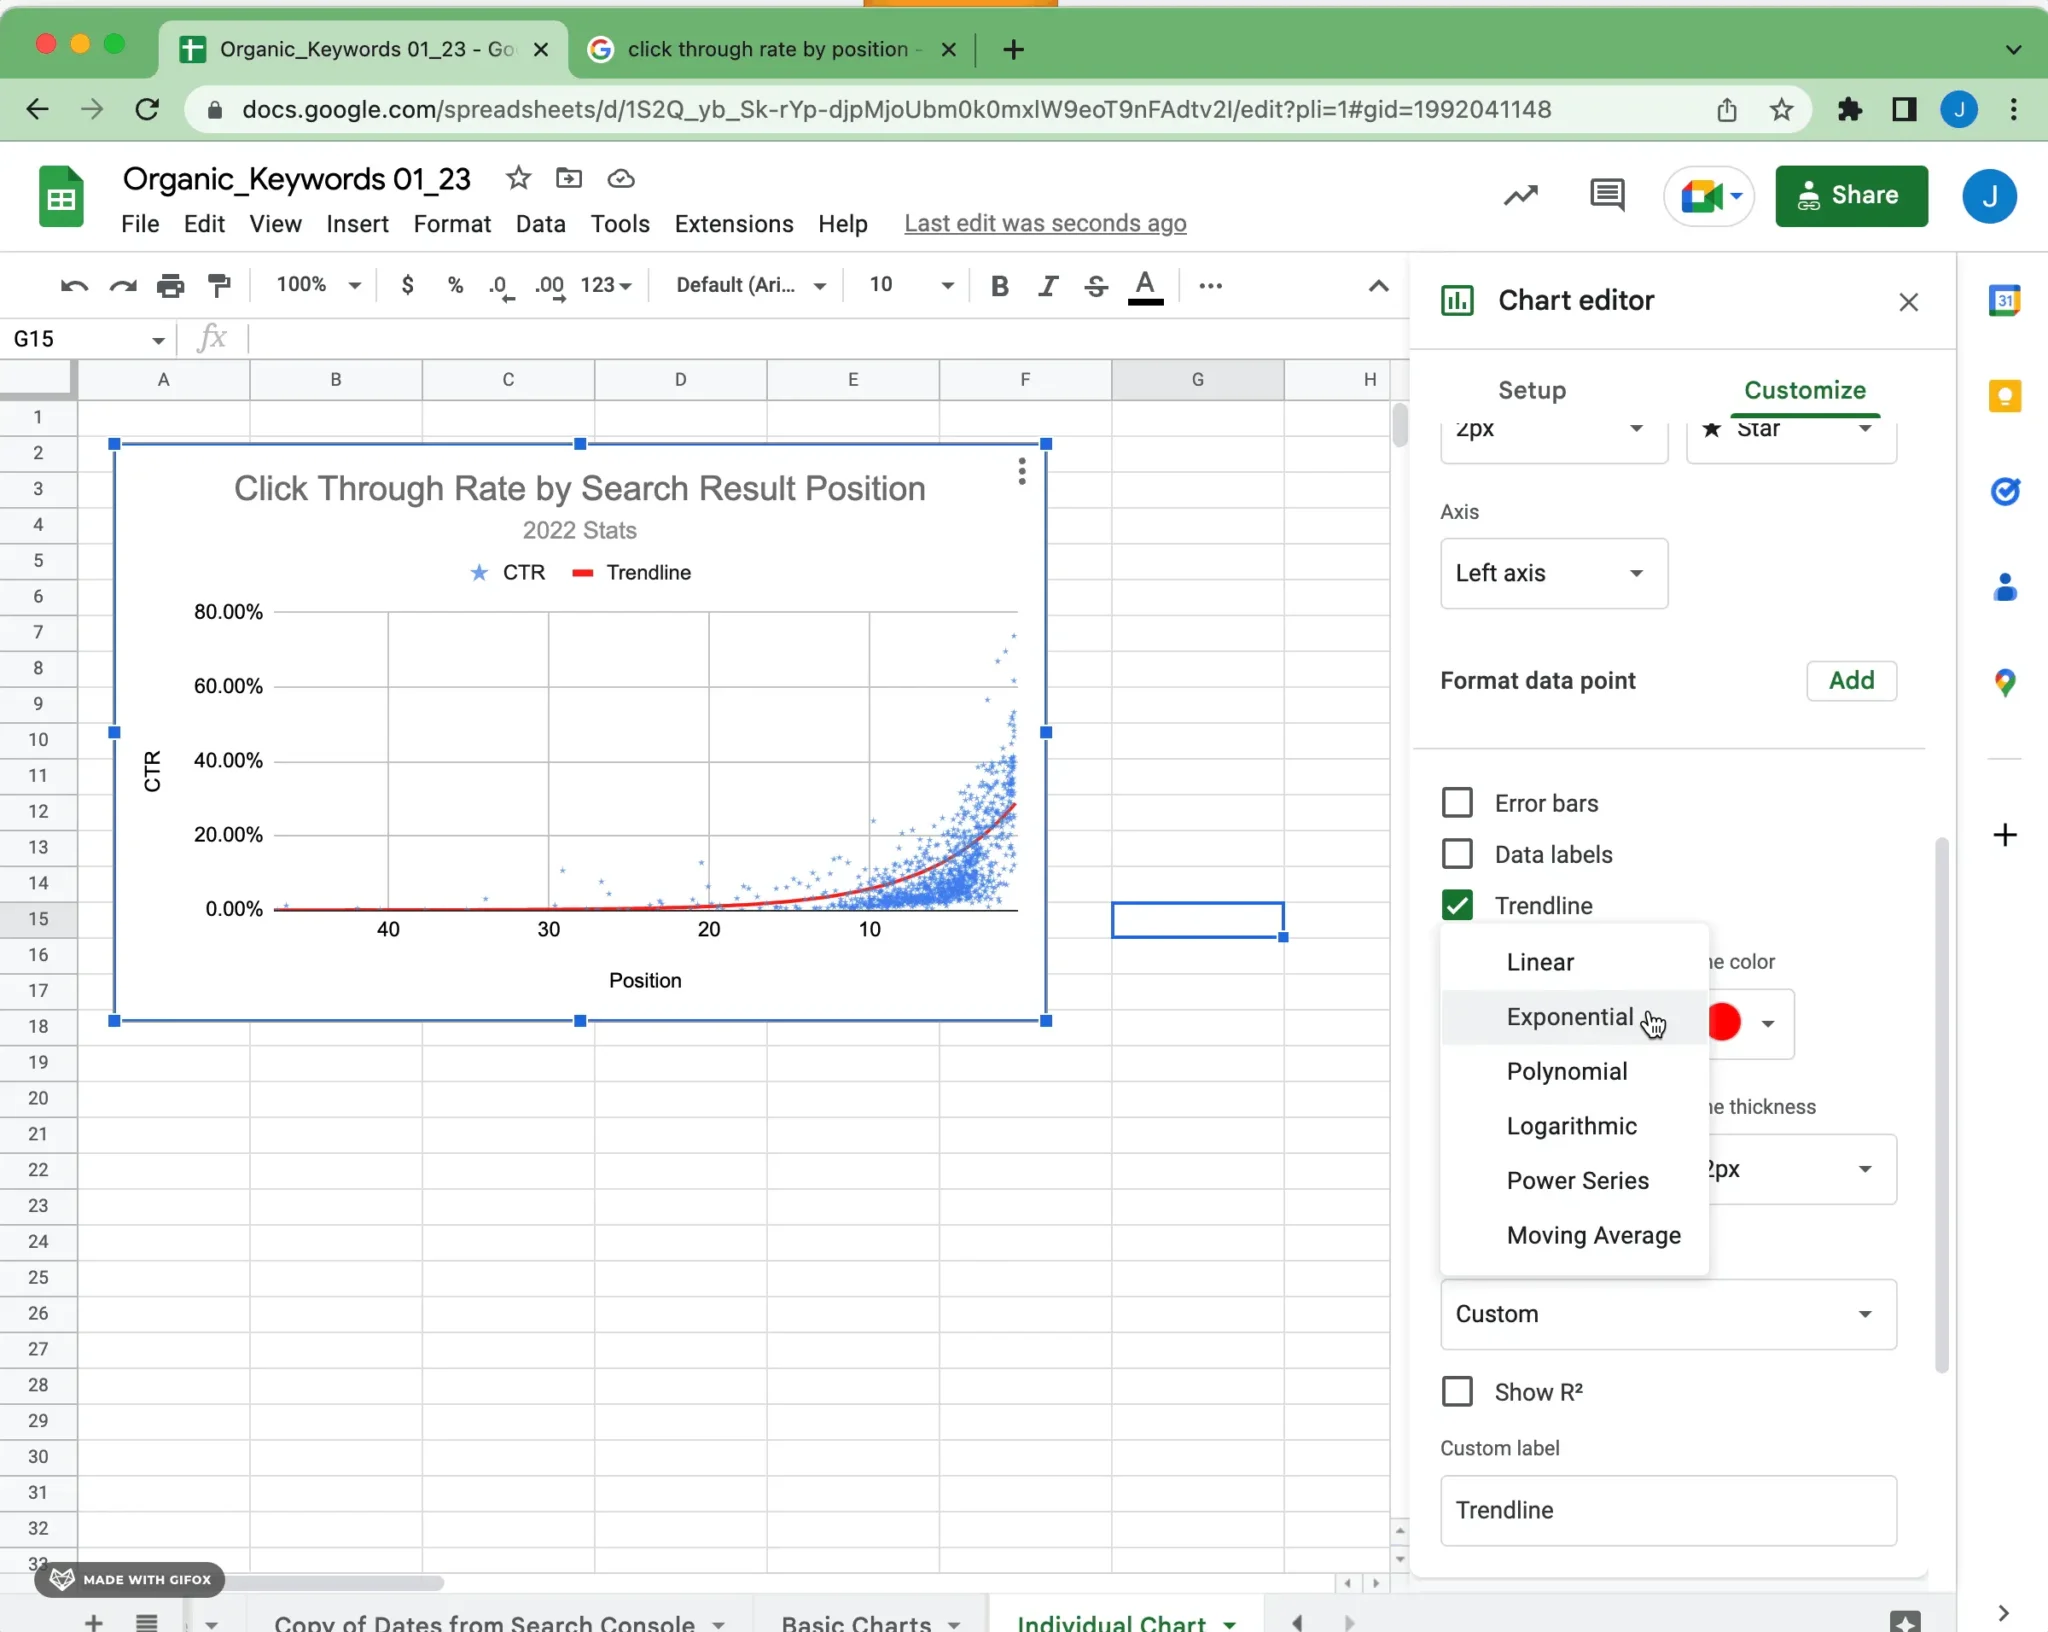
Adding A Trendline
Once you have inserted the scatter graph, adding a trendline can help identify the relationship between the variables. Here’s how you can add a trendline:
- Select the scatterplot in your Google Sheets document.
- Click on the three-dot menu in the top right corner of the chart and choose “Add trendline.”
- Customize the trendline options, including type, color, and line style.
- Explore the R-square value and equation of the line of best fit to understand the strength of the correlation.
Interpreting Error Bars
When analyzing a scatterplot, interpreting error bars can provide insights into the variability of data points. Follow these steps to interpret error bars:
- Select the scatter graph and navigate to the “Customize” tab in the chart editor.
- Click on “Series” and then “Error bars” to customize the display of error bars.
- Observe the error bars to understand the dispersion and uncertainty of the data points.
How To Customize And Export A Scatter Plot In Google Sheets
Customizing and exporting a scatter plot in Google Sheets is easy. Start by creating a data table, then insert the scatter plot using the Explore feature or Insert Chart. From there, you can customize and style the chart to your liking.
Customizing Scatter Plot Properties
To customize your scatter plot in Google Sheets, you can modify various properties to make it visually appealing and easily understandable. Here are the steps to customize scatter plot properties:
- Data Selection: Choose the data range for the x and y-axis variables.
- Title and Labels: Add a descriptive title and axis labels to provide context to your scatter plot.
- Trendlines: Incorporate trendlines to depict the overall pattern in the data.
- Markers and Colors: Customize markers and colors to highlight data points and differentiate between different datasets.
- Axis Scaling: Adjust the scaling of the axes to ensure accurate representation of the data.
Exporting Scatter Plot In Different Formats
After customizing your scatter plot, you may want to export it in different formats for various purposes. Google Sheets allows you to export scatter plots in multiple formats, including:
- JPG: Suitable for sharing the scatter plot as an image file.
- PNG: High-quality image format preserving transparency for further editing or publication.
- SVG: Scalable Vector Graphics suitable for resizing without loss of quality.
- PDF: Ideal for creating high-resolution documents or reports with the scatter plot included.
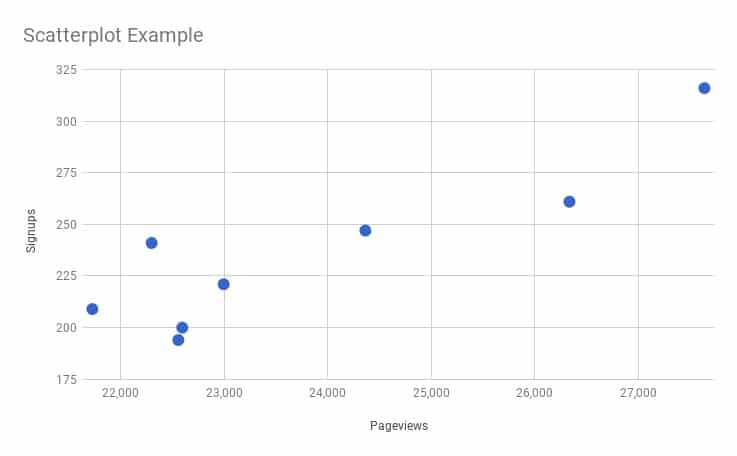
Inserting A Scatter Plot In Google Sheets
Creating scatter plots in Google Sheets is a powerful way to visualize and analyze data relationships. By inserting a scatter plot, you can easily identify patterns and trends within your datasets. Below, we will guide you through the process of inserting a scatter plot in Google Sheets using different methods.
Using Google Sheets Menu
- Click on the Insert menu at the top left of the window.
- Select Chart from the drop-down list.
- Google Sheets may initially display a different chart type like a bar chart.
- Choose Scatter chart from the list of chart options.
Inserting A Scatter Plot With Multiple Data Sets
- Select multiple data sets that you want to include in your scatter plot.
- Insert a scatter chart for the selected data sets.
- Customize the scatter chart settings to provide additional context.
- Add features like trendlines, chart equations, and data analysis methods.
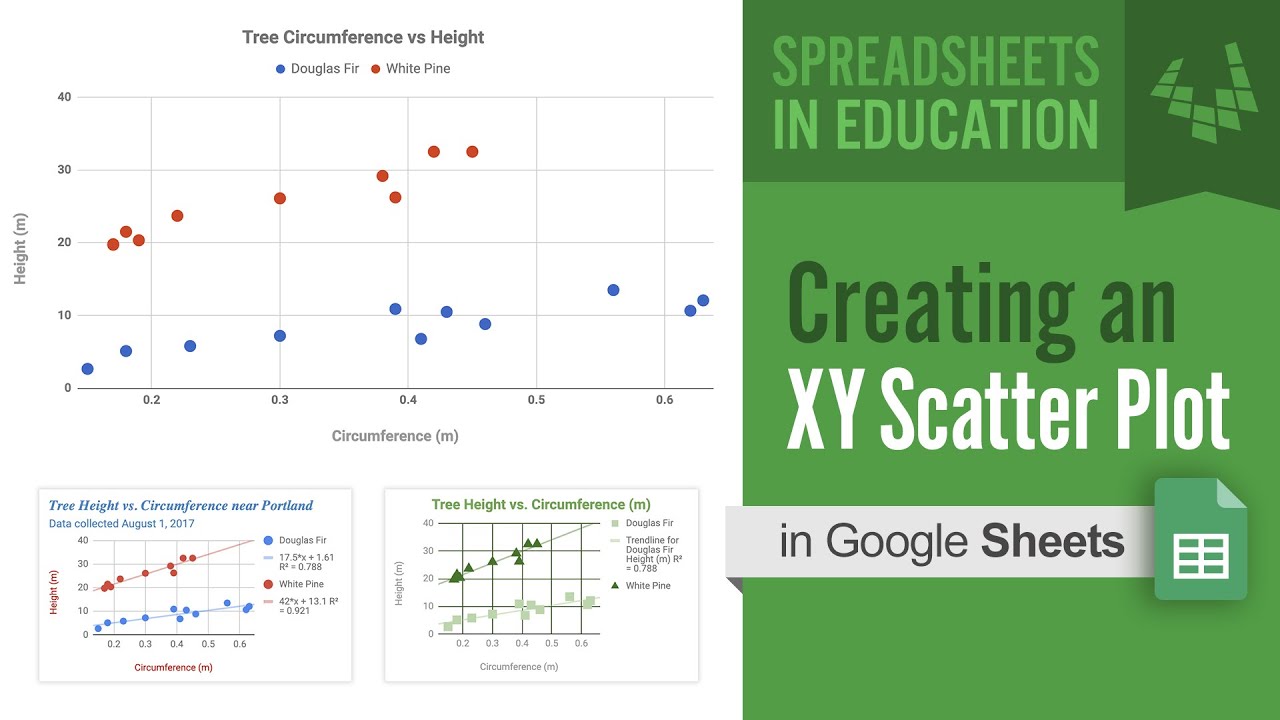
Creating An Xy Scatter Plot In Google Sheets
Learn how to create an XY Scatter Plot in Google Sheets effortlessly. Easily insert and customize the scatter plot using the Explore feature or Insert Chart tool. Enhance your data visualization with trendlines and style options for a comprehensive analysis.
Step-by-step Guide To Plotting An Xy Graph
Creating an XY scatter plot in Google Sheets is a straightforward process that involves a few simple steps. Follow this step-by-step guide to plot an XY graph:
- Start by creating a data table.
- Insert a scatter plot using the Explore feature or Insert Chart.
- Customize and style the chart to your preference.
Making An X-y Graph In Google Sheets
If you’re looking to make an X-Y graph in Google Sheets, you’ve come to the right place! Here is a quick and easy way to create an X-Y graph:
- Insert a scatter plot chart.
- Add a trendline to the chart for a line of best fit.
- Interpret error bars to analyze data.
- Find clusters to identify patterns.
Scatter plots are often preferred over line charts because they provide a clearer visualization of the relationship between variables. By following these steps, you’ll be able to create an X-Y graph in Google Sheets and gain valuable insights from your data.
So, whether you want to analyze trends, track correlations, or visualize large datasets, scatter plots in Google Sheets are a powerful tool that can help you make data-driven decisions with ease.
Credit: www.superchart.io
Credit: www.benlcollins.com
Frequently Asked Questions On Scatterplot Google Sheets
How Do I Make A Scatter Plot On Google Sheets?
To make a scatter plot on Google Sheets, create a data table, then insert a scatter plot using the Explore feature or Insert Chart. Customize and style the chart to suit your requirements.
How To Make A Scatter Plot In Google Sheets With Two Sets Of Data?
To make a scatter plot in Google Sheets with two sets of data, create a data table and select both sets. Then, use the “Insert Chart” feature and choose “Scatter chart. ” Customize the chart settings to include context and add a trendline, chart equation, and data analysis method.
How Do I Plot An Xy Graph In Google Sheets?
To plot an XY graph in Google Sheets, click on the Chart tab, select Scatter chart for an instant scatter plot.
How Do You Make A Scatter Plot Matrix In Google Sheets?
To create a scatter plot matrix in Google Sheets, follow these steps: 1. Enter values for the X axis in the first column. 2. Optional: Enter category names in the first row as labels in the legend. 3. Enter Y values in the other columns.
4. Each row represents a point on the chart. 5. Use the “Insert Chart” option in the “Insert” menu to create the scatter plot matrix.
Conclusion
When it comes to creating scatter plots in Google Sheets, the possibilities are endless. With easy-to-follow tutorials and step-by-step guidance, anyone can master this powerful data visualization tool. Start exploring the world of scatter plots today and unlock new insights with just a few clicks.
Let your data shine!