Installing Shower Shelf: A Simple Guide for Already Tiled Walls
Installing a shower shelf on an already tiled wall is a simple and straightforward process. In order to complete the installation, you will need to gather the necessary materials and tools, such as a stud finder, drill, screws, and the desired shower shelf.
Once you have these items, you can then locate the studs in the wall using the stud finder and mark their positions. Next, you can drill pilot holes into the studs and attach the shelf brackets using screws. Finally, you can attach the shelf to the brackets and ensure it is securely in place.
With these steps, you’ll have a functional and aesthetically pleasing shower shelf in no time.
Enhancing Functionality And Organization
Enhance the functionality and organization of your bathroom by easily installing a shower shelf on an already tiled wall. This convenient solution offers a practical storage option without the need for major renovations. Get organized and maximize space effortlessly.
Installing a shower shelf on an already tiled wall can be a game-changer when it comes to enhancing the functionality and organization of your bathroom. Not only does it provide you with additional storage space, but it also keeps your shower essentials within reach and helps reduce clutter in the bathroom.
In this post, we will explore how installing a shower shelf can maximize storage space, keep your shower essentials organized, and ultimately improve the overall functionality of your bathroom.
Maximizing Storage Space:
- Utilize vertical space: A shower shelf allows you to make the most of the often underutilized vertical space in your shower area.
- Store multiple items: With a shower shelf, you can easily store your shampoo, conditioner, body wash, and other shower essentials in one convenient location.
- Avoid clutter: By having a designated storage space, you can eliminate the need for multiple bottles and dispensers cluttering the edges of your tub or shower floor.
Keeping Shower Essentials Within Reach:
- Easy accessibility: A shower shelf ensures that your shower essentials are easily accessible during your daily bathing routine.
- Stay organized: With items neatly arranged on the shelf, you won’t have to waste time searching for your preferred products.
- Eliminate mess and spills: By storing items on a shelf, you can avoid accidental spills or mishaps that can occur when products are placed on the edge of the tub or shower floor.
Reducing Clutter In The Bathroom:
- Neat and tidy space: A shower shelf provides a dedicated storage area for your shower essentials, helping to maintain a clutter-free environment.
- Enhanced aesthetics: By removing clutter from the edges of your shower, you can create a cleaner and more visually appealing bathroom.
- Easy cleaning: With items neatly organized on a shelf, cleaning the shower becomes a breeze as you won’t have to constantly move bottles and products to clean the surfaces.
Installing a shower shelf on an already tiled wall is a simple yet effective solution to maximize storage space, keep your shower essentials within reach, and reduce clutter in your bathroom. With its numerous benefits, it’s no wonder that many homeowners are embracing this practical and space-saving addition to their shower areas.
So, why not take advantage of the functionality and organization a shower shelf can offer and transform your shower experience today?
Key Considerations Before Installation
Before installing a shower shelf on an already tiled wall, it’s important to consider factors such as the tile material, weight capacity, and proper installation techniques to ensure a secure and long-lasting fixture.
Assessing The Existing Tile Condition
- Check for any cracks or loose tiles on the wall where you plan to install the shower shelf.
- Ensure that the tiles are securely adhered to the wall and not showing signs of damage.
- Inspect the grout lines between the tiles to ensure they are intact and free from cracks.
- If you find any issues with the existing tile condition, address them before proceeding with the installation.
- Repair any damaged tiles or grout and allow sufficient time for the repairs to fully cure before installing the shower shelf.
Choosing The Right Type Of Shower Shelf
- Consider the style and aesthetic of your bathroom when selecting a shower shelf.
- Determine the desired material for the shelf, such as ceramic, glass, or metal, based on your preferences and budget.
- Evaluate the size and weight capacity of the shelf to ensure it can accommodate your toiletries and other items.
- Look for shelves that are designed specifically for installation on tiled walls to ensure a secure fit and proper water drainage.
- Take into account the maintenance requirements of different materials when making your decision.
Measuring And Planning The Placement
- Measure the available space on the wall where you intend to install the shower shelf.
- Consider the height at which you want to place the shelf for easy access to your items.
- Take into account the surrounding fixtures, such as showerheads or faucets, and ensure they won’t obstruct the shelf or interfere with its installation.
- Plan the placement of the shelf in a convenient and accessible location within your shower area.
- Consider the weight capacity of the shelf and ensure it is suitable for the items you plan to store on it.
Installing a shower shelf on an already tiled wall can be a practical and convenient solution for organizing your shower essentials. However, before you embark on this project, it’s essential to assess the existing tile condition, choose the right type of shower shelf, and carefully measure and plan the placement.
Taking these key considerations into account will ensure a successful installation and a functional addition to your bathroom. So let’s dive into each consideration to guide you through the process.
Gather The Necessary Tools And Materials
To install a shower shelf on an already tiled wall, gather all the tools and materials required for the job, ensuring that you have everything you need before beginning.
Installing a shower shelf on an already tiled wall is a great way to add storage and organization to your bathroom. It’s a relatively simple project that can be completed with the right tools and materials. In this section, we will discuss the necessary tools and materials you’ll need to gather before starting the installation process.
List Of Tools Required:
- Cordless drill: This will be used to drill holes into the wall for mounting the shelf.
- Drill bit set: You’ll need a set of drill bits to accommodate different screw sizes.
- Level: A level will ensure that the shelf is installed straight and level.
- Tape measure: This tool is essential for accurate measurements before drilling.
- Pencil: Use a pencil to mark the location of the shelf installation on the wall.
- Screwdriver: A screwdriver is necessary to secure screws into the wall.
- Masking tape: This can be used to mark the drill spot to prevent slipping.
- Safety goggles: Protect your eyes by wearing safety goggles during the drilling process.
- Gloves: Consider wearing gloves to protect your hands from sharp edges.
- Dust mask: If you are concerned about inhaling dust or debris, a dust mask is recommended.
Gathering The Right Materials For Installation:
- Shower shelf kit: Choose a shelf kit that suits your needs and complements your bathroom decor.
- Mounting screws: Ensure that the screws are the appropriate length for your wall thickness.
- Anchors: If your wall is made of tile or other non-solid materials, anchors may be required for proper installation.
- Wall adhesive: Some shower shelves come with adhesive strips for an alternative installation option.
- Silicone sealant: Apply silicone sealant around the edges of the shelf to prevent water damage and ensure a secure fit.
- Cleaning supplies: Before installation, clean the wall surface and the area where the shelf will be placed to ensure proper adhesion and longevity of the shelf.
By gathering the necessary tools and materials, you’ll be well-prepared to install a shower shelf on your already tiled wall. In the next section, we will discuss the step-by-step process of installing the shelf. Stay tuned!
Preparing The Tile Surface
Discover the key steps for installing a shower shelf on a pre-tiled wall, ensuring a smooth and secure surface for your bathroom essentials. From cleaning to priming, this guide will help you achieve a professional finish that lasts.
Installing Shower Shelf On Already Tiled Wall
Installing a shower shelf on an already tiled wall is a convenient and practical way to add storage to your bathroom. However, before you begin the installation process, it is important to properly prepare the tile surface. This will ensure that the shelf adheres securely and remains stable over time.
In this section, we will discuss the necessary steps to clean the tiles, remove any loose grout or debris, and ensure a smooth and even surface for the installation.
Cleaning The Tiles:
To start the preparation process, thoroughly clean the tiles to remove any dirt, grime, or soap residue. Here are some steps to follow:
- Mix a solution of warm water and mild detergent.
- Use a soft sponge or cloth to apply the soapy water onto the tiles.
- Gently scrub the tiles, paying extra attention to any stubborn stains.
- Rinse the tiles with clean water to remove all the soap.
Removing Any Loose Grout Or Debris:
Before proceeding with the installation, it is crucial to address any loose grout or debris between the tiles. Here’s what you need to do:
- Inspect the tiled surface carefully, looking for any signs of cracked or loose grout.
- Use a grout saw or a similar tool to carefully remove the damaged grout.
- Be cautious not to damage the surrounding tiles while removing the grout.
- Once the loose grout is removed, clean the area thoroughly to eliminate any debris.
Ensuring A Smooth And Even Surface:
For a secure and stable installation, it is essential to ensure that the tile surface is smooth and even. Follow these steps:
- Check the tiled wall for any uneven surfaces or protruding tiles.
- Use a sanding block or sandpaper to gently smooth out any uneven areas.
- Be careful not to apply too much pressure that could damage the tiles.
- After sanding, thoroughly clean the surface to remove any sanding residue.
By following these steps to clean the tiles, remove any loose grout or debris, and ensure a smooth and even surface, you will create the ideal foundation for installing a shower shelf on an already tiled wall. With proper preparation, your shelf will be securely mounted, offering convenient storage space in your bathroom.
Choosing The Right Location For The Shower Shelf
Choosing the right location for your shower shelf on an already tiled wall is crucial for functionality and aesthetics. Consider factors like accessibility, water resistance, and height to ensure a practical and visually pleasing storage solution in your bathroom.
Placing a shower shelf on an already tiled wall can be a practical and stylish addition to your bathroom. However, choosing the right location for the shelf is key to ensuring functionality and convenience. Consider factors such as the ideal height and position, as well as the placement of the showerhead, to optimize usability.
Here’s a guide to help you determine the perfect spot for your shower shelf.
Determining The Ideal Height And Position:
- Take into account the height of the shelving unit in relation to the user. A shelf that is too high or too low may be difficult to access comfortably.
- Position the shelf within easy reach, ensuring that items stored on it are easily accessible without straining or stretching.
- Consider the overall design and aesthetics of your bathroom. Ensure that the shelf is placed in a visually pleasing location, complementing the existing tiles and fixtures.
- If you have multiple showerheads, ensure that the shelf is positioned to allow easy access for all users.
- Take into consideration any specific requirements or preferences you may have. For example, if you use certain shower products daily, position the shelf in a way that keeps them within easy reach.
By carefully considering the ideal height and position for your shower shelf, you can create a functional and convenient storage solution in your bathroom.
Marking And Measuring For Installation
To install a shower shelf on an already tiled wall, proper marking and measuring is essential. Measure the desired height and use a level to mark the placement accurately. This ensures a secure and well-aligned installation without damaging the existing tiles.
Using A Level And Measuring Tape
When it comes to installing a shower shelf on an already tiled wall, marking and measuring the exact positions for drilling is crucial. This ensures that the shelf will be properly aligned and secure. To accomplish this, you will need a level and a measuring tape.
Here’s how to mark and measure for installation:
Using A Level And Measuring Tape:
- Begin by determining the desired height for your shower shelf. Measure the distance from the floor or the bottom of the shower to the desired location.
- Use a level to make sure the area is straight and even. Place the level horizontally or vertically against the wall to check for any slopes or irregularities.
- Mark the approximate position for your shelf using a pencil. Make sure to mark both the left and right sides of the shelf.
- Measure the distance between the two marks to ensure that your shelf will be centered. This will help achieve a balanced and visually appealing look.
- Once you have confirmed the placement and alignment, use a tape measure to ascertain the exact measurements from the floor or the bottom of the shower.
- Double-check all measurements and make any necessary adjustments before proceeding to drill.
- With the exact measurements in hand, you are now ready to proceed with drilling the holes for your shower shelf.
By following these steps and taking accurate measurements, you can ensure a successful installation of your shower shelf on an already tiled wall. Take your time to ensure everything is properly aligned and double-check your measurements to avoid any issues down the line.
Drilling Holes In The Tiles
Install a shower shelf on a tiled wall by drilling holes. Ensure accurate measurements and use the right tools for a secure installation.
When it comes to installing a shower shelf on an already tiled wall, drilling holes in the tiles requires precision and caution. To ensure a successful installation without damaging the tiles, follow these steps:
Selecting The Appropriate Drill Bit:
- Choose a diamond-tipped drill bit specifically designed for drilling into tiles.
- The size of the drill bit will depend on the diameter of the screws or anchors you plan to use for mounting the shower shelf.
Applying Gentle Pressure While Drilling:
- Start by marking the exact spot where you want to drill the hole on the tile.
- Use a supportive hand or a steady guide to keep the drill steady and apply consistent pressure.
- Begin drilling at a slow speed, gradually increasing the speed as the hole progresses.
- Continuously check the drill’s alignment to prevent it from veering off course.
Using Caution To Prevent Tile Damage:
- Place a small piece of masking tape or painter’s tape over the marked spot on the tile. This will help prevent the drill bit from slipping and provide additional protection for the tile surface.
- Keep the drill perpendicular to the tile during the drilling process.
- Apply steady and even pressure, but avoid using excessive force to prevent tile cracks or breakage.
- Consider using a cordless drill for better maneuverability and control.
Remember, it’s crucial to proceed carefully and take your time while drilling holes in the tiles. By using the appropriate drill bit, applying gentle pressure, and taking caution to prevent tile damage, you can enjoy a successful installation of a shower shelf on your already tiled wall.
Installing And Securing The Shower Shelf
Installing and securing a shower shelf on an already tiled wall is a simple and effective way to optimize bathroom storage. By following a few steps, such as measuring, drilling, and attaching the shelf securely, you can quickly enhance your shower experience while keeping your essential toiletries organized.
So you’ve already tiled your shower wall and now you want to add a convenient shelf for your shampoo bottles and soap. Installing a shower shelf on an already tiled wall may seem like a daunting task, but with the right information and technique, it can be a fairly straightforward process.
In this section, we will walk you through the steps of installing and securing your shower shelf, ensuring it stays in place for years to come.
Applying Adhesive Or Caulk To The Back Of The Shelf:
Here’s how you can attach the shelf to the wall securely:
- Measure and mark the desired position for your shower shelf on the already tiled wall.
- Use a level to ensure the shelf will be perfectly horizontal.
- Clean the back of the shelf and the area on the wall where it will be attached. Ensure they are free from any dirt, dust, or residue.
- Apply a generous amount of adhesive or caulk to the back of the shelf. Make sure to cover the entire surface evenly.
- Aligning the shelf with the marked positions:
Now that you’ve applied the adhesive or caulk, it’s time to align the shelf properly:
- Carefully place the shelf on the wall, aligning it with the marked positions you made earlier. Double-check that it’s level before proceeding.
- Applying pressure to secure the shelf in place:
To ensure the shelf is securely attached, follow these steps:
- Apply pressure to the shelf, pressing it firmly against the wall. Make sure that each corner and edge of the shelf is in full contact with the wall.
- Hold the shelf in place for the recommended curing time specified by the adhesive or caulk manufacturer. This will allow the adhesive or caulk to set and bond properly.
- Once the specified time has passed, release the pressure and check that the shelf is firmly attached to the wall.
- Avoid putting any weight on the shelf for at least 24 hours to give the adhesive or caulk sufficient time to fully cure. Refer to the manufacturer’s instructions for specific curing time recommendations.
By following these steps and using the right adhesive or caulk, you can confidently install and secure a shower shelf on your already tiled wall. Enjoy the added convenience and organization it brings to your shower routine!
Allowing Sufficient Drying Time
Ensure sufficient drying time when installing a shower shelf on an already tiled wall. This will help to prevent any moisture-related issues and ensure a secure and long-lasting installation.
Installing a shower shelf on an already tiled wall is a great way to maximize storage in your bathroom. However, it’s crucial to let the adhesive fully dry before placing any items on the shelf. This will ensure that the shelf remains secure and doesn’t fall off the wall.
Here are some tips on allowing sufficient drying time for your shower shelf installation:
Following The Manufacturer’S Instructions For Drying:
- Consult the adhesive manufacturer’s guidelines for the recommended drying time. This information can usually be found on the packaging or product label.
- Follow the instructions carefully, as different adhesives may have varying drying times. It’s important to adhere to these guidelines to achieve optimal results.
- Keep in mind that the drying time may also depend on factors such as humidity and temperature. Check if the manufacturer provides any specific recommendations regarding these conditions.
Ensuring Proper Ventilation In The Bathroom:
- Ventilation is crucial during the drying process to help the adhesive cure properly. It helps in reducing moisture levels, which can affect the drying time and adhesive strength.
- Make sure your bathroom is well-ventilated by using exhaust fans or opening windows. This will promote air circulation and expedite the drying process.
- If you don’t have good natural ventilation, using a separate fan can help circulate the air and speed up the drying time.
Additional Tips For Allowing Sufficient Drying Time:
- Avoid using the shower or direct water contact in the vicinity of the installation area until the adhesive is fully dry. Water can compromise the adhesive’s bond and lead to shelf failure.
- Be patient and resist the temptation to place items on the shelf prematurely. It’s better to wait an extra day or two to ensure the adhesive has completely cured.
- Keep in mind that proper drying time may vary based on factors such as adhesive type, tile material, and overall environmental conditions. It’s always better to err on the side of caution and wait for a longer drying period if uncertain.
By following these guidelines, you can ensure that your shower shelf installation is successful and long-lasting. Allowing sufficient drying time is crucial for a secure and sturdy shelf that can hold all your bathroom essentials.
Final Touches And Considerations
Get ready to install a shower shelf on your existing tiled wall with these final touches and considerations. Make sure to follow the steps carefully for a seamless and functional addition to your bathroom.
After successfully installing a shower shelf on your already tiled wall, there are a few final touches and considerations to ensure a professional finish. Here are the steps you should follow:
Wiping Off Excess Adhesive Or Caulk:
- Carefully inspect the area around the shower shelf for any visible excess adhesive or caulk.
- Use a damp cloth or sponge to wipe off any residue, taking care not to disturb the newly installed shelf.
- Ensure that the surrounding tiles are clean and free from any streaks or smudges.
Checking For Any Loose Fittings Or Gaps:
- Give the shower shelf a gentle tug to ensure that it is securely attached to the wall.
- Look for any gaps or spaces between the shelf and the tiles.
- If you notice any loose fittings or gaps, use a caulking gun to fill them with a suitable sealant.
Sealing The Edges For A Professional Finish:
- Apply a thin line of silicone sealant around the edges of the shower shelf, where it meets the tiles.
- Smooth out the sealant with a caulk smoothing tool or your finger, creating a neat and seamless finish.
- Take care to remove any excess sealant to ensure a clean appearance.
- Allow the sealant to dry according to the manufacturer’s instructions before using the shower.
By following these final touches and considerations, you can ensure that your shower shelf installation on an already tiled wall is not only functional but also aesthetically pleasing. Take your time and pay attention to detail to achieve a professional finish.
Choosing The Right Cleaning Products
Installing a shower shelf on an already tiled wall can be made easier by choosing the right cleaning products. By selecting products specifically designed for tiled surfaces, you can ensure a clean and smooth installation process without damaging your tiles.
Maintaining a clean and fresh shower shelf is essential to ensure its longevity and appeal. However, it’s important to be cautious when selecting the cleaning products to use on your already tiled wall. Harsh chemicals can potentially damage both the tile and the shelf, leading to costly repairs or replacements.
To avoid any mishaps, follow these tips on choosing the right cleaning products:
Avoiding Harsh Chemicals That Can Damage The Tile Or Shelf
- Opt for mild, non-abrasive solutions that are specifically designed for cleaning tiled surfaces.
- Read the labels carefully to identify any harmful chemicals that could potentially cause damage.
- Avoid products that contain acids or bleach, as they can wear down the tile’s protective sealant and cause discoloration.
Opting For Mild And Non-Abrasive Solutions
- Look for pH-neutral cleaners that are safe for use on various surfaces, including ceramic or porcelain tiles.
- Use gentle cleaning agents that won’t scratch the surface or strip away the protective coating.
- Choose cleaning products that are environmentally friendly and biodegradable to minimize their impact on the environment.
Remember, prevention is key when it comes to maintaining the cleanliness of your shower shelf on an already tiled wall. Regularly wiping down the surface with a damp cloth can help to prevent the buildup of grime and soap residue.
By choosing the right cleaning products and adopting a regular cleaning routine, you can ensure that your shower shelf remains pristine and durable for years to come.
Cleaning And Maintaining The Shower Shelf
Learn how to install a shower shelf on an already tiled wall and keep it clean and well-maintained. These simple steps will help you organize your shower essentials while maintaining a clutter-free bathroom space.
:
Regularly removing any soap scum or residue:
- Soap scum and residue can build up on the shower shelf over time, making it appear dirty and unappealing. Keeping the shelf clean not only improves its appearance but also ensures the longevity of the shelf. Here are some tips to regularly remove any soap scum or residue:
- Mix equal parts of water and white vinegar in a spray bottle.
- Spray the solution onto the shower shelf, focusing on any areas with visible soap scum or residue.
- Let the solution sit for a few minutes to break down the grime.
- Use a soft cloth or sponge to gently scrub the shelf, applying light pressure to avoid scratching the surface.
- Rinse the shelf thoroughly with clean water.
- Dry the shelf with a clean, dry cloth to prevent water spots.
- Repeat this process as needed to keep the shower shelf clean and free from soap scum or residue.
Using soft cloths or sponges to prevent scratching:
- To ensure the shower shelf stays in good condition and doesn’t get scratched during cleaning, it’s essential to use the right tools. Here’s what you should keep in mind:
- Choose soft cloths or sponges that are gentle on the surface of the shower shelf.
- Avoid using abrasive materials like steel wool or rough brushes as they can cause scratches.
- Wet the cloth or sponge before cleaning to prevent it from snagging on the shelf’s surface.
- Gently wipe the shelf, applying mild pressure to remove any dirt or grime.
- If necessary, use a non-abrasive cleaner specifically designed for the material of the shower shelf.
- Rinse the cloth or sponge frequently during cleaning to remove any debris.
- After cleaning, ensure the shelf is completely dry before placing any items on it to avoid water damage.
Keep in mind that proper cleaning and maintenance of the shower shelf will help it stay in excellent condition and prolong its lifespan. Regularly removing soap scum or residue and using soft cloths or sponges during cleaning are simple yet effective strategies to keep your shower shelf looking its best.
Preventing Water Damage
Prevent water damage by installing a shower shelf on your already tiled wall. It’s a practical solution to keep your bathroom organized and avoid potential leaks and moisture issues.
Water damage is a common concern when installing a shower shelf on an already tiled wall. To ensure the longevity and integrity of your shower shelf, it is crucial to take precautionary measures to prevent water damage. Here are some key steps to follow:
Ensuring Proper Ventilation To Minimize Moisture Buildup:
- Allow for proper airflow in the shower area by installing an exhaust fan or opening a window during and after showering.
- Use a squeegee or towel to remove excess water from the tiled walls after each use.
- Keep the bathroom door open to promote air circulation and prevent moisture buildup.
Using Waterproof Grout Or Sealant Around The Shelf:
- Use waterproof grout or sealant to create a tight seal between the shelf and the tiled wall.
- Apply the grout or sealant following the manufacturer’s instructions, ensuring complete coverage around the shelf.
- Regularly inspect and reapply grout or sealant if any cracks or gaps appear.
Following These Steps Will Help Safeguard Your Shower Shelf From Potential Water Damage. By Ensuring Proper Ventilation And Using Waterproof Grout Or Sealant, You Can Enjoy A Sturdy And Long-Lasting Shower Storage Solution That Enhances The Functionality And Aesthetics Of Your Bathroom.
Replacing Or Upgrading The Shower Shelf
Upgrade and enhance your shower space by installing a new shelf on your already tiled wall. Create extra storage for your shower essentials with this easy and practical upgrade.
Installing a shower shelf on an already tiled wall can be a great way to maximize space and keep your shower essentials organized. However, if you’re looking to replace or upgrade your existing shower shelf, there are a few important things to consider.
In this section, we’ll discuss the process of removing the old shelf with caution, choosing a new shelf that fits the existing space, and following the installation steps for a new shelf. Let’s dive in!
Removing The Old Shelf With Caution:
- Carefully inspect the old shelf to identify any screws or brackets holding it in place.
- Use a screwdriver or similar tool to remove any screws or brackets without damaging the surrounding tiles.
- Gently loosen the old shelf by applying pressure, ensuring that it doesn’t cause any damage to the tiles or surrounding area.
- Slowly pry the old shelf away from the wall, taking your time to avoid any unforeseen damage.
- Clean the area where the old shelf was installed to remove any residue or adhesive left behind.
Choosing A New Shelf That Fits The Existing Space:
- Measure the dimensions of the space where the old shelf was installed to ensure a proper fit.
- Consider the weight capacity of the new shelf, especially if you plan on storing heavy items such as shampoo bottles or toiletries.
- Take into account the materials used for the new shelf, such as stainless steel or acrylic, ensuring they are suitable for a wet environment like a bathroom.
- Look for a new shelf that complements the existing tile or bathroom decor, allowing it to blend seamlessly with the surroundings.
- Consider the shelf design, whether you prefer a corner shelf, a floating shelf, or one with multiple tiers for added storage options.
Following The Installation Steps For A New Shelf:
- Begin by gathering all the necessary tools and materials, including a level, drill, screws, wall anchors, and a screwdriver.
- Use a level to mark the desired height and position for the new shelf on the wall.
- Double-check the levelness and accuracy of the markings before proceeding.
- If required, drill holes for the wall anchors, ensuring they are of appropriate size and depth.
- Carefully attach the new shelf to the wall using the provided screws or brackets, following the manufacturer’s instructions.
- Verify that the shelf is securely mounted and level, making any necessary adjustments as needed.
- Once installed, test the stability of the shelf by gently applying pressure and ensure it can withstand the weight of your shower essentials.
Remember, replacing or upgrading a shower shelf on an already tiled wall can be a straightforward process if done with caution and attention to detail. By taking the time to remove the old shelf properly, choosing a new shelf that fits the space, and following the installation steps, you can enjoy a functional and visually appealing addition to your bathroom.

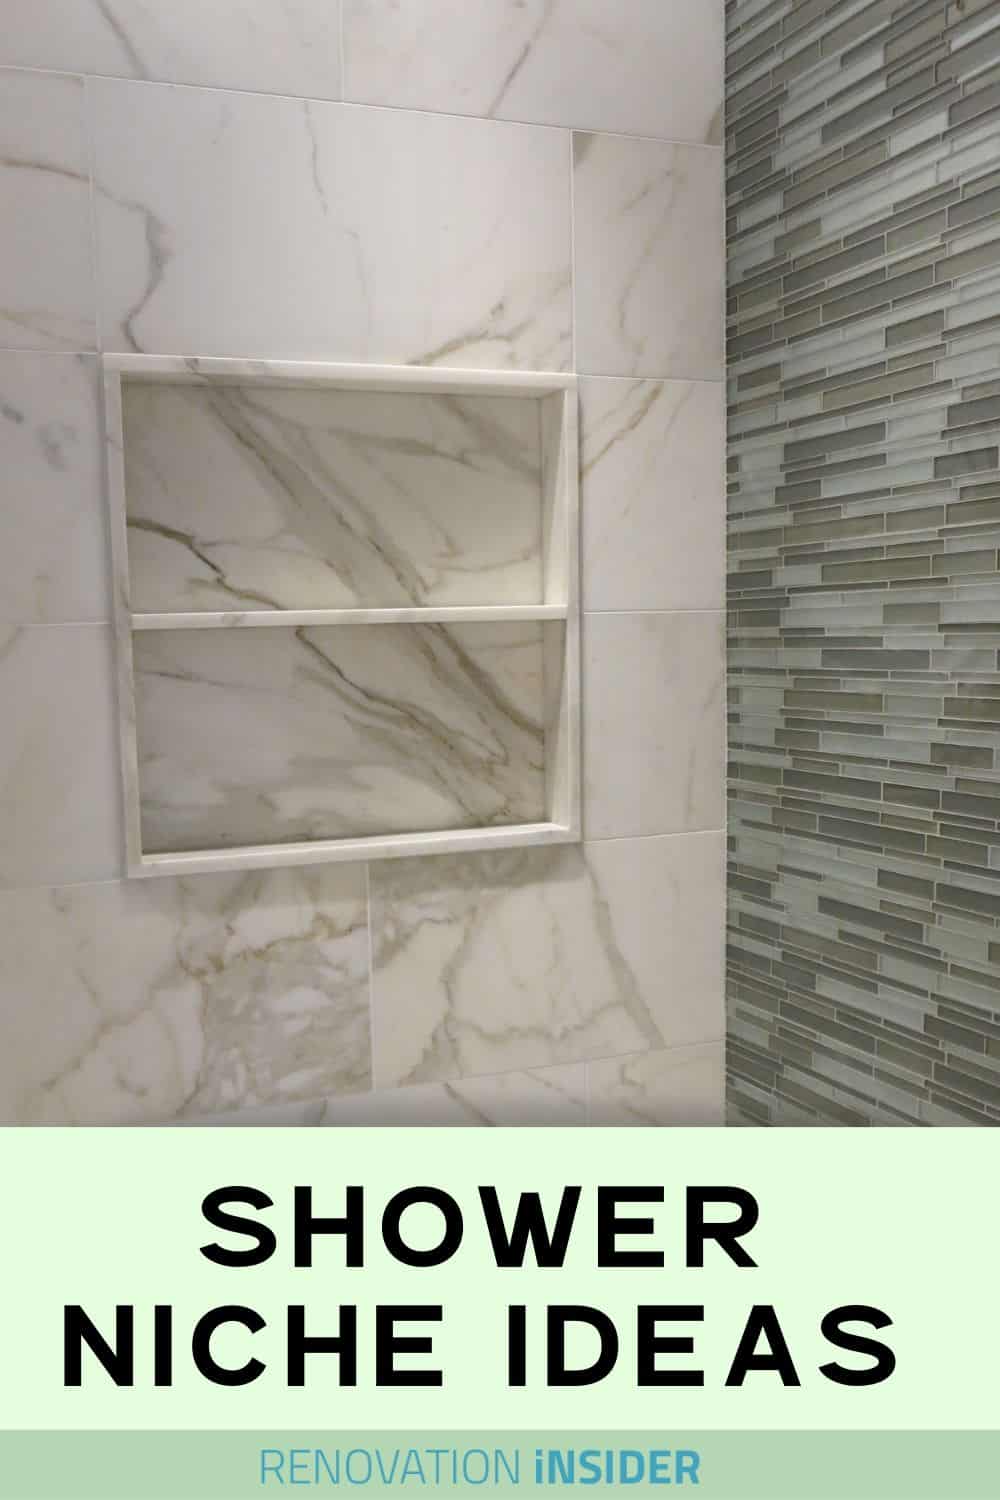
Credit: www.fourgenerationsoneroof.com
Frequently Asked Questions On Installing Shower Shelf On Already Tiled Wall
Can You Install Shower Niche After Tile?
Yes, you can install a shower niche after the tile is installed.
How Do You Glue Shelves To Tile Shower?
To glue shelves to a tile shower, follow these steps: 1. Clean the tile surface thoroughly. 2. Apply a strong adhesive specifically designed for tile. 3. Press the shelves firmly onto the adhesive. 4. Allow the adhesive to fully cure before placing any items on the shelves.
Where Do You Put Built In Shelves In A Shower?
Built-in shelves in a shower are commonly placed on the wall for easy access and convenience.
How Do You Attach A Marble Corner Shelf To A Shower?
To attach a marble corner shelf to a shower, follow these steps: 1. Clean the shower wall surface thoroughly. 2. Apply a strong adhesive specifically designed for marble surfaces. 3. Press the marble corner shelf firmly onto the adhesive. 4.
Let the adhesive dry completely before using the shelf.
Conclusion
Installing a shower shelf on an already tiled wall is a practical and stylish solution to keep your shower essentials organized and easily accessible. By following a few simple steps, you can achieve this upgrade without hassle. The first step is to gather the necessary tools and materials, including a level, drill, wall anchors, and the shower shelf itself.
Take precise measurements and mark the desired location on the wall before drilling the necessary holes. Secure the wall anchors and attach the shelf using the provided screws or adhesive. Finally, double-check the shelf’s stability and make any necessary adjustments.
By incorporating a shower shelf into your bathroom design, you not only enhance the functionality of your shower space but also add a touch of elegance and organization. Keep your shower essentials within reach and transform your bathroom into a clutter-free oasis.