Wood floors are not only a stunning addition to any home but also a durable and timeless investment. However, over time, they can succumb to wear and tear, leaving homeowners in a quandary. But fear not! In this comprehensive guide, we will delve into the art of wood floor repair, equipping you with the knowledge and skills to bring your floor back to its former glory.
From minor scratches to deep gouges, repairing a wood floor can seem like a daunting task. But with the right tools, materials, and techniques, you can tackle any imperfection head-on. We will explore the step-by-step process of assessing the damage, selecting the appropriate repair method, and executing it flawlessly. Whether you are a DIY enthusiast or a seasoned professional, this guide will provide you with valuable insights and practical advice to ensure your wood floor looks as good as new. So, roll up your sleeves, grab your tools, and let’s embark on this exciting journey of wood floor repair together!
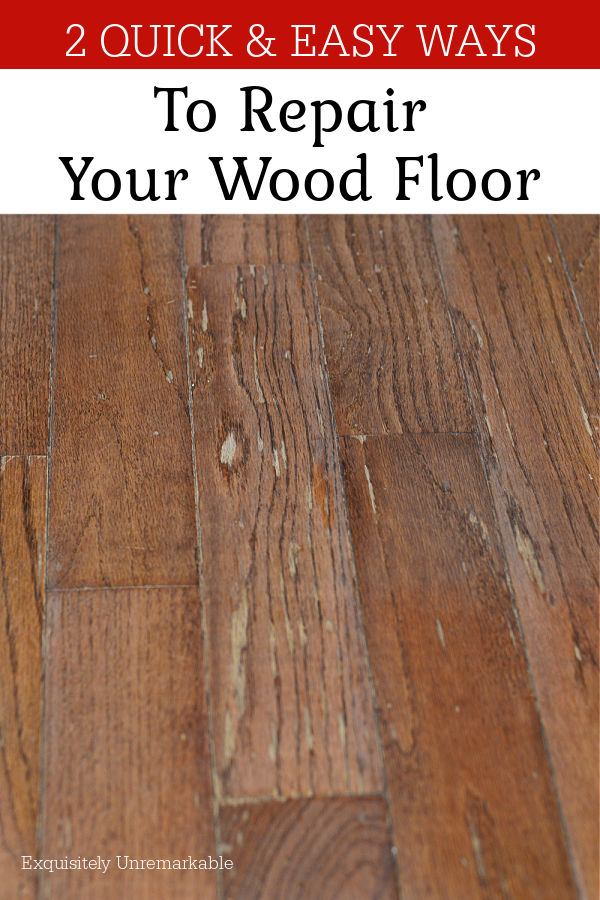
How to Repair a Wood Floor:
- Remove any furniture and rugs from the damaged area.
- Inspect the floor for loose, cracked, or damaged boards.
- Use a pry bar to carefully remove the damaged boards.
- Cut replacement boards to the appropriate size.
- Apply adhesive to the subfloor and insert the replacement boards.
- Secure the boards with nails or screws.
- Sand and refinish the repaired area to match the rest of the floor.
How to Repair a Wood Floor
Wood floors are a beautiful and timeless addition to any home. However, over time, they may experience wear and tear, resulting in scratches, dents, or even gaps between the planks. Fortunately, repairing a wood floor is not as daunting as it may seem. With the right tools and techniques, you can restore your wood floor’s beauty and ensure its longevity. In this article, we will guide you through the step-by-step process of repairing a wood floor.
Step 1: Assess the Damage
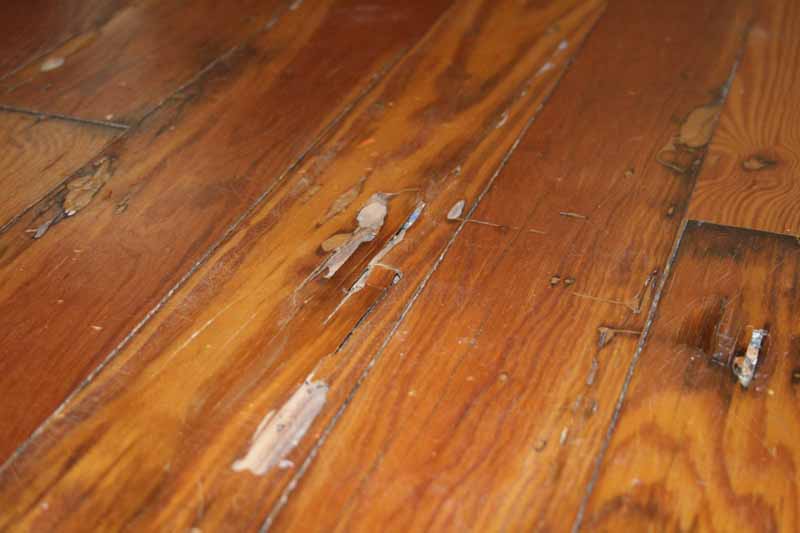
The first step in repairing a wood floor is to assess the extent of the damage. Inspect the entire floor carefully, looking for scratches, dents, or any other signs of wear. Take note of any loose or damaged boards that may need to be replaced. It’s essential to have a clear understanding of the issues before proceeding with the repair process.
If you notice scratches or minor surface damage, they can often be fixed by sanding and refinishing the affected area. However, deep scratches or gouges may require more extensive repairs, such as filling them with wood putty or replacing the damaged boards altogether.
Step 2: Prepare the Tools and Materials
Before you start repairing your wood floor, gather all the necessary tools and materials. You will need a putty knife, sandpaper, wood filler or putty, a hammer, nails, a pry bar, a circular saw (if replacing boards), a chisel, a vacuum cleaner, and a floor finish or sealer that matches your existing floor. Make sure you have everything readily available to avoid any interruptions during the repair process.
Additionally, ensure that you are wearing protective gear, such as safety goggles and gloves, to protect yourself from any potential hazards while working on the wood floor.
Step 3: Repair Scratches and Surface Damage
If you have minor scratches or surface damage on your wood floor, you can repair them by sanding and refinishing the affected area. Start by thoroughly cleaning the area with a vacuum cleaner to remove any dirt or debris. Then, use sandpaper to gently sand the damaged area, following the wood grain. Once the scratches are no longer visible, clean the area again to remove any sanding dust.
Next, apply a thin layer of floor finish or sealer to the repaired area, using a clean cloth or brush. Allow the finish to dry completely before walking on the repaired section of the floor. If needed, repeat the process until the repaired area blends seamlessly with the rest of the floor.
Step 4: Replace Damaged Boards
If you have boards that are beyond repair, you will need to replace them. Start by carefully removing the damaged boards using a pry bar and hammer. Be cautious not to damage the surrounding boards. Once the damaged boards are removed, measure and cut new boards to fit the vacant spaces. Use a circular saw or chisel to make precise cuts.
Before installing the new boards, ensure that the subfloor is clean and free from debris. Apply a thin layer of wood glue along the edges of the replacement boards, then carefully fit them into place. Use a hammer and nails to secure the boards, ensuring they are flush with the surrounding flooring. Once the glue has dried, lightly sand the repaired area and apply a matching floor finish or sealer.
Step 5: Regular Maintenance
After repairing your wood floor, it’s crucial to maintain its beauty and durability. Regularly clean the floor using a soft broom or vacuum cleaner to remove dust and dirt. Avoid using harsh chemicals or abrasive cleaners that can damage the finish. Additionally, place protective felt pads under furniture legs to prevent scratches and dents. If necessary, periodically apply a fresh coat of floor finish or sealer to keep your wood floor looking its best.
Step 6: Seek Professional Help
If you are unsure or uncomfortable with repairing your wood floor yourself, it’s always best to seek professional help. A professional flooring contractor can assess the damage and provide the most appropriate repair solution, ensuring the longevity and beauty of your wood floor.
Frequently Asked Questions
Here are some commonly asked questions about how to repair a wood floor:
Question 1: How can I fix a scratched or gouged wood floor?
To fix a scratched or gouged wood floor, start by cleaning the damaged area with a damp cloth and mild soap. Once the area is clean and dry, use a wood filler or putty that matches the color of your floor to fill in the scratch or gouge. Apply the filler or putty with a putty knife, smoothing it out so it is level with the surrounding floor. Let it dry completely. Once dry, lightly sand the filled area with fine-grit sandpaper until it is smooth. Finish by applying a matching wood stain and a protective finish to blend the repaired area with the rest of the floor.
If the scratch or gouge is deep or extensive, it may be necessary to replace the damaged section of the floor. In such cases, consult a professional for guidance on how to properly remove and replace the affected planks.
Question 2: How can I repair a warped wood floor?
To repair a warped wood floor, first identify the cause of the warping. It could be due to moisture or humidity issues, uneven subflooring, or other factors. Once you have addressed the underlying cause, you can proceed with the repair.
If the warping is minimal, you can try using a damp cloth and an iron set to low heat to steam the warped area. Gently apply the damp cloth over the warped section and run the iron over it in a back-and-forth motion. The steam will help to relax the wood fibers and allow the floor to return to its original shape. Be careful not to keep the iron in one spot for too long to avoid damaging the wood.
If the warping is severe or the above method does not work, it may be necessary to replace the affected planks. Consult a professional for guidance on how to properly remove and replace the warped planks.
Question 3: How do I fix squeaky wood floors?
To fix squeaky wood floors, you can try using a lubricant such as powdered graphite or talcum powder. Sprinkle the lubricant into the joints or gaps between the squeaky floorboards. Use a soft brush or cloth to work the lubricant into the gaps. This can help reduce friction between the boards and minimize the squeaking.
If the squeaking persists, you may need to secure the floorboards more firmly. One method is to use specialized screws designed for fixing squeaky floors. These screws can be driven through the subfloor and into the floor joists, pulling the floorboards tightly together and reducing movement. Another option is to use adhesive or construction glue to secure the floorboards to the subfloor. Be sure to follow the manufacturer’s instructions and use the appropriate adhesive for your specific flooring type.
Question 4: How can I remove stains from a wood floor?
To remove stains from a wood floor, start by identifying the type of stain. Different stains may require different removal methods. For water-based stains, you can try using a mixture of warm water and mild dish soap. Dampen a cloth with the solution and gently rub the stain in a circular motion. Rinse the area with clean water and dry it thoroughly.
For oil-based stains, you can try using a commercial wood floor cleaner or a solvent recommended by the manufacturer. Apply the cleaner or solvent to a cloth and gently rub the stain. Follow the instructions provided with the cleaner or solvent, as some may require rinsing or additional steps. Always test any cleaning solution on a small, inconspicuous area of the floor before applying it to the stain to ensure it does not cause any damage.
Question 5: How can I fix gaps between wood floorboards?
To fix gaps between wood floorboards, you can use wood filler or putty that matches the color of your floor. Apply the filler or putty to the gaps using a putty knife, ensuring it gets into the spaces completely. Smooth out the filler or putty so it is level with the floor surface. Allow it to dry according to the manufacturer’s instructions. Once dry, lightly sand the filled areas with fine-grit sandpaper to ensure a smooth finish. Finish by applying a protective finish over the entire floor to help prevent future gaps.
If the gaps are persistent or too wide to be filled with wood filler or putty, it may be necessary to consult a professional for further assessment. They can provide guidance on whether additional measures, such as resizing or replacing the floorboards, are needed.
Furthermore, don’t hesitate to seek professional help if you feel unsure or overwhelmed. A qualified flooring specialist can provide valuable advice and guidance, ensuring that your wood floor receives the best possible care. With the right techniques and a bit of effort, you can transform your damaged wood floor into a stunning focal point that enhances the overall aesthetic of your space. So go ahead, roll up your sleeves, and embark on this rewarding journey of wood floor repair. Your efforts will be well worth it when you see the final results and enjoy the longevity and beauty of your newly restored floor.