How to Record Gallery View in Zoom
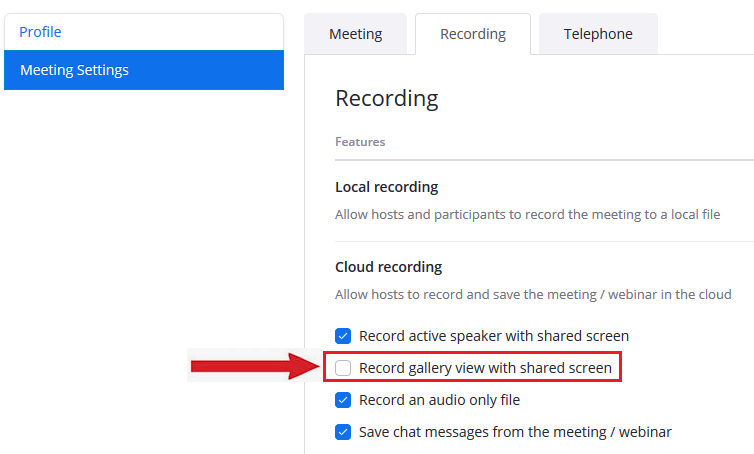
To record gallery view in Zoom, choose the option to “Record active speaker, gallery view, and shared screen separately,” allowing the gallery view to be displayed during screen sharing. However, viewers will need to select the gallery view option themselves.
This feature can be found in the recording settings of Zoom.
Credit: help.online.uts.edu.au
Recording Gallery View In Zoom
Are you looking to capture the gallery view during your Zoom meetings? Zoom’s gallery view can be a great way to record and preserve the interactions of multiple participants simultaneously. However, by default, Zoom records the active speaker view, which may not always capture the dynamics of a group discussion effectively. Here’s how you can record the gallery view in Zoom meetings and access the saved recordings effortlessly.
How To Record Gallery View Instead Of Active Speaker View
- Start a Zoom meeting and enter the Gallery View by clicking on the Gallery View option located in the top-right corner of your Zoom screen.
- Once in Gallery View, click on the Record button at the bottom of the screen. Ensure that you have the necessary permissions to record the meeting.
- Zoom will now start recording the view of all participants in the gallery layout. You can now continue with your meeting, knowing that the gallery view is being captured.
Saving And Accessing A Gallery View Recording
- Once the meeting is over, Zoom will save the recording locally or to the cloud, depending on your settings. You can access the recording from the Recordings tab in your Zoom account.
- From the Recordings tab, you can select the gallery view recording and download it to your device for future reference or sharing with others.
- When accessing the recording, ensure that you select the gallery view option from the available layout choices to playback the meeting in the desired format.
Credit: support.zoom.com
Optimizing Gallery View Recording
To optimize gallery view recording in Zoom, ensure all participants are visible and their orders remain consistent throughout the session. Selecting and saving the gallery view setting when scheduling helps maintain a seamless viewing experience. Incorporate late participants and access saved gallery views easily for a cohesive recording.
Choosing Between Gallery View And Speaker View
When recording a Zoom meeting, it is important to choose between gallery view and speaker view based on your specific needs. Gallery view allows you to see multiple participants at once, while speaker view focuses on the active speaker. Consider the following factors when making your decision:
- Number of participants: Gallery view is ideal for meetings with a large number of participants, as it allows everyone to be seen simultaneously.
- Engagement: Speaker view can be more engaging, especially if there is a main presenter or if you want to highlight one participant at a time.
- Screen sharing: If you need to share content during the meeting, gallery view allows participants to continue seeing everyone while viewing the shared screen.
Incorporating Late Participants Into The Gallery View
When participants join a Zoom meeting late, it is important to ensure they are incorporated into the gallery view recording. To achieve this:
- Remind attendees to enter the meeting with their cameras on, so they are visible on the gallery view.
- Allocate a few moments at the beginning of the meeting to allow latecomers to join and be included in the recording.
- If a participant joins after the recording has started, manually switch to gallery view and address the late participant by name to acknowledge their presence.
Cloud Recording In Gallery View
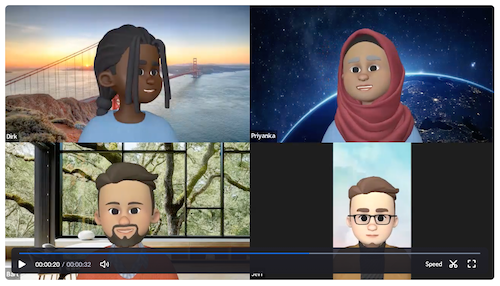
Record your Zoom meetings in all their multi-people glory with the Cloud Recording Gallery View feature. Easily capture participants in a grid formation to preserve the experience and engagement of your virtual gatherings. Get seamless access to your cloud recordings for future reference and sharing.
Logging Into Zoom For Cloud Recording
To record your Zoom meetings in gallery view, you first need to log into your Zoom account. Here’s how:
- Go to the Zoom website and click on the “Sign In” button.
- Enter your email and password, then click on “Sign In.” If you don’t have an account, you can sign up for free.
- Once logged in, you will be taken to your Zoom dashboard.
Settings For Cloud Recording And Accessing Recorded Videos
Before you start recording your meetings in gallery view, you need to ensure that your cloud recording settings are configured correctly. Here’s what you need to do:
- Click on the “Settings” tab in your Zoom dashboard.
- Scroll down to the “Recording” section and click on it.
- In the “Cloud recording” tab, make sure the toggle switch is turned on.
- You can also configure other settings such as recording audio, video, and annotations.
Once you have finished recording your meeting in gallery view, you can access the recorded video from your Zoom account. Here’s how:
- Go to your Zoom dashboard and click on the “Recordings” tab.
- You will see a list of all your recorded meetings. Click on the one you want to access.
- You can then play the video directly from the Zoom website or download it to your computer.
By following these steps, you can easily log into Zoom, configure your cloud recording settings, and access your recorded videos in gallery view. Happy recording!
Recording Gallery View In A Zoom Webinar
Recording a Zoom webinar in gallery view can be a valuable asset for capturing engaging discussions and multiple participants’ reactions. It allows hosts to track audience engagement and interactions effectively. In this post, we’ll explore configuring settings for recording in gallery view and tracking questions and engagement during the webinar.
Configuring Settings For Gallery View Recording
Before starting a Zoom webinar, organizers can configure their settings to ensure gallery view recording. By default, Zoom offers various recording options, including active speaker view and gallery view. To record in gallery view, follow these steps:
- 1. Log in to your Zoom account and navigate to Settings.
- 2. Under the Recording tab, select the preferred recording layout as ‘Gallery View’.
- 3. Save the settings to apply the changes.
This allows the host to capture the entire gallery view during the webinar, offering a comprehensive record of participant interactions.
Tracking Questions And Engagement During The Webinar
Zoom provides several features for tracking engagement and questions during a webinar. Hosts can leverage these tools to ensure a smooth flow of interactions and audience engagement:
- Utilize the chat feature: Encourage participants to ask questions or share insights using the chat feature. Hosts can monitor the chat to address queries and observe audience engagement.
- Utilize polling: Incorporate polls to gather instant feedback and engage participants in the webinar.
- Q&A management: The Q&A feature enables hosts to manage and prioritize questions efficiently, ensuring no engagement opportunities are overlooked.
By employing these strategies, hosts can record the webinar in gallery view and ensure active participation and engagement throughout.

Credit: m.youtube.com
Frequently Asked Questions On How To Record Gallery View In Zoom
Can You Record A Zoom Meeting In Gallery View?
Yes, you can record a Zoom meeting in gallery view by choosing “Record active speaker, gallery view and shared screen separately. ” This allows the gallery view to be displayed, but viewers may need to select the gallery view option themselves.
How Do I Record A Zoom Meeting With Pictures?
To record a Zoom meeting with pictures, follow these steps: 1. Click the “More” button in the control bar. 2. Choose “Record to the Cloud” (for iOS) or “Record” (for Android). 3. Access your screen recording to view pictures. 4. To include your face in the recording, choose “Record on this Computer” from the Zoom toolbar.
5. Your meeting with pictures will now be recorded.
How Do I Record A Zoom Presentation With My Face?
To record a Zoom presentation with your face, click on the “Record” button at the bottom toolbar and choose “Record on this Computer” from the menu. If you don’t see the Record button, click on the “More” button and select the “Record on this Computer” option.
How Do I Show My Camera In Zoom Recording?
To show your camera in Zoom recording, go to the bottom of your screen, select “Join Audio,” and then interact with the microphone settings.
Conclusion
Recording gallery view in Zoom opens up new possibilities for better collaboration and interaction. With the ability to capture all participants in a single frame, this feature enhances the overall meeting experience. By following the simple steps outlined in this guide, you can effortlessly record gallery view in Zoom and maximize the benefits of this functionality.
Elevate your video conferences and perpetuate engaging discussions with ease.