There are a few things to keep in mind when putting a bunk bed together. Make sure to follow the instructions that come with the bed, as there may be specific parts that need to be put together in a certain way. It’s also important to have all the necessary tools on hand before getting started.
Once everything is ready, it should only take a few minutes to assemble the bunk bed.
- Unpack all of the pieces for the bunk bed from the box and lay them out on the floor in the room where the bed will be assembled
- Find the two side rails and attach them to each other using the brackets provided
- Make sure that the side rails are flush with each other and that the brackets are tightened properly
- Next, find the headboard and footboard and attach them to the side rails using more brackets
- again, make sure everything is flush and tight before moving on
- Now it’s time to add support slats to both levels of the bunk bed – these will provide a surface for mattresses to rest on and will also help keep them in place
- Start by attaching one end of each slat to a side rail, then gently push or pull until they’re all evenly spaced out before securing at the other end
- 5 Finally, stand back and admire your handiwork! If everything looks good, you can now add mattresses (and sheets, pillows, etc) and enjoy your new bunk bed
How to Put a Wooden Bunk Bed Together
Putting together a wooden bunk bed can seem like a daunting task, but it’s actually quite simple! With a few basic tools and some patience, you’ll have your new bed put together in no time.
To start, you’ll need to gather all of the necessary tools and materials.
You’ll need a drill, screwdriver, hammer, saw (if you’re cutting your own lumber), and of course, all of the bunk bed parts. Once you have everything gathered, take a moment to lay out all of the parts in front of you so that you know what goes where. This will make the assembly process much easier.
Now it’s time to start putting things together! Begin by attaching the headboard and footboard to the side rails. Use screws or nails to secure them in place.
Next, add the slats for the mattress support. Again, use screws or nails to keep them securely in place. If you’re using futon bunk beds , now is the time to add the futon frame .
Finally, it’s time for the ladder . Attach one end of the ladder to either side rail near the top bunk . Make sure it is securely fastened before moving on.
That’s it – your new bunk bed is complete!
How to Assemble a Bunk Bed With Stairs
Bunk beds with stairs are a great option for any home with kids. They provide a safe and easy way for kids to get in and out of bed, and they can also be used as a storage space. Here is how you can easily assemble a bunk bed with stairs:
1. Start by placing the bottom bunk mattress on the floor. Then, take the headboard and place it at the top of the mattress. Make sure that the headboard is level with the mattress so that it doesn’t wobble when your child gets in or out of bed.
2. Next, take the side railings and attach them to the headboard and footboard using screws or bolts. These railings will keep your child from falling out of bed while they sleep.
3. Now it’s time to add the staircase.
First, find where you want the staircase to be located on the bunk bed frame. Once you have found the perfect spot, use screws or brackets to secure it in place.
4 Finally, add some finishing touches like blankets, pillows, and stuffed animals!
Your kid will love their new bunk bed with stairs – enjoy!
Twin Over Full Wooden Bunk Bed Assembly Instructions
Assuming you have all the required parts, tools and hardware, follow these instructions to assemble your twin over full wooden bunk bed.
1.Using a drill, screw in the lag bolts that will secure the footboard to the side rails. Make sure the holes for the bolts are facing up.
The size of the lag bolt should be 1/2″ x 4″.
2. Secure each side rail to a leg assembly using two screws at the bottom of each rail. The size of these screws should be 3/8″ x 4″.
3. Join the two side rails together using three screws at each connection point. The size of these screws should also be 3/8″ x 4″. Be sure that the holes for these screws are facing down so they will not be visible when looking at the headboard of the bed.
4. Affix ladder rungs to each side rail using wood glue and small nails or brads. It is important that these rungs are evenly spaced so that they can provide support when climbing up to the top bunk.
5 Once everything is secured, turn your bunk bed upside down so that you can access underside where slats will be attached .
Lay out slats on frame making sure they are even with one another and there is no more than 2 1/2 inches between any two slats (center to center). Screw in metal L-brackets every 6-8 inches along inside edge of frame using 1 1/4 inch flat head screws . This will help keep slats from moving around or falling out over time .
How to Put a Metal Bunk Bed Together
If you’re looking for an easy and efficient way to add extra sleeping space to your home, look no further than a metal bunk bed! These beds are incredibly sturdy and easy to assemble, making them ideal for kids’ rooms or guest bedrooms. Plus, they come in a variety of styles and colors to suit any décor.
Here’s how to put a metal bunk bed together:
Start by attaching the headboard and footboard to the side rails. Then, connect the side rails to the ladder rungs.
Once everything is firmly in place, add the mattress (or mattresses) of your choice. That’s it! Your new bunk bed is now ready for use.
Safety is always paramount when it comes to furniture, especially when children are involved. Make sure that all screws and bolts are tightened securely before allowing anyone to sleep on the bed. Also, be sure to choose a mattress that fits snugly on the frame so there’s no risk of falling out during the night.
With these tips in mind, enjoy sweet dreams on your new metal bunk bed!
How to Assemble a Bunk Bed With Ladder
A bunk bed with ladder can be a great addition to any child’s bedroom. It not only looks cool, but it’s also a great space saver. Assembling a bunk bed with ladder is actually quite easy and can be done in just a few simple steps.
Here’s how:
1. Start by attaching the headboard to the top bunk. Use screws or nails to secure it in place.
2. Next, attach the footboard to the bottom bunk in the same way.
3. Now it’s time to add the side rails. These will go on both sides of the bunks and will help keep your child from rolling out during sleep.
Again, use screws or nails to secure them in place.
4 . The next step is to add the mattress supports .
These will sit under each mattress and will provide extra support and stability for the entire bed . Simply screw them into place using wood screws .
5 .
Finally , it ’ s time to add the ladder . Position it wherever you want on one of the side rails , then use screws or nails to secure it in place . That ’ s it !
Credit: athoughtfulplaceblog.com
How Do You Put Together a Bunk Bed Frame?
Assuming you would like a step-by-step guide on how to put together a bunk bed frame:
1. Unpack all the pieces from the box and lay them out on the ground in the order that they will be assembled.
2.Using the L-brackets, screws and washers provided, attach one side rail to each end of both headboards.
Make sure that the brackets are flush against the inside edge of each board and screwed in tightly.
3. Affix the footboard to each side rail in the same manner, using your L-brackets, screws and washers.
4. Now it’s time to put your frame together!
Place your mattress support slats (at least 5) evenly across each set of side rails, making sure that they fit snugly into place without any gaps larger than 3 inches between slats. If you have a center support beam for extra stability, now is the time to install it according to manufacturer’s instructions (usually this just means attaching with L-brackets).
5. Finally, top off your frame by screwing in your cross supports – these usually go at either end of the frame where the headboard and footboard come together, but again, follow manufacturer’s instructions for exact placement.
All that’s left now is to add your mattresses and pillows and enjoy sweet dreams!
How Long Does It Take to Put Together a Bunk Bed?
Assuming you are talking about a typical bunk bed bought from a store:
It usually takes around 1-2 hours to put together a bunk bed. This assumes you have all the necessary tools and the instructions are clear.
If you need to buy additional tools or the instructions are not clear, it could take longer.
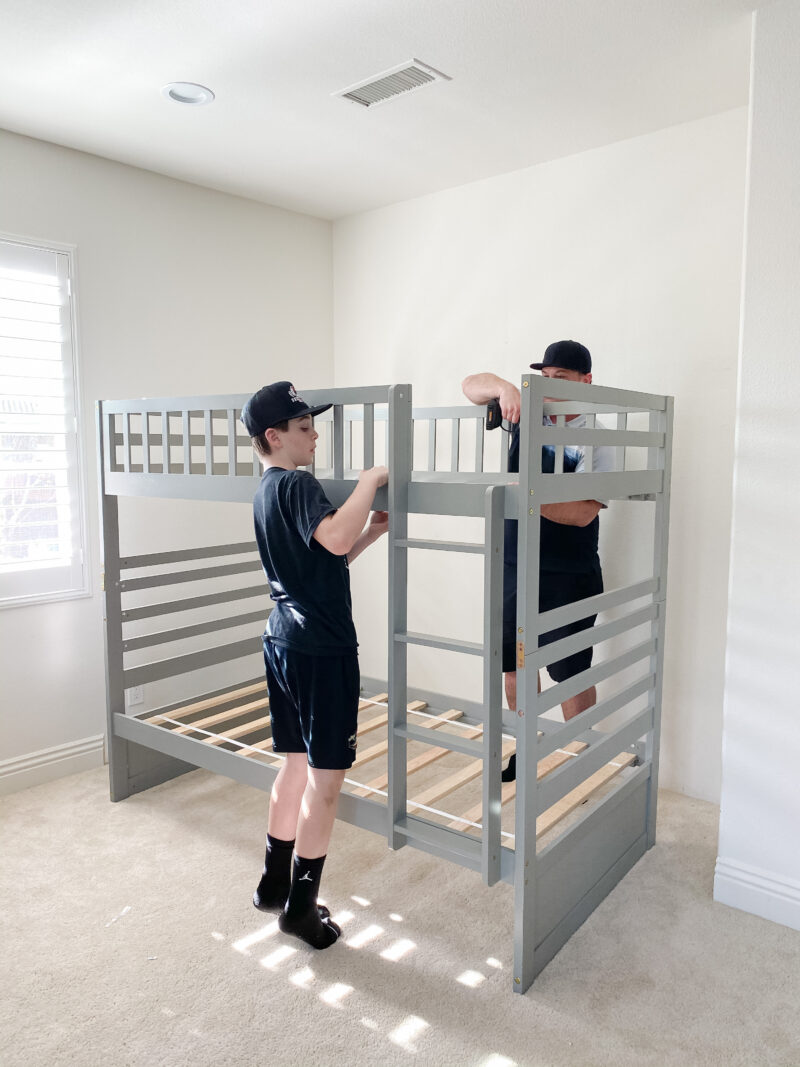
Can One Person Assemble a Bunk Bed?
It’s possible for one person to assemble a bunk bed, but it may be easier with two people. The main thing to keep in mind is that you’ll need to lift the upper bunk into place, so having an extra set of hands can be helpful. With that said, here are some tips for assembling a bunk bed on your own:
1. Read the instructions carefully before starting. This will help you get a sense of what needs to be done and how everything fits together.
2. Gather all the tools and materials you’ll need before beginning.
This way you won’t have to stop in the middle of assembly to go hunt for something.
3. Start by assembling the frame of the lower bunk first. Once that’s done, you can then lift it into place and secure it according to the instructions.
4. The next step is to assemble the upper bunk frame and then lift it onto the lower bunk frame. Again, follow the instructions for securing it in place.
How are Bunk Beds Held Together?
Bunk beds are held together using a variety of methods, depending on the type and style of bunk bed. The most common method is using metal brackets or screws that attach the frame of one bunk bed to the frame of the other. This creates a very sturdy connection that can support a lot of weight.
Other methods include using specialised joinery techniques such as dovetails or dowels, which create very strong connections without the need for metal fasteners. Whichever method is used, it is important to make sure that the bunk beds are securely held together to prevent them from collapsing.
FLEXA Classic Bunk Bed with Straight Ladder Assembly Instruction
Conclusion
In conclusion, it is not difficult to put a bunk bed together if you have the right tools and instructions. With a little patience and some help from a friend or family member, you can have your new bed set up in no time.