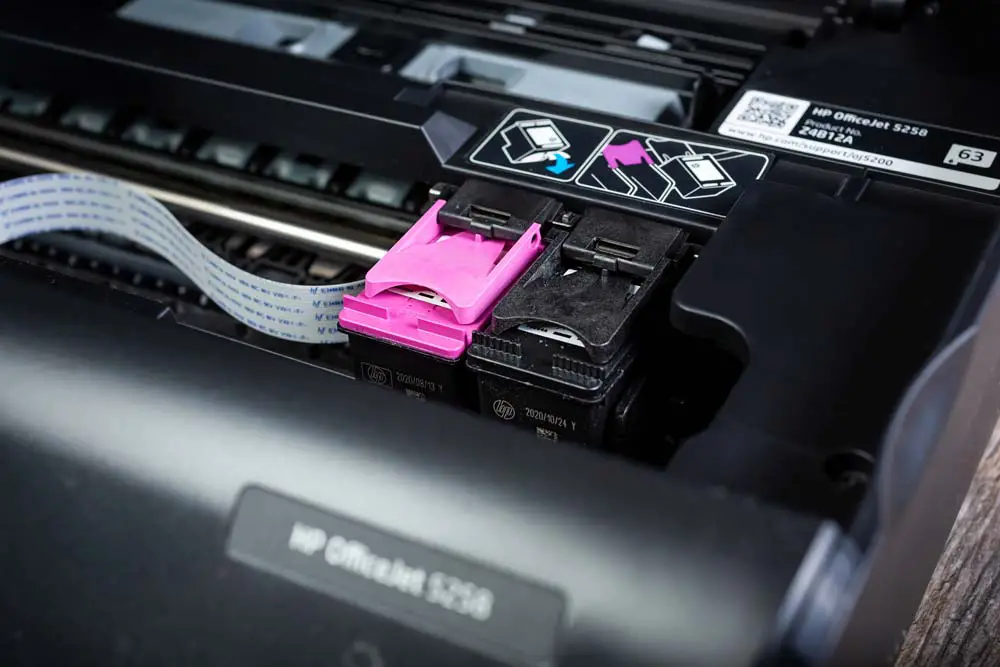
To manually move an ink cartridge in an HP printer, open the cartridge access door and gently pull and press down on the cartridge to release it. When faced with a stuck ink cartridge, ensure your printer is turned off and unplugged, shake the cartridge to redistribute ink, then reinsert it securely before turning the printer back on.
If the cartridge is not moving, reach inside through the access door and manually slide the carriage to the opposite side. HP printers often display a ‘Carriage Jam’ message when the carriage is blocked, prompting users to release and move the cartridge to resolve the issue effectively.
These simple steps can help address common cartridge movement problems in HP printers.
Causes Of A Stuck Ink Cartridge
When an ink cartridge gets stuck in your HP printer, it can be a frustrating experience. Addressing the root cause of the problem is essential to resolve it effectively. Several factors can lead to a stuck ink cartridge, including insufficient ink, mechanical issues, and paper jams.
Insufficient Ink
One of the common causes of a stuck ink cartridge is insufficient ink. When the ink level is low, the cartridge may not move smoothly within the printer, leading to a jam. Ensuring that the cartridge contains an adequate amount of ink can help prevent this issue.
Mechanical Issue
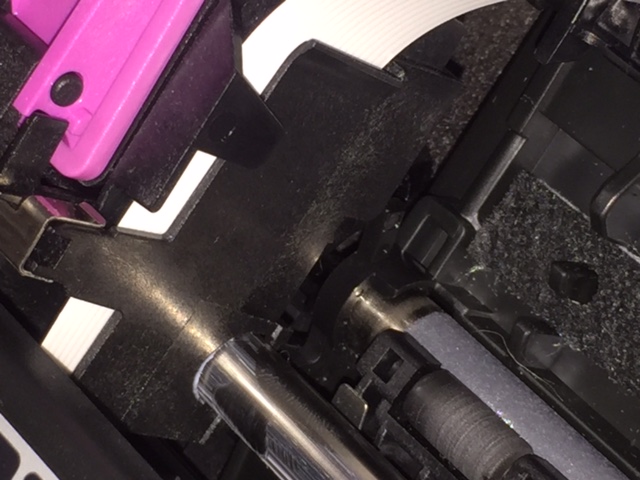
Mechanical issues within the printer can also cause the ink cartridge to get stuck. This could be due to misalignment or obstructions within the printer mechanism, hindering the smooth movement of the cartridge. Checking for any physical obstacles and ensuring proper alignment can help address this problem.
Paper Jam
Another potential cause of a stuck ink cartridge is a paper jam. If a piece of paper becomes lodged in the printer, it can impede the movement of the cartridge, leading to a jam. Clearing any paper jams and ensuring the printer’s paper path is clear can help prevent this issue.
Credit: printertesting.com
Methods To Manually Move Ink Cartridge
Maintaining your HP printer includes ensuring the proper movement of ink cartridges. In situations where the ink cartridge needs manual adjustment, there are several methods you can employ to correctly position it. Below are the steps you can take to manually move the ink cartridge in your HP printer.
Shaking The Ink Cartridge
- Turn off the printer and unplug it from the power source.
- Gently shake the ink cartridge to redistribute the ink inside.
Removing And Reinserting The Ink Cartridge
- Lower the output tray and open the cartridge access door.
- Wait for the printer to become idle and quiet.
- Press down on the cartridge you want to adjust, then gently pull it out and reinsert it securely.
- Plug the printer back in and turn it on.
Moving The Carriage Manually
To manually move the carriage in your HP printer, follow these steps:
| 1. Turn on the printer. |
| 2. Open the print cartridge access door and wait for the carriage to settle. |
| 3. Press lightly on the end of each print cartridge to release it. |
| 4. Carefully move the carriage to the desired position by hand. |
By following these simple methods, you can effectively adjust and position the ink cartridge in your HP printer for optimal printing performance.
Step-by-step Instructions
To manually move the ink cartridge in an HP printer, make sure the printer is turned on. Open the cartridge access door and wait for the print carriage to be idle and silent. Press down lightly on the end of the print cartridge to release it.
Then, manually move the carriage left or right based on its position, ensuring it can freely traverse the printer.
Turn Off The Printer And Unplug It
- Lower the output tray and open the cartridge access door.
- Wait until the printer is idle and quiet.
- Place your finger on the cartridge to be replaced and gently pull and press down on it to release.
Shake The Ink Cartridge Gently
- Gently shake the ink cartridge to redistribute the ink evenly.
Remove And Reinsert The Ink Cartridge
- Carefully remove the ink cartridge from the printer.
- Reinsert the ink cartridge, ensuring it is securely in place.
- Plug the printer back in and turn it on.
Manually moving the carriage:
- Ensure the printer is turned off.
- Open the print cartridge access door.
- Wait for the print carriage to be idle and silent.
- Press lightly on the end of each print cartridge to release it.
- Manually move the carriage by reaching inside the printer through the ink cartridge access door.
Credit: h30434.www3.hp.com
Credit: issuu.com
Frequently Asked Questions On How To Manually Move Ink Cartridge In Hp Printer
How Do You Manually Move An Ink Cartridge?
To manually move an ink cartridge in a printer, follow these steps: 1. Lower the output tray and open the cartridge access door. 2. Wait for the printer to be idle and quiet. 3. Place your finger on the cartridge you want to move and lightly pull and press it down to release it.
Remember to handle the cartridge with care.
How Do I Fix A Stuck Ink Cartridge In My Hp Printer?
To fix a stuck ink cartridge in your HP printer, follow these steps: 1. Lower the output tray and open the cartridge access door. 2. Wait for the printer to become idle and quiet. 3. Place your finger on the cartridge you want to replace and lightly pull and press down to release it.
4. If the cartridge is still not moving, turn off the printer and unplug it. 5. Shake the ink cartridge gently to redistribute the ink. 6. Carefully remove and reinsert the cartridge, ensuring it’s securely in place. 7. Plug the printer back in and turn it on.
(Source: HP Support)
What To Do If Ink Cartridge Is Not Moving?
If the ink cartridge is not moving, turn off the printer and unplug it. Gently shake the ink cartridge, then remove and reinsert it securely. Plug the printer back in and turn it on. If the cartridge is still stuck, reach inside through the cartridge access door and manually move the carriage to the opposite side.
How Do I Free The Cartridge Cradle On My Hp Printer?
To free the cartridge cradle on your HP printer, ensure it’s on. Open the cartridge access door and wait for the carriage to be idle. Lightly press down on each cartridge end to release.
Conclusion
Understanding how to manually move ink cartridges in an HP printer is crucial for resolving issues such as carriage jamming or cartridge blockages. By carefully following the steps outlined in this post, you can effectively troubleshoot and resolve common ink cartridge issues, ensuring the smooth functioning of your HP printer.