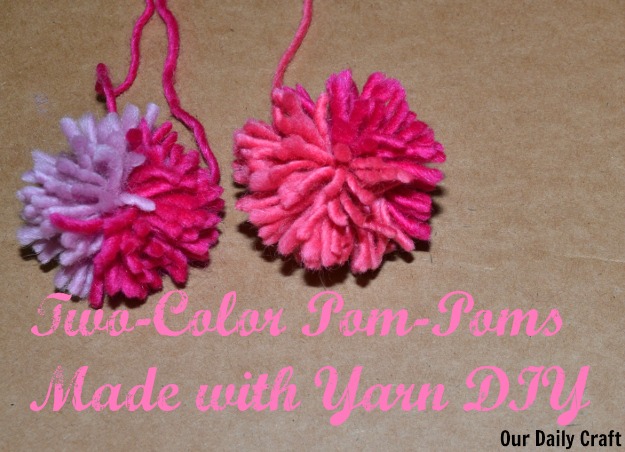
How to Make a Two Color Pom Pom

Pom poms are a fun and easy way to add some flair to any project. Making them is a quick process that only requires a few supplies. And, with just a little bit of practice, you can make perfect pom poms every time!
The key to making two-color pom poms is all in the winding. You’ll start by winding one color around your fingers, then adding the second color and winding it around both of the first color’s strands. This will create a nice spiral effect when you cut into the Pom Pom.
- Cut a piece of cardboard into a circle that is about 3 inches in diameter
- Wrap one color of yarn around the circumference of the cardboard circle approximately 30 times
- Carefully slide the yarn off of the cardboard and tie it in the center with another piece of yarn to secure it
- Repeat step 2 with a second color of yarn wrapped around the circumference in the opposite direction, so that the two colors are crossing in the middle
- Tie this second layer of yarn in the center as well to secure it
- Use sharp scissors to trim both layers of yarn evenly around the edge of the cardboard circle, being careful not to cut any of the knots that are securing each layer in place
- Fluff up both layers of yarn and give your pom pom a haircut so that it is nice and round!
4 Ways to Make Pom Poms
If you’re looking for a fun and easy craft project, pom poms are the way to go! Here are four different ways to make them:
1. Using a Fork
This is the most traditional method of making pom poms. Simply wrap your yarn around a fork, leaving a long tail at the beginning. Then, slide the yarn off of the fork and tie it in the middle.
Trim the ends to create your perfect pom pom!
2. Using Your Hands
If you don’t have a fork handy, you can also make pom poms using just your hands!
Start by wrapping the yarn around your fingers, again leaving a long tail at the beginning. Once you have enough wraps, tie off the center and trim the ends. Voila – another easy pom pom!
3. Using a Pom Pom Maker
There are also specialized tools called “pom pom makers” that can be used to create perfectly round and fluffy pom poms with ease! Simply follow the instructions that come with your particular brand of Pom Pom Maker.
Pompom Maker
Pompom makers are a great way to quickly and easily create beautiful pompoms for all sorts of projects! There are many different brands and styles of pompom makers available on the market, so it can be tricky to know which one is right for you. In this blog post, we’ll take a look at some of the key factors to consider when choosing a pompom maker, as well as provide some tips and tricks for using them.
By the end, you’ll be ready to choose the perfect pompom maker for your next project!
When choosing a pompom maker, one of the most important things to consider is the size of the finished product. Pompom makers come in a range of sizes, from small (2-3 cm) to large (8-10 cm).
If you’re not sure what size you need, it’s always best to err on the side of caution and go for a larger size. That way, you can trim down your pompoms if they’re too big, but if they’re too small you won’t be ableto use them at all!
Another thing to keep in mind is how easy the pompom maker is to use.
Some brands require you to wrap yarn around each individual prong before closing up the device, while others have pre-wound coils that make things much simpler. If you’re new to using pompom makers, it might be worth opting for a simpler design until you get used to the process.
Finally, think about what material your pompom maker is made from.
Plastic models are usually cheaper than metal ones, but they can be more difficult to use since they don’t grip onto yarn as well.
Pompoms
Pompoms are a fun and easy way to add some flair to your knitting or crocheting projects! They can be used to decorate hats, scarves, sweaters, or anything else you can think of. You can even make them in different colors and sizes to create unique effects.
pompoms are relatively easy to make, and only require a few supplies: yarn, scissors, and a Pom-pom maker (optional).
If you’ve never made a pompom before, don’t worry – it’s really not that difficult. The first thing you’ll need to do is gather your supplies.
For this project, you’ll need some yarn (any color or type will do), a pair of scissors, and optionally, a Pom-pom maker. If you don’t have a Pom-pom maker, don’t worry – you can still make pompoms without one. It will just take a little bit more time and effort.
Once you have your supplies gathered together, the next step is to start wrapping the yarn around one of the arms of the Pom-pom maker (or your fingers if you’re not using one). Wrap the yarn around until it’s nice and tight – but not so tight that it’s difficult to remove later on. Once you’ve wrapped the yarn around enough times, cut off the end of the skein with your scissors.
Now it’s time to start closing up your pompom! This part can be a little tricky if you’re not used to it, but just keep at it and you’ll get the hang of it eventually. Take one side of the pom-pom maker (or your fingers) and slide it out from under all of the loops of yarn.
Now take those same loops of yarn and tie them together in a knot as tightly as possible – this will ensure that your pompom holds its shape once it’s finished. Once you’ve tied everything together securely, snip off any excess yarn that’s sticking out.
The last step is optional – but if you want your pompoms to be extra fluffy, give them each a haircut!
Trim away any stray pieces of yarn until they’re all roughly even in length. And that’s it – congratulations on making your very first pompom!
How to Make Pom Poms
Pom poms are a fun and easy way to add some flair to any project. Whether you’re adding them to a hat, scarf, or blanket, they’re sure to bring a smile to your face. Here’s how to make your own pom poms:
1. Start by wrapping yarn around your fingers. The more wraps you do, the fuller your pom pom will be. Once you have enough wraps, slide the yarn off of your fingers and tie it in the center with another piece of yarn.
2. Cut the loops on either side of the center knot. Be careful not to cut the center knot itself!
3. Fluff out your pom pom and trim any stray pieces of yarn.
Ta-da!
Clover Pom Pom Maker
Assuming you would like a blog post about the Clover Pom Pom Maker:
If you’re looking for an easy and fun way to make pom poms, then you need the Clover Pom Pom Maker! This nifty little tool makes it quick and easy to create perfect pom poms every time.
Simply wrap your yarn around the maker, cut the ends, and fluff up your new pom pom!
The Clover Pom Pom Maker comes in four different sizes, so you can make small or large pom poms as needed. It’s also super lightweight and portable, so you can take it with you wherever you go.
So whether you’re a beginner crafter or a seasoned pro, the Clover Pom Pom Maker is a must-have tool for anyone who loves making pompoms!
Pom Pom Template
If you’re looking for a fun and easy way to make pom poms, then you need a pom pom template! With just a few simple supplies, you can make perfect pom poms every time. Here’s what you’ll need:
-Pom pom template (you can find these online or in craft stores)
-Scissors
-Yarn
-Tape
To start, print out or trace your pom pom template onto cardstock. Cut out the template, then use it to cut two identical pieces from your yarn.
Tape the pieces of yarn together at the top, then begin wrapping the yarn around the bottom portion of the template. Continue wrapping until you’ve reached the top again, then tape the yarn in place.
Now comes the fun part – cut along the outside edge of your template (be careful not to cut through the taped portion!).
Once you’ve cut all around, fluff out your pom pom and trim any uneven edges. That’s it – you’ve now made a perfect little pom pom!
Credit: www.ourdailycraft.com
How Do You Make a Pom Pom With a 2 Color Pom Pom Maker?
When it comes to making pom poms, there are a few different ways that you can go about it. One popular method is to use a pom pom maker. These devices come in all sorts of different sizes, but for this particular project, we’ll be using a 2 color pom pom maker.
To get started, you’ll need to select two colors of yarn that you want to use for your Pom Pom. Once you have your yarn colors selected, cut each one into lengths of approximately 18 inches. Take one color of yarn and thread it through one side of the pom pom maker.
Continue wrapping the yarn around the exterior of the device until you’ve used up all 18 inches. Repeat this process with the second color of yarn on the other side of the pom pom maker.
Once both colors of yarn are wrapped around the device, use a pair of scissors to trim both pieces evenly.
Next, take hold of both ends of the device and slide it open so that all of the loops are released. Now gently tie a piece of scrap yarn around the center point where all of the loops come together. This will help keep everything in place while you finish up your Pom Pom.
Now comes the fun part! Gently fluff out each looped section until your Pom Pom starts to take shape. Once you’re happy with how it looks, give it a final trimming if necessary and then remove it from the Pom Pom maker.
You can now attach your newly made 2 color Pom Pom to just about anything!
How Do You Make a Multicolored Pom Pom With Cardboard?
If you want to make a multicolored pom pom with cardboard, you will need to cut out a circular piece of cardboard. Then, you will need to wrap yarn around the circumference of the circle. To change colors, simply tie the new color of yarn onto the old color.
Once you have wrapped the yarn around the cardboard circle enough times, cut off the excess and tie it in a knot. Finally, fluff out your pom pom and trim any uneven pieces.
How Do You Make Multi Colored Tulle Pom Poms?
Tulle pom poms are a fun and festive decoration for any event. They can be made in any color or combination of colors, making them versatile and easy to coordinate with your event’s theme. To make multi colored tulle pom poms, start by cutting strips of tulle in the desired colors.
Then, tie the strips together at one end and begin wrapping them around a piece of cardboard or dowel rod. Once all the strips are wrapped tightly, remove the cardboard and tie another knot at the top to secure the strips in place. Finally, fluff out the tulle to create a full and fluffy pom pom.
How Do You Make a Patterned Pom Pom?
If you’ve ever wanted to add a little extra flair to your knitting or crocheting, learning how to make a patterned pom pom is a great way to do it! Pom poms are easy and fun to make, and they can really dress up any project. Here’s a step-by-step guide to making your own patterned poms.
Start by winding yarn around one of your fingers until you have a nice, thick coil. The more wraps you make, the fuller your pom will be. Once you’re happy with the thickness of your coil, cut the yarn at the end and slide the coil off of your finger.
Next, take another piece of yarn and tie it tightly around the center of your coil. This will be what you use to attach your pom to whatever project you’re working on later, so make sure it’s long enough that there’s plenty of excess at either end. Tie the knot as tight as you can; this will help keep your pom together once it’s finished.
Now comes the fun part: start trimming away the ends of your coil until you have a cute little ball shape. You can make your poms as fluffy or as neat as you like – it’s all up to personal preference! Once you’re happy with how your pom looks, give it a final trim and then fluff it out so that all the pieces are evenly distributed.
And that’s all there is to making a basic pom! If you want something a little more interesting, though, try adding stripes or other patterns using different colors of yarn. Just wind two (or more) colors around your finger together before cutting and tying them off – easy peasy!
Conclusion
To make a two color pom pom, you will need:
-2 colors of yarn
-Scissors
-A fork
First, start by wrapping one color of yarn around your fingers 50 times. Then, slide the yarn off your fingers and tie it in the middle with a piece of the same color yarn.
Cut the loops on either side of the knot.
Next, repeat this process with the other color of yarn. Once both colors are wrapped around your fingers and tied in the middle, put the two knots together and tie them tightly with a third piece of yarn.
Trim any loose ends.
Now you have a two color pom pom!