To make a dresser taller, remove the legs and replace them with taller ones. This simple modification allows you to increase the height of your dresser easily and efficiently.
If you find that your current dresser is too short for your needs, this solution gives you the flexibility to customize it to your preferred height. By following these steps, you can transform your dresser into a taller piece of furniture that better suits your storage and aesthetic requirements.
With a few adjustments, you can create a functional and stylish dresser that complements your space perfectly.
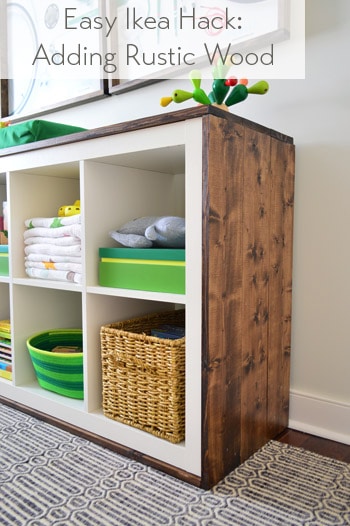
Credit: www.younghouselove.com
1. Add Legs To Your Dresser
Does your dresser feel a bit too short for your liking? Don’t worry, there’s a simple and stylish solution – add legs to your dresser! By elevating your dresser, you not only create additional storage space but also give it a brand-new look. In this article, we’ll explore two different methods for adding legs to your dresser: screw-on furniture legs and DIY wooden legs.
1.1 Screw-on Furniture Legs
If you’re not particularly handy with tools, don’t fret! Adding screw-on furniture legs to your dresser is a straightforward option that requires minimal effort. Follow these steps:
- First, ensure that your dresser is stable and well-supported before attempting to add legs. If necessary, reinforce any weak spots or repair any damage.
- Measure the height you want to add to your dresser. Keep in mind that standard furniture legs are typically around 4 to 6 inches in length.
- Choose screw-on furniture legs that match the style of your dresser. Whether you prefer sleek, modern legs or something more ornate, there are various options available to suit your taste.
- Place your dresser on its back or sides, making it easier to access the bottom.
- Using a drill, create pilot holes in the corners of the dresser where you plan to attach the legs. This will prevent the wood from splitting when you screw in the legs.
- Once the pilot holes are ready, attach the legs to the dresser using the provided screws. Make sure they’re securely fastened.
- Carefully flip the dresser back upright, and voila! Your new taller dresser is ready to use.
1.2 Diy Wooden Legs
If you’re feeling a bit more adventurous and want to add a personal touch, why not try making your own wooden legs for your dresser? It’s a fun and rewarding project that allows you to customize the height, shape, and finish of the legs. Here’s what you need to do:
- Measure the desired height for your dresser legs, keeping in mind that wooden legs can be customized to fit your preferences.
- Choose a type of wood that matches your dresser’s aesthetic and durability requirements. Popular choices include oak, pine, and maple.
- Using a saw, cut the wood into leg-shaped pieces according to your measurements. Sand the legs to smooth any rough edges.
- If you want to add a decorative touch, you can carve or shape the legs to create a unique design. Let your creativity soar!
- Apply a wood finish or paint to protect the legs and match your dresser’s style. Ensure the finish has dried completely before moving on.
- Once the legs are ready, flip your dresser onto its back or sides and mark the positions where you’ll attach the legs.
- Using a drill and screws, secure the wooden legs to your dresser, making sure they’re firmly attached.
- Carefully set your dresser upright again, and there you have it – a taller dresser with your very own customized wooden legs!
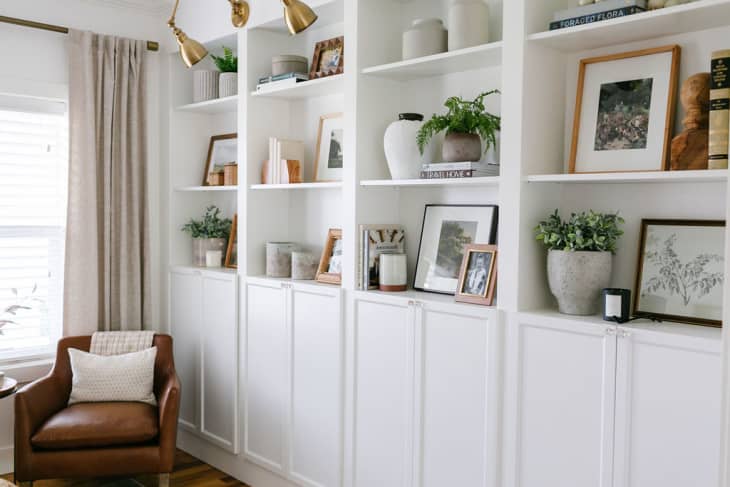
Credit: www.apartmenttherapy.com
2. Use Furniture Risers
When it comes to finding simple yet effective solutions to make a dresser taller, furniture risers can be a game-changer. Furniture risers are affordable and easy to use, providing an instant lift to your dresser. They come in various materials and styles, allowing you to choose the option that best fits your needs and preferences. In this section, we will explore two popular types of furniture risers: plastic risers and bed risers.
2.1 Plastic Risers
Plastic risers are a budget-friendly option that can easily be found at your local home improvement store or online. These risers are typically made of durable polypropylene plastic, designed to support the weight of your dresser while adding height.
Using plastic risers to make your dresser taller is as simple as placing them under each leg of the furniture. Whether you have a four-legged or six-legged dresser, make sure to use an equal number of risers for stability. Additionally, ensure that the risers are aligned properly under each leg, creating an even and balanced lift.
Plastic risers come in different heights, so you can choose the desired amount of additional height based on your needs. Remember, it’s essential to select risers that can adequately support the weight of your dresser and its contents. Check the weight limits specified by the manufacturer before making a purchase.
2.2 Bed Risers
If you’re looking for a sturdier and more versatile option, bed risers might be the ideal choice for making your dresser taller. These risers are commonly used to elevate beds but can also be used to raise dressers, tables, or other furniture pieces.
Bed risers are typically made of heavy-duty plastic or metal and are designed to handle larger and heavier furniture items. They often have a wider base to provide increased stability and support. These risers come in various heights, allowing you to customize the elevation of your dresser to your liking.
Similar to plastic risers, using bed risers is a straightforward process. Place the riser under each leg of the dresser, ensuring they are aligned correctly and evenly distributed. For dressers with more than four legs, make sure to use an equal number of risers for balance.
Bed risers are not only functional but can also add a stylish touch to your dresser. Some models feature decorative elements such as intricate designs or a polished finish. Choose a style that complements your existing furniture and enhances the overall aesthetic of your room.
3. Repurpose Other Furniture Pieces
Another option for making your dresser taller is to repurpose other furniture pieces. This allows you to get creative and customize your dresser to fit your specific needs.
3.1 Bookshelf Topper
If you have an unused bookshelf lying around, consider repurposing it as a topper for your dresser. This is a simple and cost-effective way to add height while also providing extra storage space.
To create a bookshelf topper for your dresser, follow these steps:
- Clean and prepare the bookshelf for repurposing.
- Measure the dimensions of your dresser to ensure a proper fit.
- Secure the bookshelf on top of the dresser using screws or brackets.
- Paint or stain the bookshelf to match the dresser for a cohesive look.
- Organize and display your belongings on the additional shelf space.
This repurposing idea not only adds height to your dresser but also gives you the opportunity to showcase your favorite books, decorations, or even clothing items.
3.2 Chest Of Drawers
If you have an old chest of drawers that you no longer use, consider repurposing it as an additional section on top of your dresser. This method allows you to merge the two furniture pieces into a single, taller unit.
Follow these steps to repurpose a chest of drawers as an extension for your dresser:
- Measure the dimensions of your dresser and chest of drawers to ensure compatibility.
- Remove the drawers from the chest.
- Secure the chest of drawers on top of the dresser using screws or brackets.
- Paint or stain both pieces to match for a seamless appearance.
- Reorganize your items in the additional storage space provided by the chest of drawers.
This repurposing idea not only adds height to your dresser but also gives you the opportunity to repurpose an old piece of furniture that might otherwise go to waste.
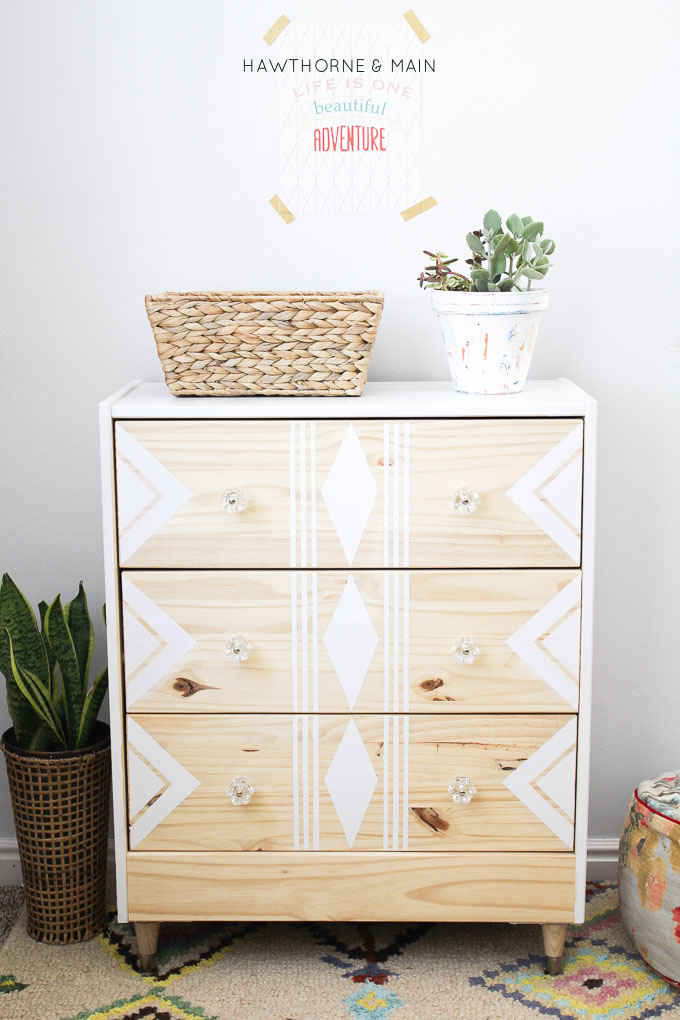
Credit: www.hawthorneandmain.com
4. Build A Custom Riser Platform
If you find yourself in need of a taller dresser but don’t want to go through the hassle of finding a new one, building a custom riser platform is a great solution. This simple DIY project allows you to add height to your dresser while maintaining its functionality and style. With just a few tools and materials, you can create a custom riser platform that perfectly fits your dresser and elevates its look. Here’s how to do it:
4.1 Measure And Cut The Plywood
The first step in building a custom riser platform is to measure and cut the plywood to the desired size. Start by measuring the dimensions of the top surface of your dresser. Use a tape measure to determine the length and width, and write down these measurements. Next, transfer these measurements to the plywood and mark them using a pencil. Carefully cut the plywood along the marked lines using a circular saw or a jigsaw, ensuring that the edges are smooth and straight.
4.2 Add Supports For Stability
To ensure stability and prevent wobbling, it’s important to add supports to your custom riser platform. Start by measuring and cutting four pieces of 2×4 lumber to the desired height of the riser. These pieces will serve as the legs of the platform. Attach these legs to the corners of the plywood using screws or a strong adhesive, making sure they are securely fastened. Additionally, you can reinforce the stability of the riser by adding cross supports between the legs. Measure and cut two pieces of 2×4 lumber to fit between the legs and attach them using screws or wood glue.
4.3 Attach The Platform To The Dresser
Now that you have built the custom riser platform, it’s time to attach it to your dresser. Place the platform on top of the dresser, ensuring that it is centered and aligned with the edges. Secure the platform to the dresser by screwing through the legs into the top of the dresser. Make sure to use screws that are long enough to penetrate through the plywood and into the dresser securely. Once the platform is securely attached, double-check its stability by applying gentle pressure from different angles.
Building a custom riser platform is a simple and cost-effective way to make your dresser taller without sacrificing its functionality. By following these steps, you can create a custom riser that perfectly fits your dresser and enhances its overall appearance. So why settle for a shorter dresser when you can easily make it taller with a DIY riser platform?
5. Paint Or Add Decorative Details
Adding a fresh coat of paint or decorative details to your dresser is a great way to transform its appearance and make it taller. This step allows you to unleash your creativity and give your dresser a unique touch that matches your personal style.
5.1 Choose A Paint Color Or Finish
Choosing the right paint color or finish is crucial to the overall look of your taller dresser. Consider the existing color scheme in your room and select a shade that complements it. Alternatively, you can go for a bold and contrasting color to make the dresser stand out as a statement piece.
Pro tip: Lighter paint colors tend to make a dresser seem taller, while darker hues can create a more dramatic effect.
5.2 Add Stencils Or Decals
If you want to add a touch of elegance or playfulness to your dresser, stencils or decals can do the trick. These decorative elements come in various designs and patterns, allowing you to customize the look of your dresser effortlessly.
Pro tip: Choose stencils or decals that match the theme of your room, whether it’s floral, geometric, or something else entirely. Ensure to measure and align as per your personal preference before applying.
5.3 Install New Hardware
Updating the hardware of your dresser can instantly elevate its appearance and make it look taller. Swap out the existing handles or knobs with new ones that are taller or have a bold design to draw attention upwards.
Pro tip: Consider using hardware in a metallic finish, such as brass or chrome, for a luxurious touch that adds visual interest to your taller dresser.
Frequently Asked Questions Of How To Make A Dresser Taller
Can A Dresser Be Made Taller?
Yes, a dresser can be made taller by using extension legs or adding a top cabinet for extra storage space. Both options can easily transform a standard dresser into a taller piece of furniture to better suit your needs.
What Materials Do I Need To Make A Dresser Taller?
To make a dresser taller, you’ll need extension legs, measuring tape, screws, a drill, and a screwdriver. The extension legs can be purchased from a hardware store or online, and they should be the right height to achieve the desired added height for your dresser.
How Do I Install Extension Legs On A Dresser?
First, remove the existing legs of the dresser. Then, measure the desired added height and attach the extension legs using screws and a drill. Make sure to secure the legs tightly to ensure stability. Finally, place the dresser back in its desired location, and it will be taller and ready to use.
Conclusion
To sum up, transforming a dresser into a taller piece can be a simple and rewarding DIY project. By following these steps and considering your personal style, you can create a stylish and functional dresser that fits perfectly into your space.
Remember to measure carefully, choose the right materials, and take your time during the process. With a little effort, you can elevate your dresser and make it a standout piece in your home. So go ahead and give your dresser the height it deserves!


