Most newer model aluminum boats come with pre-drilled holes for installing cleats. If your boat does not have pre-drilled holes, or you are adding additional cleats, you will need to drill the holes yourself. When drilling into aluminum, it is important to use a sharp drill bit and go slowly to avoid damaging the material.
In this article, we will show you how to properly install cleats on an aluminum boat.
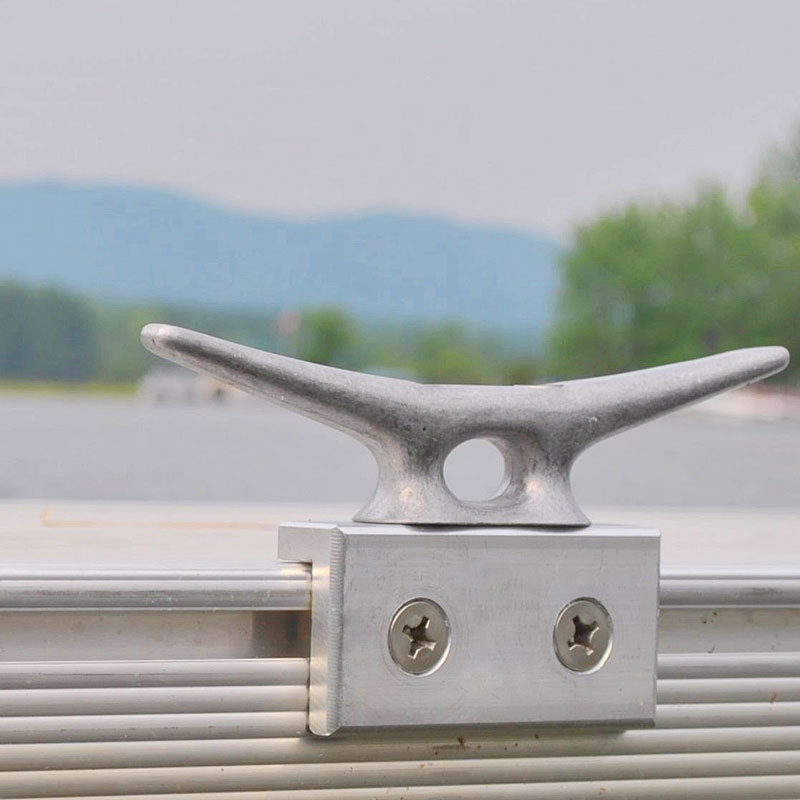
Fast & Easy Method to Add Boat Cleats to Jon Boat ????
- It is recommended that you use marine-grade stainless steel hardware when installing cleats on an aluminum boat
- Drill pilot holes in the aluminum boat hull using a drill bit that is slightly smaller than the diameter of the bolts you will be using to secure the cleat
- Place the cleat against the hull where you want to install it and mark the bolt holes with a pencil or marker
- Remove the cleat and drill through the marks you made in step 2 using a drill bit that is slightly larger than the diameter of your bolts
- Place the cleat back against the hull and insert bolts through the holes you just drilled
- Secure them in place with washers and nuts, making sure not to overtighten as this could strip the threads or damage your hull material
Attwood Neat Cleat Install
If you’ve ever been out on a boat, you know that one of the most important things is to keep everything tidy and in its place. That’s where Attwood Neat Cleats come in – they’re designed to provide a clean, flush-mount installation that will give your deck or gunwale a sleek look. Plus, they’re easy to install so you can get back to enjoying your time on the water.
Here’s what you need to know about installing Attwood Neat Cleats:
1. Choose the location for your cleat carefully. You’ll want to avoid any places where there might be potential for chafing or wear and tear.
2. Once you’ve selected the perfect spot, use a drill to create pilot holes for the screws.
3. Next, insert the screws into the pilot holes and tighten until they’re snug. Be careful not to overtighten as this could strip the threads or break the screws.
4. And that’s it!
Where to Mount Boat Cleats
Most boaters know where to mount boat cleats, but there are a few things to keep in mind when doing so. The following is a quick guide on where to mount boat cleats for the best results:
The first thing to consider is the size of your boat.
Smaller boats will need fewer cleats than larger boats. The number of people who regularly use your boat should also be taken into account. More people means more gear, and more gear means more weight and more strain on the cleats.
The next thing to think about is what you’ll be using the cleats for. If you’re mainly tying up to docks, then you’ll want at least two cleats near the stern of the boat (one on each side). If you do a lot of anchoring, then you may want an additional cleat or two near the bow of the boat.
And if you fish from your boat, then you may want yet anothercleat near the back of the boat so that you can easily tie off your fishing line.
Once you’ve decided how many and where to place them, it’s time to start drilling holes! When choosing whereto drill, keep in mind that most dock lines are around 3/8″ in diameter; therefore, 1/2″ diameter holes should be used for mounting Cleat bolts .
It’s also important not pre-drill allofyourholes because this could weakenthestructuralintegrityoftheboat itself by creating potential stress points along its length . So only predrill as many as halfof those requiredand finishdrillingthe rest afterthecleatshavebeen mounted .
Butbeforeyoucanmountanything , it’s importanttogiveeachboltacouplecoatsof marine-gradeepoxyto helppreventcorrosionand ensurea long lifespanfor your newcleats!
Now that we’ve gone over some basics, let’s get down to specifics: where should each type of cleat be mounted? For starters, spring lines should always be led through midship fairleads and then aft to either bitts or Stern Cleats . This will help prevent damage caused by rubbing against gunwales or other objects while docking.
When mooring , fore-and-aft spring lines should led through chocks placed amidships before going asternto either bollards or stern Cleats .
Bow Cleat for Anchoring
A bow cleat is an essential part of any boater’s anchoring system. This type of cleat is installed at the bow (front) of the boat, and is used to secure the anchor line. Bow cleats are typically made from stainless steel or aluminum, and are designed to withstand the elements and heavy use.
When choosing a bow cleat for your boat, it is important to select one that is durable and corrosion-resistant. Additionally, you will want to consider the size and weight of your anchor line when selecting a bow cleat.
How to Install Cleats on a Pontoon Boat
If you’re looking to add cleats to your pontoon boat, there are a few things you need to know. Here’s a quick guide on how to install cleats on a pontoon boat:
1. Choose the right location for your cleats.
You’ll want to avoid putting them in areas where they might get in the way or be a tripping hazard. Instead, opt for locations near the edge of the deck where they’ll be easy to reach.
2. Drill pilot holes for your screws.
This will help ensure that the screws go in smoothly and don’t strip out the holes as you’re screwing them in.
3. Use stainless steel screws and washers. This will help prevent rusting and ensure that your cleats are securely attached to your pontoon boat.
4. Tighten the screws until they’re snug, but don’t over-tighten them. You don’t want to strip out the holes or damage the decking material around the cleat itself.
Boat Cleat Backing Plate
If you’re looking to add a little extra protection to your boat cleats, consider adding a backing plate. Backing plates are designed to distribute the load of the cleat over a larger area, which can help prevent damage to your deck and hull. They also make it easier to remove the cleat when you’re ready to take it off.
There are a few things to keep in mind when choosing a backing plate for your boat cleat. First, you’ll need to know the dimensions of the cleat so that you can select a plate that’s large enough. You’ll also want to consider the thickness of the material and whether or not you want holes drilled in it for mounting purposes.
And finally, be sure to factor in the cost of shipping when making your purchase.
With all of that in mind, let’s take a look at some of the best boat cleat backing plates on the market:
1) The Sea-Dog Line Backing Plate is made from durable stainless steel and is available in three different sizes (2″, 3″, and 4″). It’s also relatively thin (just 1/8″ thick), which makes it easy to install without having to drill too many holes.
Prices start at around $10 per plate.
2) The Attwood Stainless Steel Backing Plate comes in two sizes (3″ and 4″) and is slightly thicker than the Sea-Dog model (1/4″). It’s also less expensive, with prices starting at just $7 per plate.
However, this option doesn’t come with any pre-drilled holes, so you’ll need to create your own if you want to mount it using screws or bolts.
3) For something a little different, check out the Wichard Self-Adhesive Backing Plate . This one is made from aluminum and has an adhesive backing that makes installation quick and easy (no drilling required).
It’s available in two sizes (3″ and 4″) and starts at around $12 per plate.
Credit: fwmdocks.com
How Do You Install Boat Cleats?
Assuming you would like a step-by-step guide on how to install boat cleats:
1. Decide where you would like the cleat to be placed on the boat. It is important to consider both function and aesthetics when choosing the location of your cleats.
2. Once you have decided on the placement of your cleat, use a pencil or marker to make a small dot on the surface of the boat where each hole will be drilled.
3. Drill pilot holes into the marked spots using a drill bit that is slightly smaller in diameter than the bolts that will be used to secure the cleat in place.
4. Install washers and nuts onto the bolts, then thread them through the pilot holes from inside the boat’s hull.
5!
Where Should Cleats Be Placed on a Boat?
There is no one definitive answer to this question as it will depend on the specific boat you are using and what you are using it for. However, there are some general guidelines that can help you determine where to place your cleats.
First, consider how and where you will be tying up your boat.
If you plan on docking in a slip, then you will need to have cleats placed near the bow and stern of the vessel so that you can easily secure it. If you’re mooring your boat offshore, then you’ll want cleats placed towards the middle of the vessel so that it’s more stable.
Another factor to consider is the size and weight of your boat.
Heavier boats will require more sturdy cleats that can support the weight, while smaller boats can get away with less heavy-duty cleats. You’ll also want to make sure that the cleats are evenly distributed across the vessel so that it’s balanced when docked or moored.
Finally, take into account any other equipment or features on your boat that could get in the way of placing cleats where they’re needed.
For example, if you have a swim platform installed, then you might need to adjust your placement accordingly. Ultimately,cleat placement is something that you’ll need to experiment with until you find what works best for your particular boat and situation.
How Do You Mount Boat Dock Cleats?
Most boat dock cleats are mounted using through-bolts. This involves drilling a hole in the dock, then inserting a bolt from the underside and tightening it from the top. Some newer types of cleats have special mounting brackets that can be screwed or bolted to the dock, making installation easier.
To mount a boat dock cleat, first determine where you want it to go and mark the location with a pencil. Then, using a drill fitted with a bit slightly smaller than the diameter of your bolts, drill a hole at each mark. If your bolts are 3/8 inch in diameter, for example, use a 7/16 inch bit.
Next, insert the bolts through the holes from underneath the dock and screw on washers and nuts snugly from above. Be sure to leave enough thread exposed so that you can remove the nuts later if necessary. Finally, tighten everything down securely with a wrench or socket set.
How Do You Install Folding Boat Cleats?
There are a few things you need to know before installing folding boat cleats. The first is what size and type of cleat you need. The second is how many cleats you’ll need to properly secure your vessel.
And the third is where on your vessel you should install them.
Let’s start with size and type. Folding boat cleats come in two basic varieties: short and long.
Short cleats are typically used for light-duty applications, while long cleats can handle more weight and stress. As for size, that will depend on the width of your vessel’s gunwale (the edge of the hull where it meets the deck). A good rule of thumb is to choose a cleat that’s about half the width of the gunwale.
Next, let’s talk about how many folding boat cleats you’ll need. This will vary depending on the length and beam (width) of your vessel, as well as how heavy it is and how much stress it will be under when moored. Generally speaking, though, most vessels will require four short cleats or two long ones fore and aft (front and back).
Finally, we come to installation location. When installing folding boatcleats, always try to place them in areas that won’t interfere with lines or other gear when they’re folded down. That said, they should also be positioned close enough to the edge of the hull so that they can provide adequate support when needed.
With all that in mind, a good rule of thumb is to install one short cleat near each corner of the transom (rear), one long one near the bow (front), and another long one amidships (in the middle).
By following these simple tips, you can ensure that your new folding boatcleats are installed correctly – providing years of safe mooring for your vessel!
Conclusion
Installing cleats on an aluminum boat is a simple process that can be completed in a few minutes with the right tools. First, drill holes in the desired location for the cleats using a drill bit slightly smaller than the bolts that will be used to secure the cleats. Next, insert the bolts through the holes and add washers and nuts to secure them in place.
Finally, use a wrench to tighten everything down. This process can be repeated for as many cleats as needed.