How to Install a Motion Sensor Light Switch? Step-by-Step Guide
To install a motion sensor light switch, turn off the power, remove the old switch, connect the new switch, and secure it in place. Now, let’s dive into the details.
Installing a motion sensor light switch is a simple process that can enhance the convenience and energy efficiency of your home. By automatically turning lights on and off based on movement, these switches provide added security and convenience. In this guide, we will walk you through the step-by-step process of installing a motion sensor light switch, from preparing for the installation to securing the new switch in place.
With a little time and effort, you can easily upgrade the lighting in your home to a more intelligent and efficient system.
Understanding Motion Sensor Light Switches
Motion sensor light switches are a convenient addition to any home, offering energy-saving benefits and increased security. Installing them is a straightforward process that involves a few simple steps. With this guide, you’ll be able to install a motion sensor light switch easily and efficiently.
What Is A Motion Sensor Light Switch?
A motion sensor light switch, also known as an occupancy sensor or motion detector switch, is an innovative device that automatically turns on the lights when it detects motion in a room or area. This smart switch operates based on infrared, ultrasonic, or microwave technology, allowing it to sense movement and trigger the lights accordingly.
By eliminating the need to manually switch lights on and off, a motion sensor light switch offers convenience, energy efficiency, and enhanced security.
Benefits Of Installing A Motion Sensor Light Switch:
Installing a motion sensor light switch in your home or workplace can bring a range of advantages. Here are some key benefits to consider:
- Energy efficiency: Motion sensor light switches significantly reduce energy consumption by ensuring lights are only on when needed. They automatically switch off the lights when no movement is detected, preventing unnecessary power wastage.
- Cost savings: With reduced energy usage, motion sensor light switches can help trim your electricity bills. The efficient operation of these switches means you won’t have to worry about lights being left on in unoccupied rooms.
- Convenience: Gone are the days of fumbling for light switches in the dark. Motion sensor light switches offer hands-free operation, providing instant illumination as soon as you enter a room. This simple touch-free approach enhances convenience and eases daily tasks.
- Enhanced safety: Motion sensor light switches provide an added layer of security. By illuminating specific areas when motion is detected, they deter potential intruders and make it easier to navigate your property in low-light situations, reducing the risk of accidents.
- Extended bulb life: Traditional light switches often leave lights on for longer than necessary, leading to premature bulb burnout. Motion sensor light switches eliminate this issue by ensuring lights are only activated when needed, increasing the lifespan of your bulbs.
- Customizable settings: Many motion sensor light switches offer adjustable settings, allowing you to customize the sensitivity, duration, and range of the motion detection. This flexibility ensures you can tailor the switch to suit your specific needs and preferences.
Overall, installing a motion sensor light switch provides a range of benefits, including energy efficiency, cost savings, convenience, safety, and extended bulb life. With their smart technology and customizable features, these switches are an excellent addition to any home or workplace, enhancing both functionality and efficiency.
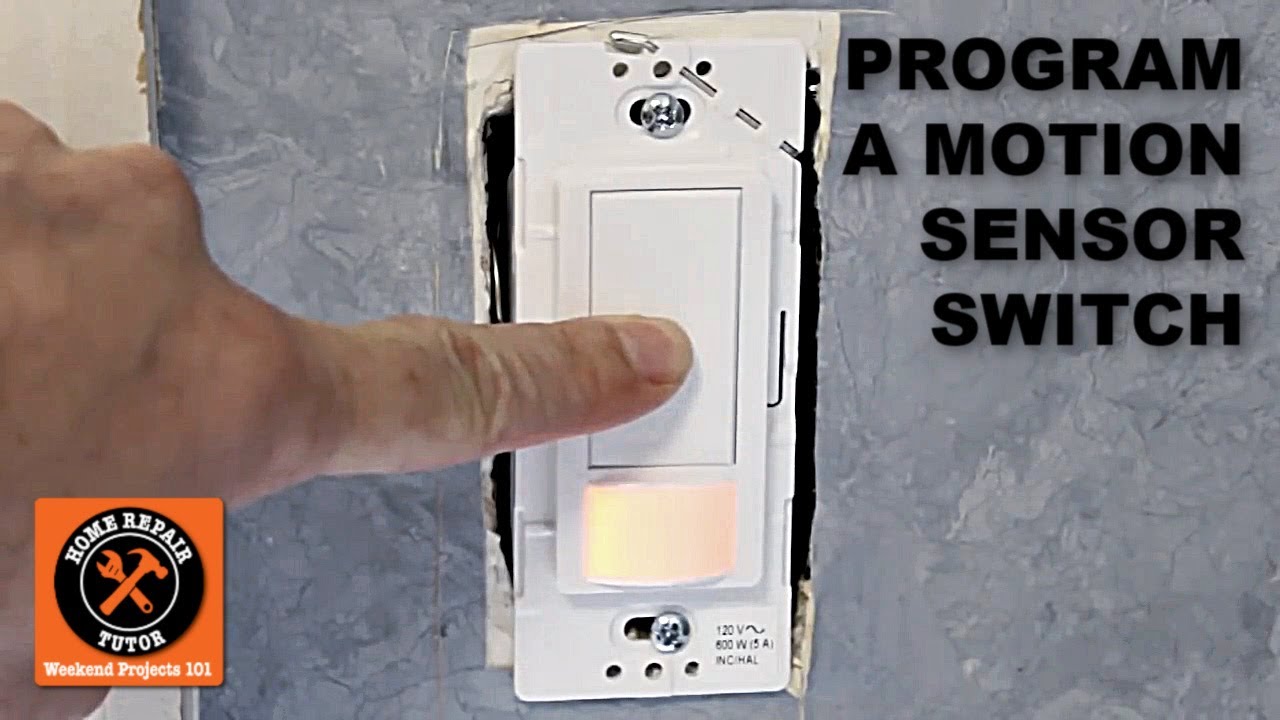
Credit: m.youtube.com
Tools And Materials Needed
To install a motion sensor light switch, you will need tools such as a screwdriver, wire strippers, and a voltage tester. Additionally, gather materials like the motion sensor switch, wire connectors, and electrical tape to ensure a successful installation.
To successfully install a motion sensor light switch, you will need a few essential tools and materials. These will help you tackle the installation process with ease and efficiency. Here is a list of the items you should have on hand before getting started:
- Screwdriver: A screwdriver is crucial for removing and securing screws during the installation process. Make sure you have the appropriate type (typically a flathead or Phillips-head) for your specific light switch.
- Pliers: Pliers come in handy for various tasks, such as bending or twisting wires, especially when it comes to connecting the motion sensor switch to the electrical system.
- Wire stripper: A wire stripper is essential for safely removing the insulation from the wires during the installation process. This tool ensures a proper electrical connection between the switch and the wires.
- Voltage tester: Before beginning any electrical work, it is crucial to ensure that the power is off. A voltage tester allows you to verify that the electrical current is shut off, preventing any potential accidents.
- Motion sensor light switch: Of course, you will need the motion sensor light switch itself. Ensure you choose a high-quality switch that suits your specific requirements and fits the existing electrical box.
- Wire nuts: Wire nuts are important for connecting and securing the wires together properly. They help maintain a secure and reliable connection between the wires and the motion sensor switch.
- Electrical tape: Use electrical tape to secure and insulate any exposed wires once the connections are made. This provides an added layer of safety and prevents potential short circuits.
- Mounting screws: Depending on the type of motion sensor light switch you have, you may need mounting screws to securely attach the switch to the electrical box.
- Safety goggles and gloves: Prioritize your safety by wearing protective goggles and gloves throughout the installation process. This will help shield your eyes from any debris and protect your hands from potential electrical hazards.
By gathering these tools and materials before you begin, you’ll have everything you need for a successful motion sensor light switch installation. Now that you’re well-equipped, let’s move on to the next steps of the installation process.
Step 1: Preparing For Installation
In the first step of installing a motion sensor light switch, you need to make necessary preparations. This includes turning off the power, removing the old switch, and ensuring the area is clean and safe for installation.
Checking Compatibility Of The Existing Switch:
It is essential to ensure that your existing switch is compatible with a motion sensor light switch before proceeding with the installation process. Here are the steps to check the compatibility:
- Examine the current switch: Take a close look at your current light switch and determine if it is a single-pole switch, which means it controls a single light or group of lights. Motion sensor switches are typically only compatible with single-pole switches.
- Check the wiring: Open the switch plate cover and examine the wiring behind it. Look for a neutral wire, typically white, and a ground wire, usually green or copper. It is crucial to have both of these wires present for the motion sensor switch installation.
- Confirm the load capacity: Motion sensor switches have specific load capacity requirements. Check the wattage rating of the switch and ensure it can handle the total wattage of the lights it will control. If the lights exceed the switch’s capacity, you may experience flickering or malfunctions.
- Consider switch location: Motion sensor switches work best in areas with sufficient line of sight. Ensure that the location you intend to install the switch allows for proper detection of motion.
By verifying the compatibility of your existing switch, you can proceed confidently with the installation process without any complications.
Turning Off The Power Supply:
Before beginning any electrical work, it is crucial to turn off the power supply to ensure your safety. Follow these steps to turn off the power supply:
- Locate the circuit breaker: Find the circuit breaker panel in your home or facility. It is typically located in the basement, garage, or utility room.
- Identify the switch: Locate the circuit breaker switch corresponding to the area where you will be working. Look for labels or use a voltage tester to confirm which circuit the switch controls.
- Turn off the switch: To turn off the power, flip the circuit breaker switch to the off position. This will cut off the electricity supply to the designated area.
- Double-check power: Use a voltage tester to confirm that the power is indeed off before proceeding with the installation. This step is crucial for your safety and the safety of the electrical components.
Ensure that the power supply is fully turned off before starting the installation process to avoid any accidents or damage. Following these steps will help you prepare for a successful motion sensor light switch installation.
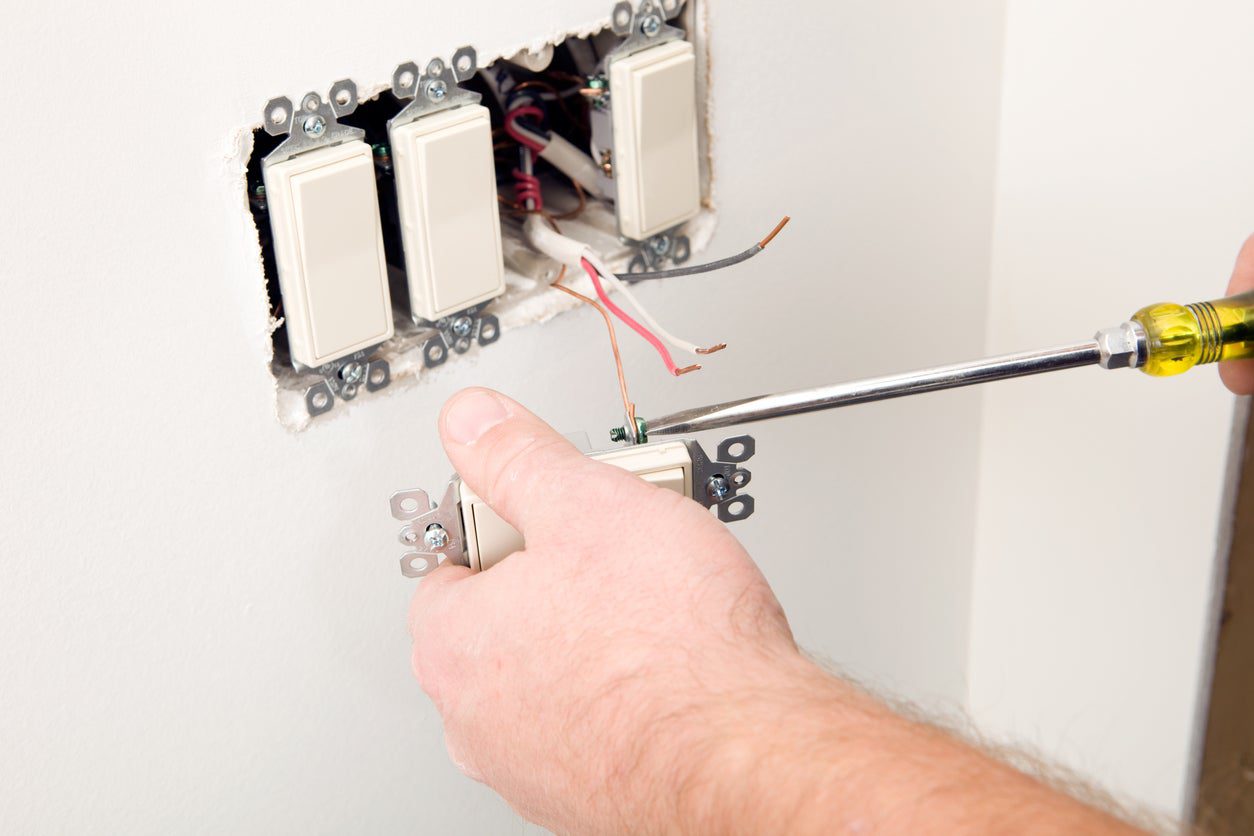
Step 2: Removing The Existing Switch
To install a motion sensor light switch, start by removing the existing switch. Follow the necessary steps and precautions to ensure a successful installation.
Removing The Switch Cover Plate:
To begin the process of installing a motion sensor light switch, you’ll need to remove the existing switch. This step involves removing the switch cover plate. Follow these steps to easily complete this task:
- Locate the screws on the switch cover plate.
- Use a screwdriver to gently unscrew the screws counterclockwise.
- Once the screws are removed, carefully pull the switch cover plate away from the wall.
Disconnecting The Wires From The Switch:
After removing the switch cover plate, you’ll need to disconnect the wires from the switch. Here’s how you can do it:
- Identify the wires connected to the switch. Most switches have two wires, a hot wire (usually black) and a neutral wire (typically white).
- Using a screwdriver, loosen the screws securing the wires to the switch in a counterclockwise direction.
- Once the screws are loosened, gently pull the wires away from the switch, ensuring that they are completely disconnected.
Remember to exercise caution when handling electrical wiring and ensure the power is turned off before proceeding with any work. Following these steps will help you safely remove the existing switch and move forward with the installation of your motion sensor light switch.
Step 3: Mounting The Motion Sensor Light Switch
Mounting the motion sensor light switch is the crucial step in installing it, ensuring the switch is securely attached to the wall and positioned correctly to detect motion effectively. Following the manufacturer’s instructions and using the appropriate tools, you can easily complete this step and enhance the security and convenience of your home lighting system.
Mounting The Motion Sensor Light Switch
Once you have chosen the optimal location for your motion sensor light switch, it’s time to move on to the next crucial step: mounting the switch onto the electrical box securely. Follow these steps to ensure a successful installation:
- Prepare the necessary tools: Before you begin, gather the tools you will need for the installation process. These typically include a screwdriver, wire stripper, and pliers.
- Turn off the power: As with any electrical work, your safety should be the top priority. Before you proceed, turn off the power at the circuit breaker to avoid any accidents.
- Remove the existing switch: Carefully remove the existing switch from the electrical box by unscrewing the screws that hold it in place. Take note of the wire connections as you will need to replicate them with the new motion sensor switch.
- Connect the wires: Using your wire stripper, carefully strip the ends of the wires coming from the electrical box. Make sure to match the colors of the wires – black to black, white to white, and green or bare copper to the ground wire.
- Secure the switch onto the electrical box: Place the motion sensor switch onto the electrical box, aligning the screw holes. Insert the screws provided with the switch and tighten them to securely mount the switch onto the box.
- Tighten wire connections: With the switch mounted, proceed to tighten the wire connections. Gently twist the exposed ends of the wires together, ensuring a tight and secure connection. Use wire nuts to fasten the connections, covering them entirely.
- Attach the motion sensor to the switch: Depending on the specific model of your motion sensor switch, you may need to attach the sensor device onto the switch. Follow the manufacturer’s instructions to properly attach it.
- Double-check your connections: Before proceeding, double-check all wire connections to ensure they are secure and properly fastened. It’s crucial to have a reliable electrical connection to prevent any malfunctions.
- Restore the power: Once you have completed the mounting and wiring process, go back to the circuit breaker and turn the power back on. Test the motion sensor lights to confirm that they are functioning correctly.
- Adjust the settings, if necessary: Some motion sensor light switches allow for customization of settings such as sensitivity and duration. Refer to the manufacturer’s instructions to adjust these settings to your desired preferences.
With the motion sensor light switch securely mounted onto the electrical box, you are one step closer to enjoying the convenience and energy-saving benefits it offers. Move on to the next step in the installation process to complete your project successfully.
Step 4: Wiring The Motion Sensor Light Switch
To install a motion sensor light switch, follow Step 4: Wiring the motion sensor switch. Connect the wires according to the provided instructions for a hassle-free installation process.
Identifying The Different Wires And Their Functions
When it comes to wiring a motion sensor light switch, it’s essential to identify the different wires and understand their functions. This will help ensure a safe and accurate installation. Here are the wire colors you may encounter and their corresponding functions:
- Black wire: This wire is typically the live or hot wire, which carries the electrical current to the switch.
- Red wire: In some cases, you may come across a red wire, which is often used as a traveler wire in three-way switch systems.
- White wire: The white wire is the neutral wire, responsible for completing the electrical circuit. It is usually connected to the white wire in your electrical box.
- Green or bare copper wire: This wire is the ground wire and provides an electrical path for safety, preventing the build-up of electrical charges.
Connecting The Wires Accurately According To The Manufacturer’S Instructions
To ensure a successful installation, it is crucial to connect the wires accurately based on the manufacturer’s instructions. Here are the steps you should follow:
- Turn off the power: Before starting any wiring work, turn off the power to the switch at the circuit breaker box to avoid any accidents or electrical shocks.
- Match the wire colors: Match each wire from the motion sensor light switch to the corresponding wires in your electrical box based on their colors. For example, connect the black wire from the switch to the black wire in the box.
- Secure the connections: Use wire nuts to secure the connections. Twist together the exposed ends of the wires and place the wire nut over the joined wires, twisting it clockwise until it is tight and secure.
- Ground wire connection: If your motion sensor light switch has a green or bare copper ground wire, connect it to the ground wire in your electrical box. You can use a wire nut or a grounding screw, depending on the manufacturer’s instructions.
- Test the connections: After completing the wiring connections, carefully tuck the wires into the electrical box, ensuring they are not being pinched. Restore the power at the circuit breaker box and test the motion sensor light switch to ensure it is properly functioning.
Remember, always consult the manufacturer’s instructions for your specific motion sensor light switch model, as the wiring details may vary. If you are unsure about any step or encounter unfamiliar wiring, it is recommended to seek professional assistance to ensure a safe and accurate installation.
Step 5: Testing The Motion Sensor Light Switch
In Step 5 of installing a motion sensor light switch, you need to test the switch to ensure it’s functioning properly. This step is crucial to ensure the switch detects motion correctly and operates the lights accordingly.
Before finalizing the installation, it is crucial to test the functionality of the motion sensor light switch. Follow these steps to ensure everything is working correctly:
- Turning on the power supply: Once you have installed the motion sensor light switch and mounted the cover plate, you can turn on the power supply. Be cautious when dealing with electricity and ensure all safety measures are followed.
- Checking the functionality of the motion sensor: To test the motion sensor, walk within its detection range and observe the light’s response. Here’s what you need to look for:
- The light should turn on promptly when motion is detected, indicating that the sensor is functioning correctly.
- When there is no motion detected for a specific duration, the light should automatically turn off. This feature helps conserve energy and prolong the bulb’s lifespan.
- Verify that the sensor’s range covers the desired area. Move around to test different angles and distances. A well-placed motion sensor should adequately cover the intended space.
- Adjust the sensor’s sensitivity if needed. Some models allow you to modify the detection range and sensitivity settings. This step ensures optimal performance and minimizes false activations.
- Test the duration the light remains on after motion is detected. Most motion sensor switches have adjustable timer settings to control how long the light stays illuminated. Customize it to your preference.
- Check if the motion sensor switch has any additional features. Some models may offer dimming functionality or the option to switch between manual and automatic operation. Familiarize yourself with these options and assess their suitability for your needs.
Congratulations! You have successfully installed and tested your motion sensor light switch. With its motion-activated capabilities, you can now enjoy enhanced convenience and energy efficiency in your space.
Step 6: Adjusting The Settings
In Step 6 of installing a motion sensor light switch, you’ll need to adjust the settings to customize the sensitivity and duration of the sensor. This allows you to have optimal control over when and how your motion sensor light switch operates.
Once you have successfully installed your motion sensor light switch, it is important to adjust the settings to suit your needs. This step will ensure that the motion sensor is sensitive enough to detect movement, while also allowing you to control the duration of the light’s activation.
In this section, we will discuss understanding the sensitivity and timer options, which are essential for fine-tuning your motion sensor light switch settings.
Understanding The Sensitivity And Timer Options
- Sensitivity: Adjusting the sensitivity of your motion sensor light switch determines how easily it detects motion. Higher sensitivity settings make the sensor more responsive, while lower settings make it less likely to detect subtle movements. Consider the following points when adjusting the sensitivity:
- High sensitivity (maximum): Suitable for areas where even slight movements need to trigger the light, such as hallways or staircases.
- Medium sensitivity: Ideal for most indoor spaces, such as bedrooms or living rooms, where a moderate level of motion detection is required.
- Low sensitivity: Useful for spaces where there may be false triggers, such as near a busy road or strong winds.
- Timer options: The timer settings dictate how long the light stays illuminated after motion is detected. The duration can be adjusted based on your specific requirements. Take note of the following options:
- Short duration: Set a shorter time for the light to stay on, typically useful for areas with frequent movement or if energy conservation is a priority.
- Medium duration: Allows the light to remain illuminated for an average period, suitable for spaces like garages or laundry rooms where you may need ample time to complete tasks.
- Long duration: Increases the time the light stays on, which is beneficial for areas where extended visibility is required, such as driveways or outdoor spaces.
Adjusting the settings to suit your needs is crucial for optimizing the functionality and effectiveness of your motion sensor light switch. By understanding the sensitivity and timer options, you can ensure that the light only activates when necessary, saving energy and providing convenience.
Experiment with different settings until you find the perfect balance that meets your specific requirements.
Remember, follow the quick and simple steps provided in this blog post to install and set up your motion sensor light switch effectively. Enjoy the benefits of improved safety, convenience, and energy efficiency that come with this modern lighting solution.
Additional Tips For Installing Motion Sensor Light Switches
Looking to install a motion sensor light switch? Here are some additional tips to consider for a successful installation.
When it comes to installing motion sensor light switches, there are a few additional tips that can help ensure a smooth installation process and enhance the functionality of your lights. Here are some key tips to keep in mind:
- Proper maintenance and troubleshooting tips:
- Regularly check the batteries: Motion sensor light switches often rely on batteries for power. Make it a habit to check the batteries every few months and replace them if necessary.
- Clear obstructions: If your motion sensor light switch doesn’t seem to be detecting motion correctly, check for any obstructions that may be blocking its view. Remove any objects or debris that could be interfering with its functioning.
- Adjust sensitivity and range: Most motion sensor light switches allow you to adjust the sensitivity and range of motion detection. Experiment with different settings to find the optimal ones for your needs.
- Clean the sensor: Over time, dust and dirt can accumulate on the sensor, reducing its effectiveness. Clean the sensor periodically using a soft cloth or cotton swab to remove any buildup.
- Enhancing security with multiple motion sensor light switches:
- Strategic placement: Install motion sensor light switches at key entry points and vulnerable areas around your property to enhance security. This includes places like the front and back doors, garage, and backyard.
- Interconnected lighting: Consider connecting multiple motion sensor light switches to create a network of synchronized lights. This can provide a better deterrent effect and improve overall lighting coverage.
- Adjusting timers and sensitivity: Configure the timers and sensitivity settings of each motion sensor light switch to work in harmony with one another. This ensures that lights activate simultaneously and respond appropriately to motion.
Remember, proper maintenance and troubleshooting play a crucial role in ensuring that your motion sensor light switches work effectively. Additionally, strategic placement and interconnected lighting can significantly enhance your security measures. By following these tips, you can make the most of your motion sensor light switch installation.
Frequently Asked Questions On How To Install A Motion Sensor Light Switch?
Do You Need An Electrician To Install A Motion Sensor Light?
No, an electrician is not necessary to install a motion sensor light.
How Do You Install A Motion Sensor On An Existing Light?
To install a motion sensor on an existing light, follow these steps: 1. Turn off the power to the light fixture. 2. Remove the existing light bulb and fixture. 3. Connect the motion sensor wires to the corresponding wires in the fixture.
4. Mount the motion sensor in the desired location. 5. Install the new light fixture on the motion sensor. 6. Turn the power back on and test the motion sensor’s functionality. Remember to prioritize safety and consult a professional if needed.
How Do You Attach A Motion Sensor To An Outdoor Light?
To attach a motion sensor to an outdoor light: 1. Turn off the power supply. 2. Remove the existing light fixture. 3. Connect the motion sensor wires to the light fixture wires. 4. Secure the motion sensor and reinstall the light fixture.
Note: If unsure, consult an electrician for proper installation.
How Do You Convert A Regular Light To A Motion Sensor?
To convert a regular light to a motion sensor, follow these simple steps: 1. Purchase a motion sensor switch. 2. Turn off power to the light. 3. Remove the existing switch cover. 4. Disconnect the wires from the old switch.
5. Connect the wires to the motion sensor switch. 6. Attach the motion sensor switch to the wall. 7. Install a light bulb compatible with the motion sensor. 8. Restore power and test the motion sensor light.
Conclusion
Installing a motion sensor light switch is a simple and effective way to improve the energy efficiency and security of your home. By automatically turning on and off when someone enters or leaves a room, these switches help to minimize wasted energy and reduce your electricity bills.
In addition, they act as a deterrent for potential intruders, providing a sense of security and peace of mind. To install a motion sensor light switch, start by turning off the power, removing the existing switch, connecting the wires to the new switch, and securing it in place.
Finally, turn the power back on and test the switch to ensure it is functioning properly. With just a few steps, you can enjoy the convenience and benefits that come with a motion sensor light switch in your home.