How to Install a Lyra Hoop

Installing a Lyra hoop is a relatively easy process that can be completed in just a few minutes. The first step is to find a suitable location for the hoop. It should be placed in an area where there is plenty of room to move around, and where the ceiling is high enough to allow for comfortable aerial movement.
Once you have found an appropriate location, mark out the spot where the center of the hoop will be installed.
- Hang your hoop from a secure object using the included hook or clamp
- If you are hanging your hoop from a ceiling, make sure that the chosen spot can support the weight of both you and the hoop
- Once your hoop is in place, stand inside of it and grab hold of the top portion with both hands
- Gently rock your body back and forth, allowing the bottom half of the hoop to rotate around your waist
- As you become more comfortable with the movement, try adding in some simple body waves or hip shakes
Aerial Hoop Home Installation
If you’re thinking about adding an aerial hoop to your home gym, there are a few things you need to know before getting started. Here’s a quick guide to help you get started on your aerial hoop home installation:
1. Choose the right location.
The first step is finding the perfect spot for your new piece of equipment. Keep in mind that you’ll need enough ceiling height to safely practice your moves.
2. Gather the necessary supplies.
In addition to the aerial hoop itself, you’ll need two sturdy anchor points and some rigging equipment (like carabiners and pulleys).
3. Install your anchor points. This is probably the most important step of the entire process.
Make sure your anchor points are securely installed into a support beam or other strong structure before attaching anything else.
4. Attach the rigging equipment. Once your anchor points are in place, it’s time to start attaching the rigging equipment.
If everything is done correctly, this should be a relatively straightforward process.
5. Hang up your aerial hoop!
How to Hang Aerial Hoop from Ceiling
Aerial hoops are a popular choice for aerialists and circus performers alike. They offer a unique challenge and can be used to perform a variety of tricks. But before you can start swinging around on your new aerial hoop, you need to know how to hang it from the ceiling!
Here are some tips on how to properly hang an aerial hoop from your ceiling:
1. Use the proper hardware. Make sure you use screws and anchors that are rated for the weight of your aerial hoop.
Also, be sure to follow the manufacturer’s instructions for hanging the hoop.
2. Hang at the correct height. The height of your aerial hoop will depend on what tricks you want to perform on it.
A good rule of thumb is tohang the hoop about 10 feet off the ground for beginners, and 12-15 feet for more experienced performers.
3. Mark your spot! Before you drill any holes, be sure to mark where the screw eyes will go so that they are evenly spaced around the circumference of the hoop.
This will help ensure that your aerial hoop is balanced and safe to use.
4. Time to drill! Once you have marked where your screw eyes will go, carefully drill pilot holes into the ceiling joists at those spots (being careful not to damage any wiring or plumbing that may be behind the drywall).
Freestanding Aerial Hoop
Aerial hoop, also known as lyra, is a circular steel apparatus (usually 3-4ft in diameter) suspended from the ceiling. It is used in aerial acrobatics and can be performed solo or with a partner.
Aerial hoops can be freestanding or hung from a fixed point.
A freestanding aerial hoop is ideal for those who want to practice at home, as it does not require any special equipment or installation. These hoops are made of sturdy materials such as steel or aluminium and can support up to 250kg.
There are many different ways to get into and out of the hoop, and once you have mastered the basic movements, you can begin to experiment with more complex tricks.
The possibilities are endless! Whether you want to use it for exercise, fun, or performance, an aerial hoop is a great addition to any circus repertoire.
Aerial Hoop Portable Rig
If you are looking for a portable aerial hoop rig, then you have come to the right place! This article will provide you with all the information you need to know about portable aerial hoop rigs, including what they are and how they can benefit your practice.
Aerial hoops, also known as lyra hoops or cerceaux, are circular steel frames that hang from the ceiling and are used in acrobatic performances.
They vary in size from 2 meters (6.5 feet) to 4 meters (13 feet) in diameter. Aerial hoops can be rigged permanently or temporarily, depending on your needs.
Portable aerial hoop rigs offer many benefits over traditional rigs.
They are easier to set up and take down, which means you can use them anywhere – indoors or outdoors. They are also more versatile, as they can be configured to suit any space and practice requirements. And because they are not permanently installed, portable rigs can be moved around as needed, making them ideal for traveling performers.
If you’re looking for a portable aerial hoop rig that is easy to set up and take down, offers versatility and portability, and won’t break the bank, then an Aerial Hoop Portable Rig is perfect for you!
Diy Aerial Hoop
The aerial hoop, also known as the lyra, is a circular steel ring suspended from a single point. It is a popular apparatus used in aerial circus and is similar to the trapeze. The difference is that instead of swinging back and forth, the performer spins around inside the hoop.
The aerial hoop can be performed with or without props such as fabrics or silks. The act can be very sensual and elegant, or dynamic and athletic. It requires strength, flexibility, coordination and grace.
Here are some tips for those of you who want to try this amazing apparatus!
1. Choose the right size hoop: Make sure the hoop you choose is appropriate for your height. If it’s too big or small it will make things more difficult (and possibly dangerous).
2. Don’t be afraid to ask for help: Learning how to properly mount and dismount the hoop can be tricky. Ask a friend or experienced aerialist for help at first until you get the hang of things.
3. Warm up: As with any physical activity, it’s important to warm up your muscles before you start flying around on the hoop!
Do some simple stretches and cardio exercises to get your blood flowing before attempting any complicated tricks.
4. Start slow: When you’re first learning, take things slowly and focus on perfecting basic moves before moving on to more advanced tricks. You’ll avoid getting frustrated (and injured) if you progress gradually instead of trying to do too much too soon .5 Have fun!
: Remember that aerial hoops is supposed to be enjoyable so don’t put too much pressure on yourself! Try new things, experiment ,and most importantly – have fun !
Aerial Hoop for Sale
Aerial Hoop for Sale
Are you looking for an aerial hoop for sale? There are many reasons why people want to buy an aerial hoop.
Maybe you want to start practicing aerial acrobatics, or maybe you want to add another element to your fitness routine. Whatever the reason, there are a few things you should know before buying an aerial hoop.
First, make sure that the hoop is the right size for you.
If it’s too big or too small, it will be difficult to use. Second, check that the material is strong and durable. You don’t want it to break while you’re using it!
Third, make sure the price is reasonable. There are many hoops on the market, so shop around until you find one that fits your budget.
Now that you know what to look for in an aerial hoop, take a look at our selection!
We have hoops of all sizes and materials, so you’re sure to find one that’s perfect for you. And because we believe in quality over quantity, we only sell products that we would use ourselves. So shop with confidence knowing that your satisfaction is guaranteed!
Minimum Ceiling Height for Aerial Silks
Aerial silks, also known as tissu or fabric, are a type of aerial acrobatics in which performers use fabric to climb, wrap, and suspend themselves in the air. There are many different ways to rig aerial silks, but the most common is with a ceiling-mounted pulley system. The height of the ceiling is one of the most important factors to consider when setting up an aerial silks performance space.
The minimum ceiling height for aerial silks generally falls between 16 and 20 feet (4.9 – 6.1 meters). This range allows for adequate clearance for both climbing and falling, as well as plenty of room to execute flips and other tricks. Some performers may be able to get by with a lower ceiling, but it’s always best to err on the side of caution.
In addition to ceiling height, there are other factors that need to be taken into consideration when rigging aerial silks. The weight and size of the performer must be taken into account, as well as the type of tricks that will be performed. It’s always best to consult with a professional before setting up your own rig – they can help you determine the best way to set things up based on your individual needs and goals.
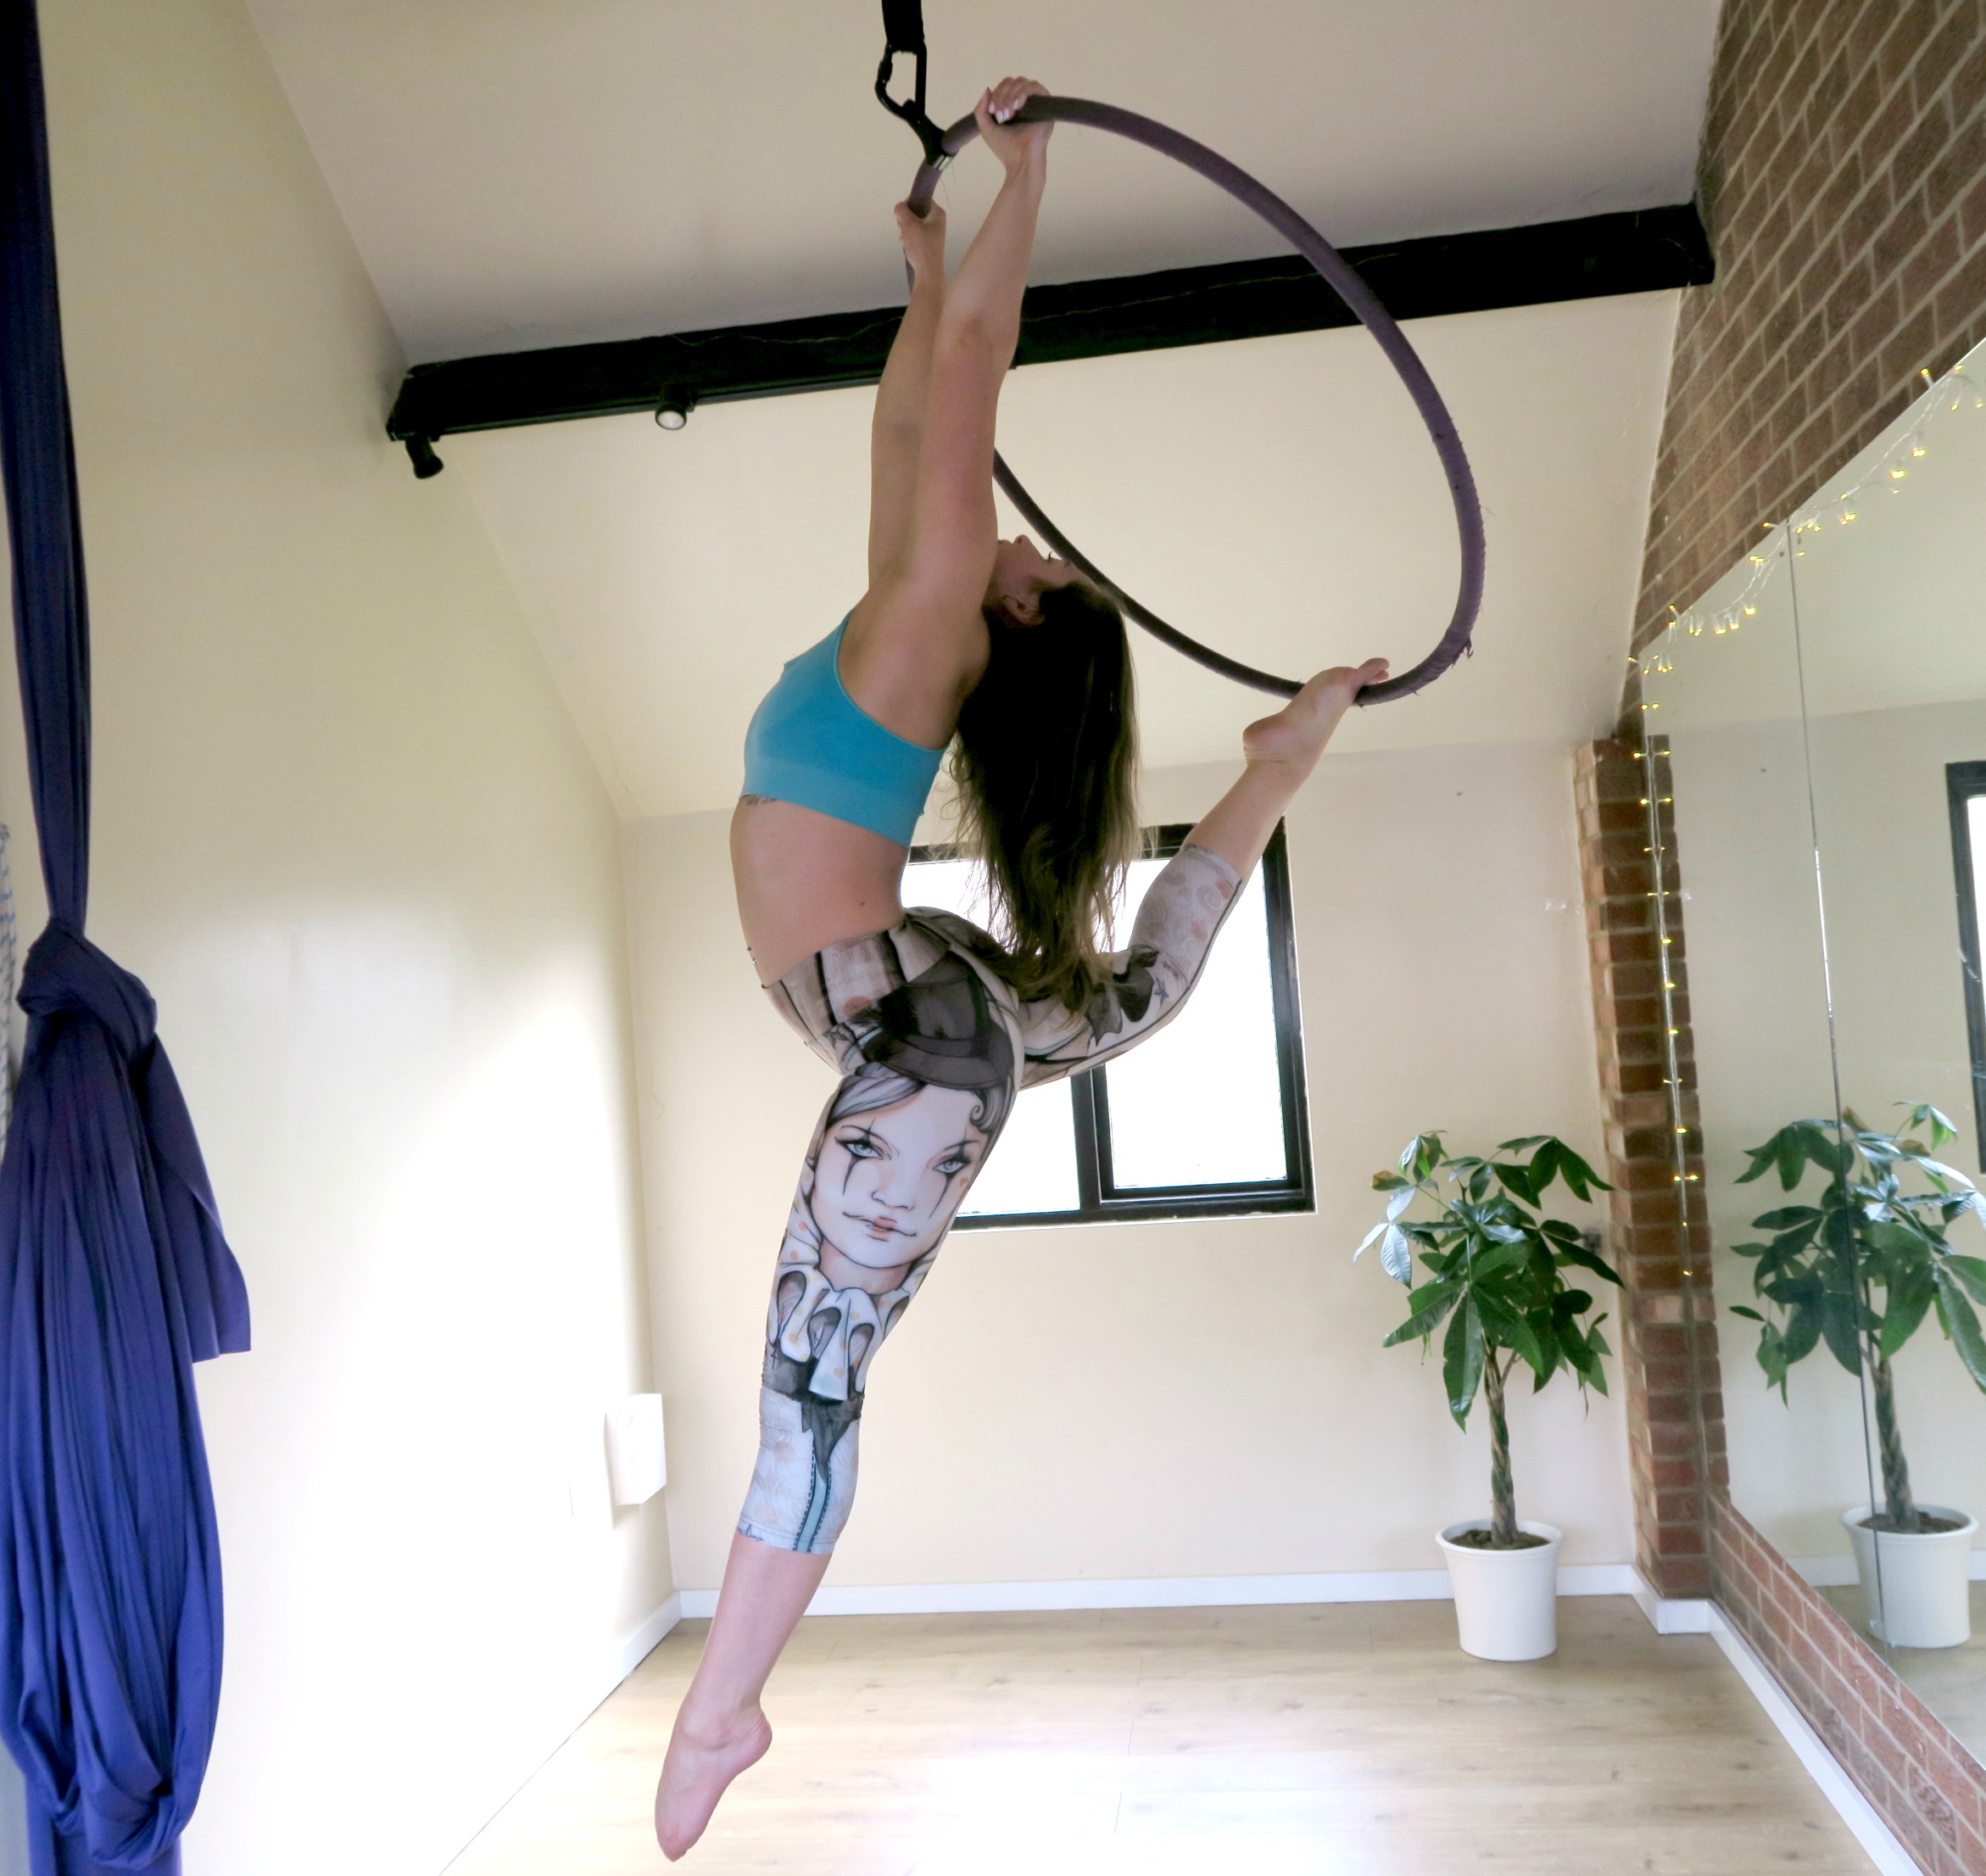
Aerial Hoop Poses
Aerial hoops, also called lyra, offer a unique way to workout. They provide an excellent cardio and strength-building workout while also allowing you to experience the joy of flying!
There are many different aerial hoop poses that you can try.
Some are easy and some are more advanced, but all of them will give you a great workout. Here are just a few of the many poses that you can try on your aerial hoop:
The Superman Pose: This pose is perfect for beginners.
It helps to build upper body strength and is a great stretch for the back. To do this pose, start by lying face down on your hoop with your arms extended in front of you. Then, slowly lift your head, chest, and legs off the ground as high as you can.
Hold this position for 30 seconds to 1 minute before lowering back down.
The Candlestick Pose: This pose is slightly more advanced than the Superman pose but it is still suitable for beginners. It helps to build core strength and flexibility.
To do this pose, start by sitting on top of your hoop with your legs extended in front of you. Then, lean back and grab hold of the edges of the hoop behind you with both hands. Slowly lift your legs up into the air until they are perpendicular to your body (in a candlestick position).
Hold this position for 30 seconds before lowering your legs back down again.
The Pike Pose: This pose is more advanced than the previous two but it is still achievable for most people with some practice. It helps to build core strength and stability as well as upper body strength .
To do this pose , start by standing on top of your hoop with both feet together . Then , place your hands on either side of the hoop and lean forward until your torso is parallel to the ground . Next , slowly lift one leg straight up into the air behind you ( keeping it parallel to the ground) while keeping hold of the sides of The Hoop With Your Hands . Once Both Legs Are In The Air And You Are Balancing On Your Hands , You Have Achieved The Pike Position !
Credit: www.uniqueaerialists.com
How Do You Mount a Lyra Hoop?
There are a few ways to mount a lyra hoop, depending on what kind of setup you have and what type of performance you’re doing. If you have a portable rig, you can use ground spikes or sandbags to secure the base of the hoop. For more permanent setups, you can bolt the hoop to the floor or ceiling.
If you’re doing acrobatic tricks or need extra stability, it’s best to use a thicker hoop that is made specifically for lyra. These hoops are usually made of stainless steel or aluminum and have a powder-coated finish. Make sure the diameter of the hoop is appropriate for your height and skill level before purchasing.
To mount the hoop, start by attaching one end to an anchor point using either screws or bolts (depending on the material). Then, stretch the other end around until it meets up with the first side and attach it in the same way. Once both sides are securely fastened, give the entire structure a good shake to make sure everything is sturdy and secure before getting in position to perform.
How Do You Attach a Aerial Hoop to the Ceiling?
If you’re looking to add an aerial hoop to your ceiling, there are a few things you’ll need to take into account. First, you’ll need to make sure that the ceiling is strong enough to support the weight of the hoop and anyone who may be using it. You’ll also want to consider the height of the ceiling and how much space you have available.
Once you’ve taken these factors into account, you can begin attaching the hoop.
The first thing you’ll need to do is secure one end of the hoop to an anchor point on the ceiling. This can be done by screwing or bolting the hoop into place.
Next, you’ll need to attach a pulley system to the other end of the hoop so that it can be raised and lowered as needed. Finally, test out the stability of the hoops before allowing anyone to use it.
How Do You Set Up a Lyra?
Setting up a Lyra is a simple process that can be done in just a few minutes. Here are the steps:
1. Unfold the Lyra and stand it up on a flat surface.
2. Insert the handles into the holes at the top of the Lyra.
3. Step onto the platform and hold onto the handles.
4. Use your feet to push off from the ground and begin spinning!
What Do You Need to Hang an Aerial Hoop?
If you want to hang an aerial hoop, also known as a lyra, you will need a rigging point that can support your weight. The most common rigging points are a beam or a ceiling mount. You will also need two carabiners and two lengths of rope or webbing.
The carabiners should be rated to hold your weight, and the rope or webbing should be strong enough to support your weight as well.
To rig the hoop, first attach one carabiner to the rigging point. Then, thread the other end of the rope or webbing through the carabiner and tie it off.
Repeat this process with the second carabiner and the second length of rope or webbing. Once both ends are tied off, you can adjust the tension on the ropes or webbing by pulling on them until the hoop is at the desired height.
Conclusion
If you’re looking to add a little extra flair to your home décor, look no further than the Lyra hoop! This unique hoop is perfect for hanging tapestries, curtains, or even just adding some extra color to your walls. But how do you install a Lyra hoop?
Luckily, it’s not as difficult as it looks. With a few simple steps, you can have your very own Lyra hoop up and ready to use in no time.
First, find a spot on your wall where you want to hang the hoop.
Then, using a measuring tape, mark off where you’ll need to drill holes for the screws. Once the holes are drilled, simply screw in the hooks that come with the Lyra hoop kit.
Finally, thread your fabric or curtain through the hoops and enjoy your new home décor!