To hide an Ethernet cable, use cable management accessories or concealing methods such as routing it through walls, baseboards, or under carpets. Installing and setting up an Ethernet network at home or in the office requires the running of cables to connect various devices.
While these cables are essential for a stable and reliable network connection, they can often create an unsightly appearance, cluttering up the space. Thankfully, there are several ways to hide your Ethernet cables, ensuring a neat and organized environment. By utilizing cable management accessories or concealing methods like routing cables through walls, baseboards, or under carpets, you can seamlessly integrate your Ethernet network into your space without compromising on aesthetics.
This article explores various techniques to efficiently hide your Ethernet cables, providing you with a clean and visually appealing setup.
Why Conceal Your Ethernet Cable
Hide your Ethernet cable to maintain a clean and organized space. Concealing it not only improves aesthetics but also reduces the risk of tripping hazards and accidental disconnections. Discover effective methods to keep your cables out of sight while ensuring optimal network connectivity.
Ethernet cables are essential for a stable and reliable internet connection in our increasingly connected world. However, leaving these cables exposed can create various issues, such as trip hazards and a cluttered appearance. That’s why it’s important to consider hiding your Ethernet cable.
Concealing your cable provides several benefits, including:
- Avoiding trip hazards: Exposed Ethernet cables can easily become tangled and pose a potential tripping hazard, especially in high-traffic areas. By hiding your Ethernet cable, you can eliminate the risk of accidents and create a safer environment.
- Aesthetics and maintaining a clean look: Exposed cables can be visually unappealing, disrupting the overall aesthetic of your space. Concealing your Ethernet cable helps maintain a clean and organized appearance, enhancing the visual appeal of your home or office.
In addition to these benefits, hiding your Ethernet cable also offers practical advantages, such as protecting the cable from damage and preventing accidental disconnections. By taking the time to conceal your Ethernet cable properly, you can enjoy a seamless and visually pleasing internet setup without compromising on safety or functionality.
Credit: thesmarthomejourney.com
Planning Your Cable Concealment
Planning your cable concealment is an essential step in hiding an Ethernet cable. From utilizing cable clips and raceways to creating hidden pathways, there are several effective methods to keep your cables organized and out of sight, creating a cleaner and more aesthetically pleasing space.
Assessing the space and layout of your home or office:
- Take a walk around your space and visualize the areas where you want to hide the ethernet cable.
- Consider the different rooms or areas you will need to connect and identify the most convenient locations for concealed cables.
- Note any specific design elements or limitations that might impact your cable concealment plan.
Determining the best path for your Ethernet cable:
- Start by identifying the source of your internet connection and where you want it to reach.
- Examine the existing infrastructure, such as baseboards, walls, or ceilings, to determine the most practical route for your cable.
- Take into account the proximity to power outlets and any potential interference from other electrical devices.
Mapping out potential obstacles and challenges:
- Look for potential obstacles that might obstruct the cable’s path, such as heavy furniture, doorways, or fixtures.
- Consider any architectural features, like arches or columns, that might require a different approach to concealment.
- Take measurements and make notes of any challenges you might encounter, ensuring you have the right tools and materials to overcome them.
Remember, careful planning is key to a successful cable concealment project. By assessing the space and layout of your home or office, determining the best cable path, and mapping out potential obstacles, you can ensure a seamless and hidden ethernet cable installation.
Happy concealing!
Concealment Methods
Ethernet cables can be discreetly hidden using various concealment methods, ensuring a clean and organized appearance without compromising on connectivity. Explore practical tips and tricks for concealing Ethernet cables in a seamless and effective manner.
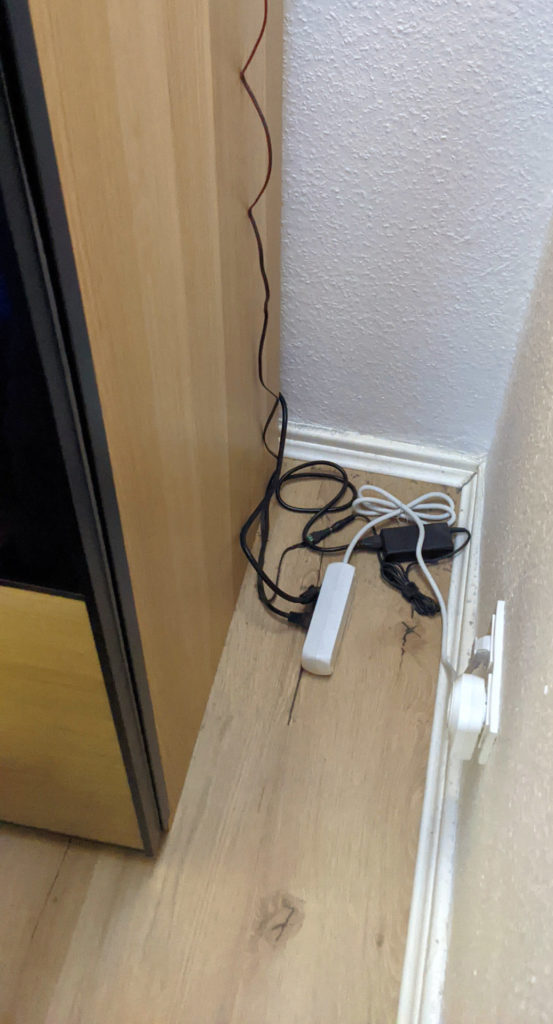
Concealing Cables Behind Baseboards:
- One common and effective method to hide an Ethernet cable is to conceal it behind baseboards. This method involves running the cable along the edge of the baseboard and securing it in place.
- To hide the cable behind the baseboard, follow these steps:
- Remove the baseboard: Carefully remove the baseboard using a putty knife or similar tool. Take caution not to damage the wall or baseboard.
- Create a groove: Use a router or a chisel to create a groove along the backside of the baseboard, where you will route the Ethernet cable.
- Insert the cable: Position the Ethernet cable into the groove and make sure it fits snugly. Ensure that the cable is long enough to reach the desired destination.
- Secure the baseboard: After inserting the cable, reattach the baseboard to the wall. Be careful not to pinch or damage the cable during this step.
- Concealing cables behind baseboards is a simple and effective way to keep your Ethernet cable hidden from view. This method not only maintains a neat appearance but also protects the cable from potential damage.
Using Cable Raceways Or Conduits:
- Another popular option for hiding Ethernet cables is using cable raceways or conduits. These are plastic channels that provide a safe and organized route for cables.
- Here’s how you can use cable raceways or conduits to hide your Ethernet cable:
- Plan the route: Determine the path you want the cable to take and plan accordingly. Consider the length and number of raceways or conduits you will need.
- Attach the raceway or conduit: Use adhesive or screws to attach the raceway or conduit to the wall. Make sure it is aligned with the desired path.
- Insert the cable: Place the Ethernet cable inside the raceway or conduit. Ensure that it is properly positioned and doesn’t have any kinks or bends that could affect performance.
- Secure and conceal: Once the cable is inside the raceway or conduit, secure it in place using clips or cable ties. Conceal the raceway or conduit by painting it the same color as the wall or choosing a color that blends in.
- Using cable raceways or conduits not only hides the Ethernet cable but also protects it from potential damage. This method provides a clean and professional look to your space.
Installing In-Wall Cable Management Systems:
- If you prefer a more permanent and professional-looking solution, you can install in-wall cable management systems to hide your Ethernet cable.
- Follow these steps to install an in-wall cable management system:
- Plan and prepare: Determine the best location for the cable management system, considering the accessibility and aesthetics. Gather the necessary tools and materials for installation.
- Cut the opening: Use a drywall saw or similar tool to cut an opening in the wall where you want to install the cable management system.
- Install the system: Insert the cable management system into the opening and secure it in place. Follow the manufacturer’s instructions for proper installation.
- Route the cable: Thread the Ethernet cable through the cable management system, ensuring it is securely in place. Be mindful of any sharp edges that could damage the cable.
- Close the opening: Once the cable is routed, close the opening in the wall. Repair any damage to the drywall and ensure a smooth finish.
- In-wall cable management systems offer a clean and seamless way to hide Ethernet cables. The cables are neatly routed within the walls, providing a professional and clutter-free appearance to your space.
By following these concealment methods, you can effectively hide your Ethernet cable while maintaining a clean and organized space. Choose the method that best suits your needs and enjoy a tidy and professional-looking setup.
Concealing Cables Behind Baseboards
Learn how to hide an Ethernet cable by concealing it behind baseboards. This simple method allows you to keep your cables neat and out of sight, creating a clean and organized look for your home or office.
Hiding Ethernet cables behind baseboards is an effective way to keep them out of sight while still maintaining a neat and organized appearance. With a few simple steps, you can easily conceal those unsightly cables and enjoy a clutter-free environment.
Here’s how:
Removing The Baseboards:
- Carefully inspect the area where you intend to hide the Ethernet cable. Make sure the baseboards are securely attached to the wall.
- Using a flathead screwdriver or a pry bar, gently pry the baseboard away from the wall. Take your time to avoid causing any damage.
- Continue removing the baseboard along the desired path where you plan to run the cable. Be cautious not to break or crack the baseboards during this process.
Laying And Securing The Ethernet Cable:
- Once the baseboards have been removed, plan the route for the Ethernet cable behind them. Consider the length of the cable and the locations where it needs to connect.
- Carefully position the Ethernet cable along the path, making sure it is flat against the wall and not causing any bulges.
- Use cable clips or adhesive cable holders to secure the cable in place. These can be attached to the wall or baseboard using screws or adhesive backing.
- Run the cable along the desired route, making adjustments as necessary to ensure it is hidden from view and does not interfere with any doors or windows.
Reattaching The Baseboards:
- Before reattaching the baseboards, double-check that the Ethernet cable is securely in place and the desired route has been achieved.
- Align the baseboard with the wall and carefully push it back into position. Take care to avoid damaging the cable during this process.
- Once the baseboard is in place, use a hammer and finishing nails to reattach it to the wall. Drive the nails into the existing nail holes if possible to maintain a seamless appearance.
- Repeat this process for each section of baseboard that you removed.
By following these simple steps, you can easily hide an Ethernet cable behind baseboards, keeping your space tidy and ensuring a clean and professional look. So go ahead, conceal those cables and enjoy a clutter-free environment!
Using Cable Raceways Or Conduits
Learn how to hide an Ethernet cable with cable raceways or conduits. These practical solutions make it easy to conceal unsightly cables and create a clean and organized look in your home or office. Say goodbye to tangled wires and hello to a clutter-free space.
If you want to hide an Ethernet cable effectively, using cable raceways or conduits is a great option. These solutions allow you to conceal the cable neatly along walls or ceilings, preventing it from being an eyesore. Here’s a step-by-step guide on how to utilize cable raceways or conduits to hide your Ethernet cable:
Identifying The Appropriate Raceway Or Conduit
- Measure the length of the Ethernet cable you plan to hide to determine the size and type of raceway or conduit you need.
- Select a raceway or conduit that is suitable for your specific environment, whether it’s for indoor or outdoor use.
- Consider the color of the raceway or conduit, ensuring it matches or blends well with the surrounding surface.
Applying The Raceway Or Conduit On Walls Or Ceilings
- Clean the surface where you want to install the raceway or conduit, making sure it is free from dust and debris.
- Cut the raceway or conduit to the desired length using a hacksaw or appropriate cutting tool.
- Use a level tool to ensure the raceway or conduit is straight before securing it to the surface.
- Adhere the raceway or conduit to the wall or ceiling using strong adhesive tape or mounting brackets, following the manufacturer’s instructions.
Running The Ethernet Cable Through The Raceway Or Conduit
- Insert one end of the Ethernet cable into the raceway or conduit entry point.
- Feed the cable through the raceway or conduit, making sure it is properly aligned and doesn’t have any kinks or twists.
- If necessary, use cable clips or ties to secure the Ethernet cable within the raceway or conduit, ensuring it stays in place.
- Once the cable is successfully guided through the entire length of the raceway or conduit, plug the other end into the appropriate device or wall outlet.
By utilizing cable raceways or conduits, you can hide your Ethernet cable effectively and maintain a visually appealing environment. Remember to choose a raceway or conduit that suits your needs, properly apply it to the intended surface, and carefully run the cable through it to ensure seamless concealment.
Installing In-Wall Cable Management Systems
Installing In-Wall Cable Management Systems is an effective way to hide an Ethernet cable. With this solution, you can discreetly route the cable through walls, keeping your space organized and cables out of sight. Say goodbye to the clutter and unsightly cables with this easy to install system.
Locating The Access Points For In-Wall Cable Management
- Begin by identifying the areas where you want to install the in-wall cable management system. It could be behind your entertainment center, office desk, or any other location where you need to conceal the Ethernet cable.
- Look for the nearest power outlet or existing cable access point in the wall near the desired installation area.
- Check if there are any obstacles such as pipes or electrical wires that could hinder the installation process.
- Use a stud finder to locate the wall studs or any other structural supports that you can utilize for securing the cable management system.
Installing The Cable Management System
- Before starting the installation, gather all the necessary tools such as a level, measuring tape, screwdriver, and drywall saw.
- Measure the length of the Ethernet cable and add a few extra feet to ensure it reaches the desired access point.
- Use a drywall saw to create access points in the wall where you want to install the cable management system.
- Attach the cable management system to the wall using screws or adhesive, ensuring proper alignment and stability.
- Feed the Ethernet cable through the access points and secure it to the cable management system, making sure it is taut and out of sight.
- Use a level to ensure the cable management system is properly aligned and adjust as needed.
Concealing The Ethernet Cable Within The Walls
- Once the cable management system is installed, cover the access points in the wall with wall plates or wall-mounted cable concealers for a clean and professional look.
- Paint or decorate the wall plates or wall-mounted cable concealers to match your room’s decor or blend seamlessly with your walls.
- Ensure that the Ethernet cable is neatly organized within the cable management system to avoid any tangling or interference.
- Test the Ethernet cable connection to ensure it is working correctly after concealing it within the walls.
- Enjoy a clutter-free and aesthetically pleasing space, knowing that your Ethernet cable is hidden out of sight.
Remember, it’s essential to plan and execute the installation carefully to avoid any damage or complications. With an in-wall cable management system, you can maintain a tidy space while enjoying a reliable and hidden Ethernet connection.
Tips For A Clean And Professional Finish
Discover simple yet effective tips to achieve a clean and professional finish when hiding an Ethernet cable. From creatively concealing it along baseboards to utilizing cable management solutions, these expert suggestions will ensure a tidy and seamless setup without compromising your home or office decor.
Whether you’re setting up a home office or simply looking to tidy up your living space, concealing an Ethernet cable is a great way to achieve a clean and professional look. By hiding the cable, you can minimize clutter and create a seamless aesthetic.
In this section, we’ll explore some useful tips to help you achieve a tidy and professional finish when hiding an Ethernet cable.
Ensuring Proper Cable Length For A Tangle-Free Installation:
- Measure the distance: Before concealing the cable, measure the distance between the network device and the destination point. This will help you determine the appropriate length of Ethernet cable required.
- Opt for extra length: It’s always a good idea to add some extra length to the measured distance. This ensures that you have enough slack to work with and allows for flexibility in case you need to reposition or adjust the cable in the future.
- Avoid tangling: To prevent potential tangles, make sure the cable is not overly long. Excessive length can lead to loops and knots, which may affect the signal quality and overall performance.
Using Cable Clips Or Ties To Secure The Concealed Cable:
- Cable clips: Use cable clips to secure the Ethernet cable along the desired pathway. These clips can be easily attached to walls, baseboards, or furniture, providing a sturdy and concealed route for the cable.
- Cable ties: Alternatively, you can bundle the Ethernet cable together using cable ties. This helps keep the cable neat and prevents it from coming apart or becoming tangled.
- Concealment options: Depending on the setup and the location, you can explore different concealment options such as running the cable along baseboards, behind furniture, or inside cable channels. This ensures a clean and unobtrusive appearance.
Testing The Ethernet Connection After Concealing The Cable:
- Verify connectivity: Once you have hidden the Ethernet cable, it is important to test the connection to ensure everything is working as expected. Connect your device to the network and check for a stable and reliable connection.
- Speed and performance: Test the speed and performance of the Ethernet connection to ensure there are no disruptions or slowdowns. This will help you identify any possible issues and make adjustments if needed.
- Troubleshooting: If you experience any connectivity problems after concealing the cable, check for any loose or damaged connections. Ensure that all connectors are securely attached and that the cable is not pinched or bent excessively.
By following these tips, you can achieve a clean and professional finish when hiding an Ethernet cable. Remember to plan the cable length properly, use cable clips or ties for secure installation, and test the connection for optimal performance. With a well-concealed cable, you can maintain a clutter-free environment while enjoying reliable network connectivity.
Frequently Asked Questions For How To Hide An Ethernet Cable
How Do You Organize And Hide Ethernet Cable Perfectly?
To perfectly organize and hide Ethernet cables, use cable management solutions like cable clips, cable sleeves, and cable ties for a neat and tidy appearance.
How Do I Hide The Ethernet Cable Across My Hallway?
To hide an Ethernet cable across your hallway, try these tips: Use cable covers, run the cable along baseboards or under carpets, use adhesive cable clips, or hide it behind furniture.
How Do You Hide A 100 Foot Ethernet Cable?
To hide a 100-foot Ethernet cable, you can conceal it along baseboards, under carpets, or inside cable management systems.
How Do I Run Ethernet Through Walls?
To run Ethernet through walls, follow these steps: 1. Plan the route and ensure you have the necessary tools. 2. Locate the studs and use a stud finder to avoid damaging the wall. 3. Drill holes at the desired locations to pass the Ethernet cable through.
4. Feed the cable through the holes and secure it using cable staples or clips.
Conclusion
Hiding an Ethernet cable can be easily accomplished with a few simple and creative techniques. By utilizing existing infrastructure, such as baseboards, ceiling corners, or electrical conduits, you can seamlessly integrate the cable into your home or office space. Alternatively, you can explore the various options available in the market for cable management solutions, such as cable covers, adhesive clips, or cable sleeves, enabling you to maintain a clean and organized environment without sacrificing functionality.
Remember to plan ahead, measure your cable length, and consider the specific needs of your space in order to achieve the best results. With these strategies, you can enjoy a clutter-free and visually appealing space, while ensuring a reliable and fast internet connection.
So, go ahead and hide those unsightly cables, and enjoy the benefits of a well-designed and efficient living or working space.