How to Enclose a Pole Barn
There are a few things to consider when enclosing a pole barn. First, decide what the purpose of the enclosure will be. Will it be for storage, livestock, or both?
Once you know the purpose, you can better determine the type and amount of materials needed. For example, if you’re enclosing a pole barn for storage, you’ll need more sturdy materials than if you’re just using it for livestock. You’ll also need to take into account the size of your pole barn and what type of roofing system it has.
After all these factors are considered, you can start to enclose your pole barn by adding walls and a ceiling.
- Decide on the size of your pole barn
- Purchase the necessary materials, including lumber, siding, roofing, and hardware
- Cut the lumber to size and build the frame for your pole barn
- Install the siding and roofing on your pole barn
- Add any additional features you desire, such as windows or doors
- Stand back and admire your handiwork!
Cheapest Way to Close in Pole Barn
If you’re looking for the cheapest way to close in a pole barn, there are a few options available to you. One option is to simply use tarps or plastic sheeting to cover the opening. This will provide a barrier against the elements, but won’t do much to insulate the space or keep out pests.
Another option is to install plywood or OSB panels over the opening. This will provide better insulation and protection from the elements, but will be more expensive than using tarps or plastic sheeting.
You could also choose to install a garage door over the opening.
This will provide the best protection from the elements and pests, but will be the most expensive option.
Whatever option you choose, make sure that you take into consideration the climate where your pole barn is located and how often it will be used. That way, you can choose an appropriate solution that fits your budget and needs.
Diy Post Frame Building
Are you considering a post frame building for your next project? If so, you’re in luck! Post frame construction is an excellent diy project for those with some basic carpentry skills.
In this blog post, we’ll provide detailed instructions on how to build a post frame structure, from start to finish.
Building a post frame structure is relatively simple and straightforward. The first step is to select a level spot on which to construct your foundation.
Once the location is selected, you’ll need to excavate the area and pour concrete footings. Next, you’ll install the posts and beams that form the framework of the building. Finally, you’ll add the roofing, siding, and any other finishing touches.
If you follow these steps carefully, you’ll end up with a high-quality post frame building that will serve whatever purpose you need it to. So what are you waiting for? Get started on your project today!
Pole Barn Kits
Are you thinking about building a pole barn? If so, you may be wondering if you should buy a pole barn kit. There are pros and cons to buying a kit, and the decision ultimately comes down to personal preference.
If you decide to purchase a pole barn kit, there are several things to keep in mind. First, make sure that you select a reputable company that offers high-quality materials. It’s also important to choose a size that will accommodate your needs – both now and in the future.
Once you have the kit delivered, take the time to carefully review the instructions before beginning assembly. And finally, don’t hesitate to ask for help if you need it!
There are several advantages to buying a pole barn kit.
Perhaps the biggest benefit is that it can save you time and money. When everything is included in one package, it eliminates the need for multiple trips to the hardware store (and back). Kits also tend to be more affordable than purchasing all of the materials separately.
And because they’re designed for easy assembly, most people can put them together without any outside assistance.
Of course, there are some drawbacks to consider as well. One potential downside is that kits may not include everything you need (or want) for your project.
For instance, they might not come with windows or doors – which means you’ll have to purchase those items separately (and install them yourself). Additionally, because kits are mass-produced, they might not offer as much flexibility in terms of design and customization. But if you’re okay with those trade-offs, then a pole barn kit could be a great option for your next project!
How to Build a 30X50 Pole Barn
A 30X50 pole barn can be a great addition to any property. Whether you need extra storage space for your farm equipment or a place to shelter your livestock, this size of pole barn can provide plenty of room. But how do you go about building one?
Here are the basics:
First, you’ll need to decide where on your property you want to build the pole barn. Once you have a location picked out, it’s time to start excavating.
You’ll need to dig post holes that are at least 8 feet deep and 18 inches in diameter. Once the holes are dug, you can begin setting the posts in concrete. Be sure that the posts are level as you set them so that your barn will be stable once completed.
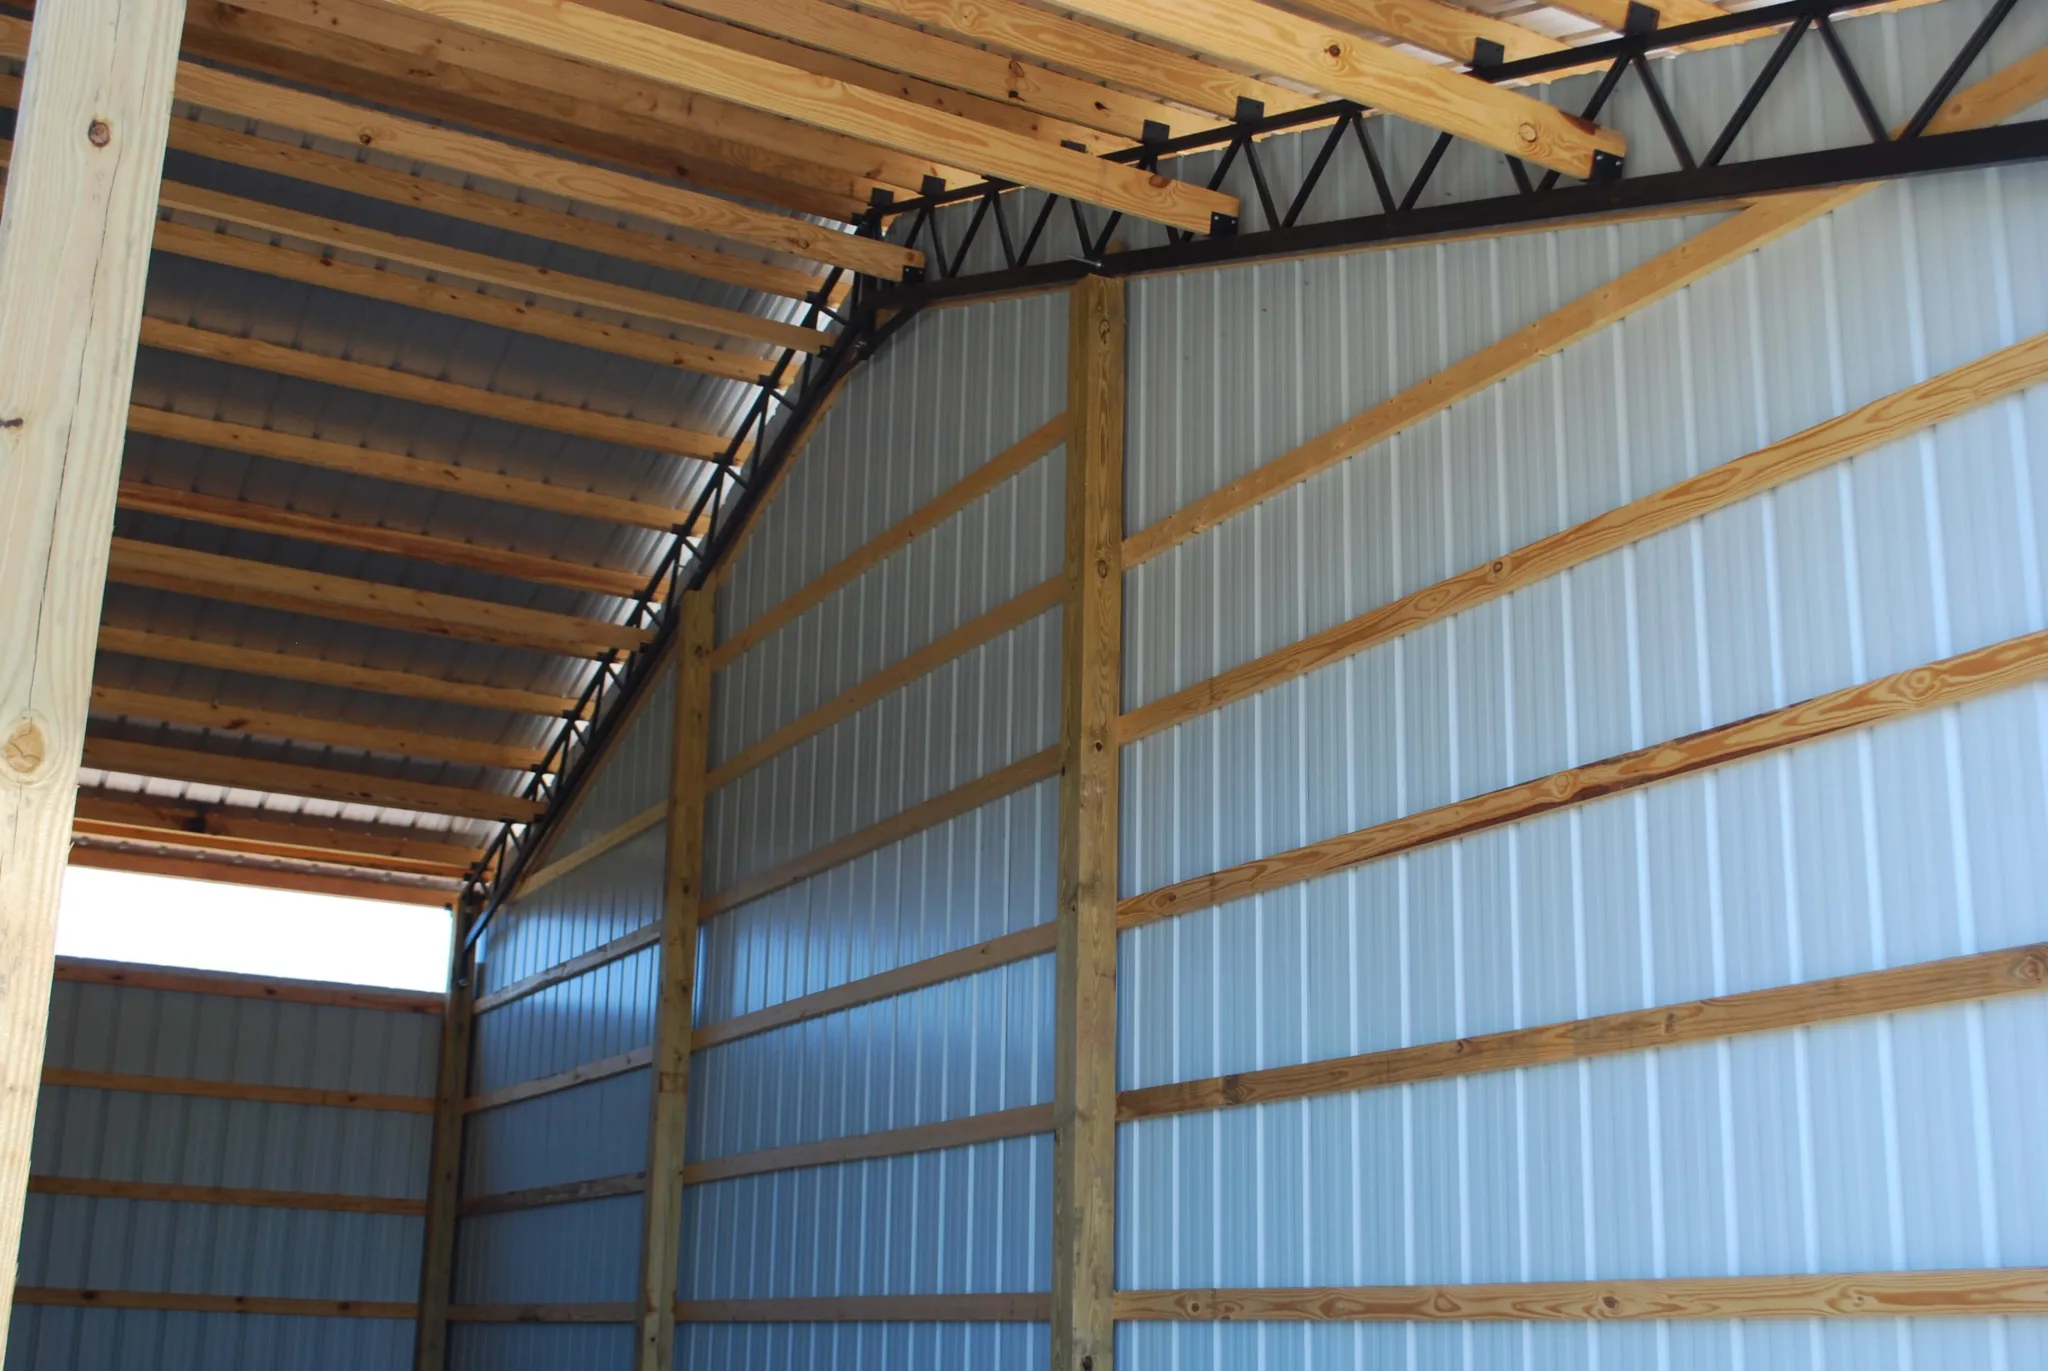
After the posts are set, it’s time to start framing the walls and roof. For a 30X50 pole barn, you’ll likely want to use trusses for the roof which will require additional support beams running along the length of the ceiling joists. When framing the walls, be sure to leave openings for doors and windows as desired.
You can also add insulation between the wall studs before enclosing everything with siding or other materials.
Once the walls and roof are framed, it’s time to work on finishing touches like doors, windows, and exterior finishes. For a basic pole barn, metal siding or simple wood boards may be all that’s needed but there are endless possibilities when it comes to dress up the outside of your new structure!
How to Build a Pole Barn Shop
Are you thinking about building a pole barn shop? This is an excellent idea if you need extra space for your business or hobby. Here are some tips to help you get started:
1. Choose the right location. The first step is to choose a level spot for your pole barn shop. You’ll also want to make sure that the area is large enough to accommodate the size of structure you have in mind.
2. Gather the necessary materials. Once you have a location picked out, it’s time to start gathering materials. You’ll need things like lumber, metal roofing, and siding panels.
If you’re not sure where to find these items, your local hardware store can point you in the right direction.
3. Assemble the frame. The next step is to assemble the frame of your pole barn shop using the lumber and other materials you’ve gathered.
Make sure everything is square and level before moving on to the next step.
4. Add the roof and siding panels.
Credit: tooltimebuildings.com
How Do You Build an Enclosed Pole Barn?
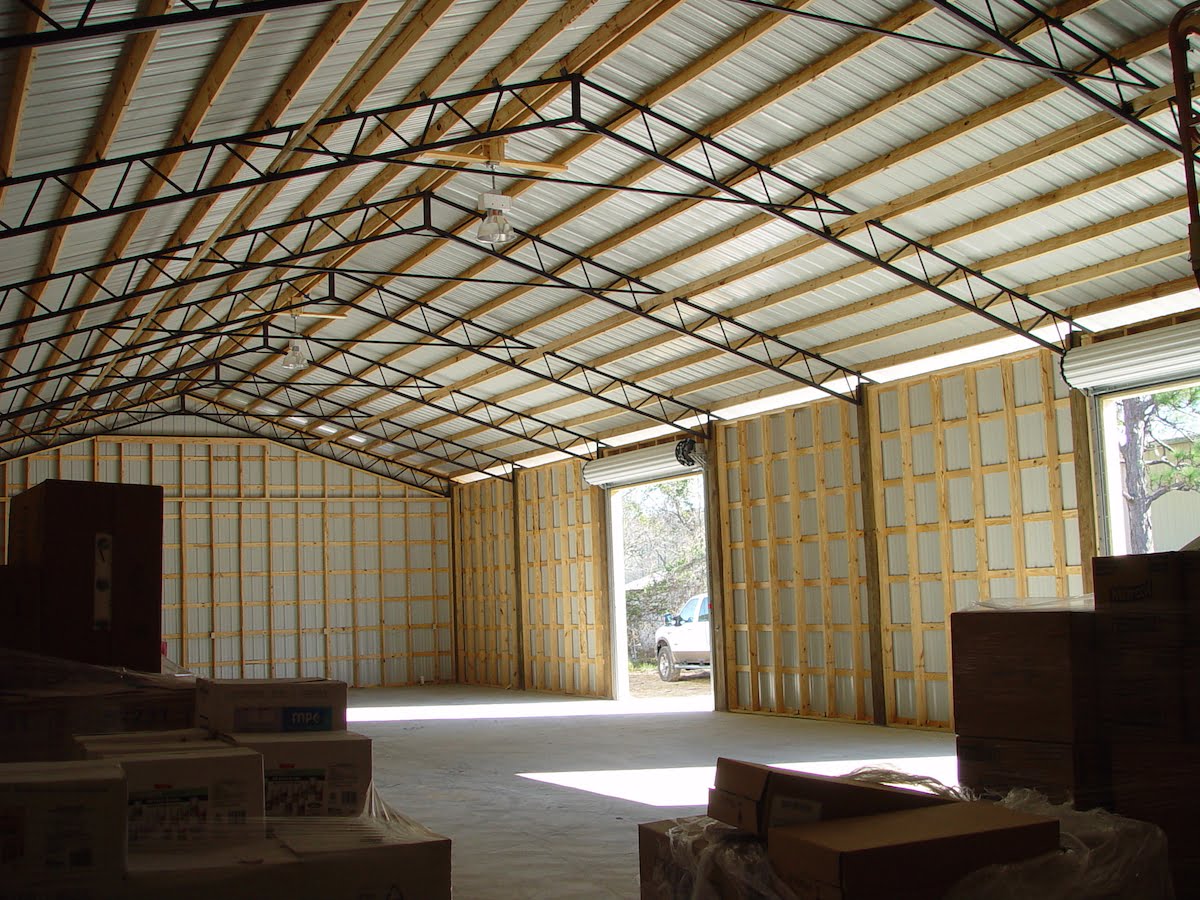
Building an enclosed pole barn is a great way to add storage space or shelter for animals. The process is relatively simple and can be completed in a few days. Here are the steps you need to take to build an enclosed pole barn:
1. Choose a level spot for your barn. You’ll need to excavate the area and remove any obstacles like large rocks or trees.
2. Install your poles.
These should be set in concrete at least two feet deep.
3. Add crossbeams and rafters for support. Make sure these are securely fastened to the poles.
4. Cover the frame with plywood or metal siding panels. Seal all seams and joints with caulk or weatherstripping to keep out moisture and pests.
5 .
How Do You Finish the Inside of a Pole Barn Wall?
If you’re looking to finish the inside of a pole barn wall, there are a few different options you can choose from. You can either go with a traditional drywall finish, or opt for something more unique like tongue and groove paneling. Whichever route you decide to take, make sure you follow these tips to ensure a professional-looking finished product.
Start by installing furring strips on the studs. This will give you something to attach the finish material to. Next, measure and cut your panels or sheets of drywall to fit.
If you’re using tongue and groove paneling, make sure the pieces fit tightly together before nailing them into place. Once everything is cut and in position, start attaching it to the furring strips with screws or nails.
If you’re going with drywall, apply joint compound to all the seams and corners, then sand smooth once it’s dry.
Prime and paint the walls as desired once the joint compound is completely dry. If you chose tongue and groove paneling, simply apply a coat of stain or paint before hanging it up on the wall.
Whichever route you decide to take, following these steps will help ensure a professional-looking finish on your pole barn walls!
What Keeps Pole Barn Posts from Rotting?
When constructing a pole barn, one of the main concerns is ensuring that the posts do not rot. There are a few key things that you can do to help prevent this from happening.
One of the most important things to do is to use pressure-treated lumber for the posts.
This lumber has been treated with chemicals that help protect it from rot and pests.
Another thing you can do is to set the posts in concrete. This will help to keep them from shifting and also make it more difficult for water and pests to access the wood.
You should also consider adding a layer of protection around the base of the post. This could be something like gravel or mulch, which will help keep moisture away from the wood.
Finally, make sure that your roofing materials extend past the edge of your posts so that water does not have a chance to run down the wood and cause rot.
Can You Put Drywall in a Pole Barn?
You can put drywall in a pole barn, but there are a few things you need to take into consideration before doing so. First, the height of the ceiling in your pole barn will dictate how much drywall you’ll need to purchase. Second, you’ll need to make sure the framing of your pole barn is sturdy enough to support the weight of the drywall.
Third, you’ll need to install furring strips on the walls of your pole barn before hanging the drywall. And finally, you’ll need to use longer screws than usual when attaching the drywall to the furring strips.
Building a Custom Pole Barn with Work shop | Enclosing a Pole Barn | E78
Conclusion
Building an enclosed pole barn is a great way to add storage or workshop space to your property. There are a few things to consider when enclosing a pole barn, such as the type of foundation, walls, and roof you want. Once you have a plan in mind, enclosing a pole barn is a relatively easy project that can be completed in a weekend.