To connect a Brother printer to WiFi, follow the steps provided in the printer’s manual or on the Brother website. Modern printers often come with built-in WiFi capabilities, allowing you to print wirelessly from your computer or mobile devices.
However, the process of connecting your Brother printer to WiFi may vary depending on the model. By following the steps in the printer’s manual or on the Brother website, you can easily connect your printer to your WiFi network. Once connected, you can enjoy the convenience of printing without the need for direct cable connections.
We will guide you through the process of connecting your Brother printer to WiFi, ensuring a seamless printing experience.

Credit: medium.com
Prepare Your Brother Printer
To connect your Brother printer to Wi-Fi, you need to prepare it properly. This includes checking compatibility, connecting the power cord, and installing ink cartridges. With these steps, you’ll have your printer ready to connect to your Wi-Fi network.
Check Compatibility
Before you start, it’s important to ensure that your Brother printer is compatible with wireless connectivity. Check the printer’s user manual or the manufacturer’s website for information on Wi-Fi compatibility. If your printer model supports wireless connection, then you’re good to go!
Connect Power Cord
Next, connect your Brother printer to a power source. Plug in the power cord securely into the printer and then connect the other end to a power outlet. Make sure the power source is stable and reliable to avoid any interruption during the setup process.
Install Ink Cartridges
Now, it’s time to install the ink cartridges in your Brother printer. Open the printer cover by lifting it gently. Locate the ink cartridge slots and carefully insert each cartridge into its corresponding color slot. Ensure that each cartridge is securely placed to avoid any leaks or printing issues.
Once all the cartridges are installed, close the printer cover firmly. Your Brother printer is now prepared and ready for the next step in connecting it to Wi-Fi.

Credit: www.amazon.com
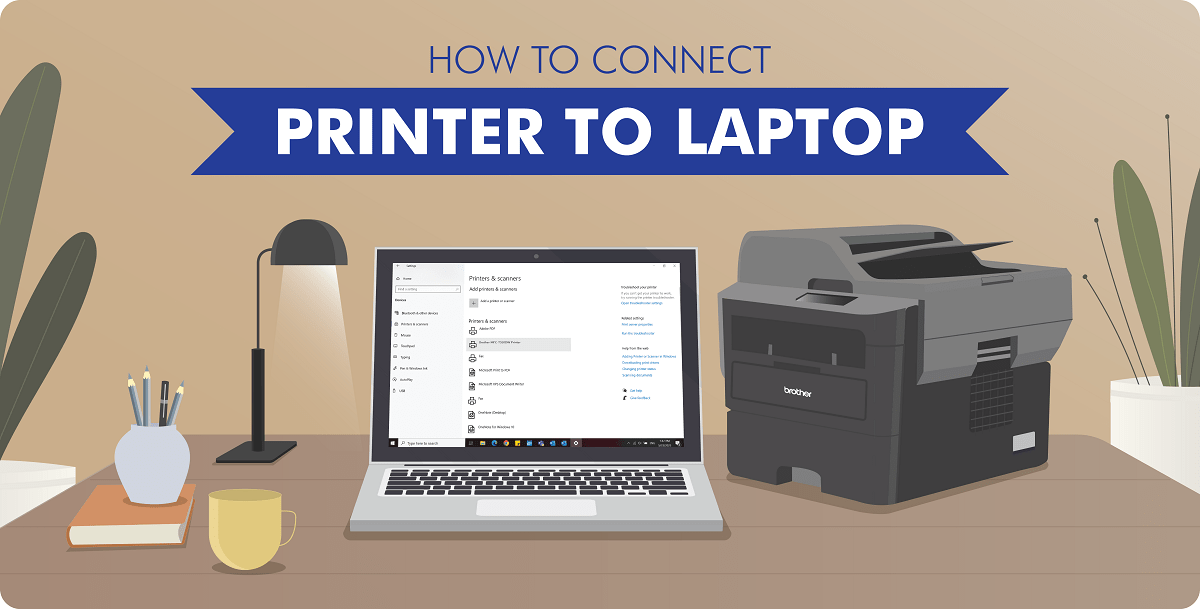
Connect Brother Printer To Wifi
Setting up your Brother printer to connect to your WiFi network is essential for easy and convenient printing. Follow the step-by-step guide below to connect your Brother printer to WiFi.
Check Network Connection
Before connecting your Brother printer to WiFi, make sure that your printer and computer are connected to the same network. Follow these simple steps to check the network connection:
- Turn on your Brother printer.
- On the printer’s control panel, navigate to the Network or Wireless menu.
- Select WLAN or Network option.
- Choose WLAN Status or Network Status.
- The WLAN Status or Network Status should indicate that the printer is connected to your network.
If your printer is not connected to the network, find detailed instructions in the printer’s manual or contact Brother’s customer support for further assistance.
Access Network Settings
Once you have confirmed that your Brother printer is connected to the network, it’s time to access the network settings.
- Open a web browser on your computer.
- In the address bar, enter the IP address of your Brother printer. You can find the IP address in the printer’s settings or by printing a network configuration report.
- Press Enter to access the printer’s web interface.
- In the web interface, navigate to the Network Settings or Wireless Settings section.
Select Wifi Network
After accessing the network settings, you need to select your WiFi network from the list of available networks.
- In the network settings, look for the SSID or Network Name field.
- Click on the dropdown menu to see a list of available WiFi networks.
- Select your WiFi network from the list.
Enter Wifi Password
Finally, you’ll need to enter the WiFi password to complete the connection process.
- Locate the Password or Security Key field in the network settings.
- Click on the field and enter your WiFi password.
- Double-check that the password is entered correctly.
- Click Save or Apply to save the network settings.
Your Brother printer is now connected to your WiFi network. You can now enjoy the convenience of wirelessly printing from your computer or mobile devices.
Troubleshooting
Having trouble connecting your Brother printer to wifi? Don’t worry, we’ve got you covered. In this troubleshooting guide, we’ll walk you through some common issues and provide easy solutions to help you get your printer up and running in no time. Whether you’re experiencing weak wifi signals, network connection problems, or need to update your printer’s firmware, we’ll take you step by step through the process. Let’s get started!
Check Wifi Signal
If you’re having trouble connecting your Brother printer to wifi, the first thing you should check is the strength of your wifi signal. A weak signal can cause connectivity issues and lead to a frustrating printing experience. To check the wifi signal strength, follow these simple steps:
- Ensure that your printer is within range of your wifi router. Move the printer closer to the router if necessary.
- Check if other devices can connect to the wifi network. If they can, it’s likely that the issue lies with the printer’s settings.
- Restart your printer and wifi router. Sometimes, a simple reboot can fix the problem.
- If the signal is still weak, consider using a wifi range extender or relocating your wifi router to improve coverage.
Reset Network Settings
If checking the wifi signal did not solve the issue, the next step is to reset the network settings on your Brother printer. Here’s how you can do it:
- On the printer’s control panel, navigate to the Network Settings or Network Reset option.
- Select the option to reset the network settings.
- Follow the on-screen instructions to complete the reset process.
- After the reset, reconnect your printer to the wifi network using the printer’s control panel.
Update Firmware
Outdated firmware can cause compatibility issues and prevent your Brother printer from connecting to wifi. To update the firmware, follow these simple steps:
- Visit the Brother support website and search for your printer model.
- Download the latest firmware update for your printer.
- Connect your printer to your computer using a USB cable.
- Open the firmware update tool provided by Brother.
- Follow the on-screen instructions to update the firmware of your printer.
By following these troubleshooting steps, you should be able to connect your Brother printer to wifi and enjoy a seamless printing experience. If you’re still facing issues, it’s recommended to contact Brother customer support for further assistance. Happy printing!
Print A Test Page
Learn how to connect your Brother printer to Wi-Fi easily with our step-by-step guide. Follow the instructions to print a test page and ensure a successful wireless connection.
So, you have successfully connected your Brother printer to Wi-Fi. What’s next? It’s time to print a test page to ensure the connection is working properly. Printing a test page helps you verify if your Brother printer is set up correctly and if you can send print jobs wirelessly from your devices. In this section, we will guide you through the process of printing a test page, step by step.
Verify Connection
Before proceeding to print a test page, it’s essential to make sure that your Brother printer is properly connected to your Wi-Fi network. To verify the connection, follow these simple steps:
- Check if the Wi-Fi indicator light on your Brother printer is solid or blinking, indicating a successful connection.
- If the Wi-Fi light is off or not blinking, check the printer’s display panel for any error messages related to the connection.
- If there are no error messages, try restarting your Brother printer and make sure it is within the range of your Wi-Fi router.
- If the problem persists, consult your Brother printer’s user manual or visit their official website for further troubleshooting steps.
Print A Document
Now that you have verified the Wi-Fi connection, it’s time to print a document using your Brother printer. To print a document, follow these steps:
- Make sure your computer or mobile device is connected to the same Wi-Fi network as your Brother printer.
- Open the document you want to print and go to the Print option.
- Select your Brother printer from the list of available printers.
- Adjust any printing settings, such as paper size, print quality, or number of copies.
- Click on the Print button to send the document to your Brother printer wirelessly.
- Wait for the print job to complete and collect your printed document from the printer’s output tray.
Congratulations! You have successfully printed a test page and a document using your Brother printer over Wi-Fi. Now you can enjoy the convenience and flexibility of wireless printing from any device connected to your Wi-Fi network.
Additional Tips
Connecting your Brother printer to WiFi is simple with these additional tips. Enjoy a hassle-free setup process and seamless wireless printing experience.
Use Wps Method
Connecting your Brother printer to Wi-Fi using the WPS (Wi-Fi Protected Setup) method is a quick and convenient option. It allows you to connect your printer without the need for a password or network name. Here’s how you can do it:- Make sure your printer is turned on and in a ready state.
- Locate the WPS button on your Wi-Fi router.
- Press and hold the WPS button on your router for a few seconds.
- Within two minutes, press the WPS button on your Brother printer.
- The Wi-Fi LED on your printer should start blinking, indicating that it’s searching for the network.
- Once the connection is established, the Wi-Fi LED will stop blinking and remain lit.
- Test the connection by printing a test page from your computer or any other device connected to the same network.
Set Up A Static Ip Address
Setting up a static IP address for your Brother printer ensures a more stable and reliable connection to your Wi-Fi network. Here’s how you can set it up:- Access your printer’s web-based management page by typing the printer’s IP address into your web browser.
- Enter the login credentials for your printer.
- Navigate to the network settings or TCP/IP settings section.
- Select the option to set a static IP address.
- Enter the IP address, subnet mask, and default gateway provided by your network administrator or ISP.
- Save the changes and restart your printer.
- Wait for your printer to reconnect to the network using the new static IP address.
- To verify the connection, print a test page from your computer or any other device connected to the network.
Credit: www.brother.in
Frequently Asked Questions On How To Connect Brother Printer To Wifi
How Can I Connect My Brother Printer To Wifi?
To connect your Brother printer to wifi, first make sure your router is on and working. Then, go to the printer’s settings menu and select “Network. ” Choose the wifi network you want to connect to and enter the password if prompted.
The printer should now be connected to wifi.
What Should I Do If My Brother Printer Won’t Connect To Wifi?
If your Brother printer won’t connect to wifi, there are a few troubleshooting steps you can try. First, make sure your printer is within range of the wifi signal. Check that the wifi network name and password are entered correctly.
You can also try restarting both your printer and router. If all else fails, consult your printer’s manual or contact Brother support.
Can I Connect My Brother Printer To Wifi Without A Computer?
Yes, you can connect your Brother printer to wifi without a computer. Most Brother printers have a built-in wifi menu that allows you to connect directly to your wireless network. Simply access the printer’s settings menu and select “Network. ” Choose the wifi network you want to connect to and enter the password if prompted.
The printer should now be connected to wifi.
Conclusion
Connecting your Brother printer to WiFi is a simple yet essential task that ensures seamless printing experience. By following the step-by-step instructions mentioned in this blog post, you can easily connect your printer to WiFi and enjoy the convenience of wireless printing.
With this capability, you can print from any device connected to the same WiFi network, making printing hassle-free and efficient. So, go ahead, follow the instructions, and enjoy the benefits of wireless printing with your Brother printer.