To clean the Gevi Ice Maker, simply follow these steps.

Credit: www.amazon.com
Preparing For Deep Cleaning
This short guide provides simple steps to effectively clean your Gevi Ice Maker, ensuring it is ready for optimal performance. From thorough cleaning to descaling, these tips will help you maintain a clean and efficient ice maker.
Gather The Necessary Cleaning Supplies
Before you begin deep cleaning your Gevi Ice Maker, it’s crucial to gather all the necessary cleaning supplies. Here’s a checklist of items you’ll need to get started:- Bowl or bucket to catch excess water
- Mild dish soap
- Vinegar
- Soft bristle brush or toothbrush
- Microfiber cloth or sponge
- Locate the power switch or button on your ice maker.
- Switch the ice maker to the “Off” position.
- Unplug the ice maker from the electrical outlet.
Turn Off And Unplug The Ice Maker
To ensure safety during the cleaning process, it’s important to turn off and unplug your Gevi Ice Maker. Follow these steps to do so: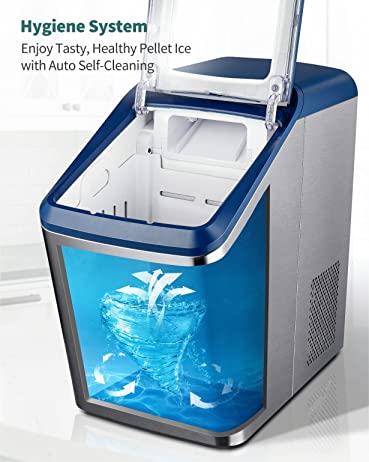
Credit: household.gevi.com
Cleaning The Exterior
To clean your Gevi Ice Maker, start by unplugging it and removing any ice from the storage bin. Then, wipe down the exterior with a damp cloth and mild detergent. Be sure to dry thoroughly before plugging it back in to ensure safe operation.
Start Your Response With An Introductory Paragraph About The ‘cleaning The Exterior’.
When it comes to maintaining the functionality and longevity of your Gevi Ice Maker, regularly cleaning the exterior is just as important as cleaning the interior. Dust, fingerprints, and spills can make your ice maker look dirty and unappealing. In this article, we will guide you on how to clean the exterior of your Gevi Ice Maker, leaving it looking shiny and new. Let’s dive into the step-by-step process to ensure your ice maker stays in top-notch condition.
Wipe Down The Exterior Surfaces
The first step in cleaning the exterior of your Gevi Ice Maker is to wipe down all the external surfaces. Start by unplugging the ice maker from the power source to ensure your safety during the cleaning process. Using a soft microfiber cloth or a sponge, dampen it with warm water and mild dish soap. Gently wipe the surfaces, including the top, sides, and front of the ice maker. Pay close attention to areas that are prone to spills and fingerprints.
Clean The Control Panel
The control panel of your Gevi Ice Maker is an essential part that requires regular cleaning to maintain its functionality. The control panel can collect dust and grime over time, affecting its performance. To clean the control panel, start by wiping it down with a soft, damp cloth to remove any visible dirt or debris. Avoid using excessive water or harsh chemicals as it may damage the panel. For stubborn stains or residue, use a gentle cleaner specifically formulated for electronic devices. Apply a small amount of the cleaner onto a clean cloth and gently wipe the control panel, ensuring not to press too hard or scrub vigorously.
Now that you have successfully cleaned the exterior of your Gevi Ice Maker, it’s important to maintain its cleanliness to keep it looking its best. Here are a few tips to help you maintain a clean and shiny exterior:
- Regularly clean the surfaces using a soft microfiber cloth or sponge
- Wipe down the control panel weekly to prevent dirt buildup
- Avoid using abrasive cleaners or harsh chemicals that can damage the exterior
- Immediately wipe off any spills or stains to prevent them from becoming permanent
- Keep the ice maker away from direct sunlight and high humidity areas to minimize the risk of damage
By following these simple steps and tips, you can ensure that your Gevi Ice Maker not only produces clean ice but also looks clean and well-maintained on the outside. Regular cleaning will not only enhance the appearance but also prevent any potential issues caused by dirt or debris buildup.
Cleaning The Interior
Properly cleaning the interior of your Gevi ice maker is essential for maintaining ice quality and preventing any potential build-up of dirt or bacteria. In this section, we will guide you through two crucial steps: removing and cleaning the ice bin and clearing ice buildup in the water line.
Remove And Clean The Ice Bin
To start cleaning the interior, you need to remove and clean the ice bin. Follow these simple steps:
- Power off the ice maker and unplug it from the power source.
- Remove the ice bin from the ice maker. Be careful not to spill any ice or water.
- Empty the ice from the bin and dispose of it properly.
- Wash the ice bin with mild soap and warm water. Scrub off any stubborn stains or residues.
- Rinse the bin thoroughly to ensure no soap remains.
- Dry the ice bin completely using a clean, lint-free cloth.
- Put the clean ice bin back into the ice maker, making sure it is properly aligned and securely in place.
- Plug the ice maker back in and turn it on.
Clear Ice Buildup In The Water Line
Ice buildup in the water line can interfere with the ice-making process and affect the quality of the ice. Here’s how you can clear it:
- Power off and unplug the ice maker to ensure safety.
- Locate the water line at the back of the ice maker.
- Disconnect the water line carefully.
- Inspect the water line for any visible ice buildup or blockages.
- If you find any ice, use a hairdryer on low heat to defrost it. Be gentle to avoid damaging the water line.
- Once the ice is melted, clean the water line with a soft brush or cloth.
- Reconnect the water line securely.
- Plug in the ice maker and turn it back on.
Regularly cleaning the interior of your Gevi ice maker not only ensures fresh and clean ice but also extends the life of your appliance. By following these simple steps, you’ll maintain optimal performance and enjoy a steady supply of ice for your beverages!
Descale The Ice Maker
Learn how to effectively clean your Gevi Ice Maker by descaling it. This simple process ensures that your ice maker stays in top condition, providing you with clean and refreshing ice cubes whenever you need them.
Prepare The Descaling Solution
To effectively descale your Gevi ice maker, you’ll need to prepare a descaling solution. This solution helps remove mineral deposits and limescale that can hinder the performance of your ice maker. Here’s what you need to do:- Start by preparing a mixture of equal parts of white vinegar and water. For example, you can use 1 cup of white vinegar and 1 cup of water.
- Pour the solution into a clean container or a spray bottle. Make sure the container is large enough to hold the entire mixture you’ve made.
Run The Descaling Cycle
Now that you have your descaling solution prepared, it’s time to run the descaling cycle on your Gevi ice maker. Follow these steps to ensure effective descaling:- Empty the ice bin and remove any ice cubes that may be present. Discard them or use them before they melt.
- Place a container or a bucket underneath the ice maker’s water outlet to catch the descaling solution.
- Pour the prepared descaling solution into the ice maker’s water reservoir. Make sure to fill it up to the recommended level.
- Press and hold the descaling button on the ice maker control panel. This will initiate the descaling cycle and start pumping the descaling solution through the system.
- Allow the descaling cycle to complete. This process usually takes about 30 minutes, but the specific duration may vary depending on your Gevi ice maker model.
- Once the descaling cycle is finished, dispose of the descaling solution by emptying the water reservoir. Rinse the reservoir thoroughly with clean water to remove any remaining traces of the solution.
- Refill the water reservoir with fresh water and run a few cycles to flush out any residue from the descaling process.
- Finally, wipe down the exterior of the ice maker with a damp cloth to remove any spills or residue. Your Gevi ice maker is now descaled and ready to produce clean and fresh ice cubes once again!
Regular Maintenance And Care
Regular maintenance and care is essential for keeping your Gevi Ice Maker clean and functioning properly. Follow these simple steps to ensure the best performance: regularly clean the ice maker with a mild detergent, remove any ice build-up, and rinse thoroughly.
Clean The Condenser Coils
To ensure optimal performance of your GEVI ice maker, regular cleaning of the condenser coils is essential. Over time, dust, dirt, and debris can accumulate on the coils, reducing their efficiency and leading to potential issues with ice production. Cleaning the condenser coils is a straightforward process that can be done in just a few simple steps. First, unplug the ice maker from the power source to prevent any accidents. Locate the condenser coils, which are usually located at the back or underneath the unit. Using a soft brush or a vacuum cleaner with a brush attachment, gently remove any visible dust or dirt from the coils. Be careful not to bend or damage the coils during the cleaning process. If there is stubborn dirt that cannot be removed with a brush or vacuum, a can of compressed air can be used to blow the debris out of the coils. Hold the canister upright and spray the air in short bursts, directing it towards the coils. This will help dislodge any trapped dirt particles. After cleaning the condenser coils, plug the ice maker back in and allow it to function as normal. Regularly cleaning the coils will keep your GEVI ice maker operating efficiently and extend its lifespan.Replace The Water Filter
In addition to cleaning the condenser coils, replacing the water filter is another crucial aspect of regular maintenance for your GEVI ice maker. The water filter plays an important role in ensuring clean and pure ice production by removing impurities and contaminants from the water. Over time, the filter can become clogged, affecting the taste and quality of the ice. Therefore, it is recommended to change the water filter every six months or according to the manufacturer’s instructions. To replace the water filter, start by turning off the ice maker and locating the filter housing. This is typically found on the back or inside the ice maker. Remove the old filter by twisting it counterclockwise and pulling it out. Before installing the new filter, make sure to remove any protective caps or seals. Insert the new filter into the housing and twist it clockwise until it locks into place. Ensure that it is securely installed to prevent any leaks. Once the new filter is in place, turn on the ice maker and run a few cycles to flush out any air or carbon residue. Regularly replacing the water filter will help maintain the purity and taste of your ice, ensuring a refreshing experience every time you use your GEVI ice maker.
Credit: www.walmart.com
Frequently Asked Questions Of How To Clean Gevi Ice Maker
How Do I Clean My Gevi Ice Maker?
To clean your Gevi ice maker, start by unplugging it and removing any ice cubes. Then, mix a solution of warm water and mild detergent. Use a soft cloth or sponge to wipe down the interior and exterior surfaces. Rinse with clean water and dry thoroughly before plugging it back in.
How Often Should I Clean My Gevi Ice Maker?
To keep your Gevi ice maker in optimal condition, it is recommended to clean it every 2-3 months. However, if you notice any build-up or foul odors, it’s best to clean it more frequently. Regular cleaning helps prevent bacteria growth and ensures the ice produced is clean and safe to consume.
Can I Use Vinegar To Clean My Gevi Ice Maker?
Yes, you can use vinegar to clean your Gevi ice maker. Mix equal parts of vinegar and water to create a cleaning solution. Apply the solution to the interior and exterior surfaces of the ice maker, and let it sit for a few minutes.
Then, rinse with clean water and dry thoroughly. Vinegar helps remove mineral deposits and disinfect the ice maker.
Conclusion
To ensure the proper functioning and longevity of your Gevi ice maker, regular cleaning is essential. By following the step-by-step guide provided in this blog post, you can easily clean your ice maker and keep it in optimal condition. Remember, a clean machine produces clean and fresh ice, adding to your overall enjoyment.
So, don’t neglect this simple maintenance task and enjoy hassle-free ice production for years to come.