How to Change Ip Address on Ps4
If you want to change your PS4’s IP address, it can be done in just a few steps. First, go to the Settings menu and select Network. Next, select Set Up Internet Connection and then select Use a LAN Cable.
Finally, choose Custom and enter in your new IP address. That’s all there is to it!
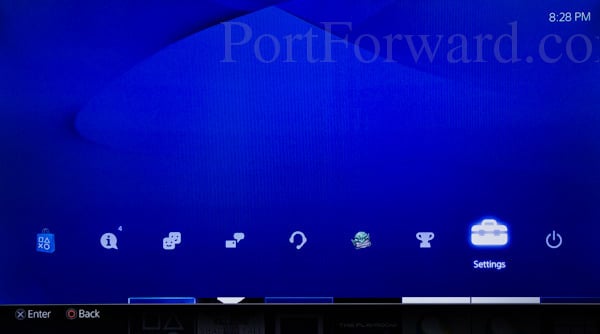
- On your PS4, go to “Settings”
- Go to “Network”
- Select “Set Up Internet Connection”
- Choose the connection type you want to use: “Use Wi-Fi” or “Use a LAN Cable”
- If you chose “Use Wi-Fi”, select the network you want to connect to and enter the password
- If you chose “Use a LAN Cable”, connect your PS4 directly to your router using an Ethernet cable
- Select “Custom”
- Enter the IP Address, Subnet Mask, Default Gateway and Primary DNS that were given to you by your ISP (Internet Service Provider)
- Enter 1 for the MTU value and leave the Proxy Server field blank
- Test your internet connection by going back to “Settings” > “Network” >
Credit: portforward.com
How Do I Change My Ip Address to Us on Ps4?
If you want to change your IP address to the US on PS4, there are a few things you need to do. First, connect your PS4 console to a VPN server in the US. This will allow your console to route all traffic through the VPN server and get a US IP address.
Next, log into your Playstation Network account and go to Settings > Playstation Network/Account Management> Account Information> Country Selection. From here, select United States as your country. Once you’ve done this, all of your PSN content will be region locked to the US.
If you’re playing games that aren’t region locked (like most Steam games), you’ll also need to change your PS4’s primary DNS server to a US-based DNS server. You can find a list of public DNS servers here: https://www.lifewire.com/free-and-public-dns-servers-2626062
After changing your DNS settings, restart your PS4 console and try loading up a game or accessing some US-based content on the Playstation Store.
If everything worked correctly, you should now have a US IP address on PS4!
What is the Best Ip Address for Ps4?
An IP address is a unique number that identifies a device on the internet. When you connect your PS4 to the internet, it is assigned an IP address. The best IP address for PS4 is one that is not already in use by another device on your network.
If you are not sure what IP address to use, you can check your router’s documentation or contact your ISP.
What is My Ip Address for My Ps4?
An IP address is a unique identifier for devices connected to a network. On the PlayStation 4, the IP address can be found in the Settings menu under “Network.” The IP address will be displayed in the console’s current connection information.
This information can be useful for troubleshooting network issues or for setting up port forwarding.
How Do U Change Ur Ip Address?
If you want to change your IP address, there are a few methods you can use. One is to change the IP address of your router. This will likely require you to login to your router’s settings page and find the option to change the IP address.
Another method is to use a VPN service, which will route your traffic through a server with a different IP address. Finally, you can use a proxy server, which will act as an intermediary between your computer and the internet. Whichever method you choose, make sure that you do not violate any terms of service agreement that you have with your ISP.
How to setup Static IP on PS4
Ps4 Ip Address
The PlayStation 4 has a dedicated IP address that you can use to connect to your console. This is different from the IP address that your router uses, and it’s necessary in order to connect your PS4 to the internet. In this article, we’ll show you how to find your PS4’s IP address, so that you can get online and start playing games.
First, open up the Settings menu on your PS4. You can do this by pressing the “Options” button on your controller, and then selecting “Settings.”
Once you’re in the Settings menu, scroll down to the “Network” option and select it.
On the next screen, select “Set Up Internet Connection.”
Now, choose which method you’re using to connect to the internet: wired or wireless. If you’re using a wired connection, simply plug an Ethernet cable into your PS4 and follow the on-screen instructions.
If you’re connecting wirelessly, select the “WiFi” option and enter your WiFi password when prompted.
After you’ve established a connection to the internet, select “Use DHCP.” This will automatically assign an IP address to your PS4 from your router’s pool of available addresses.
If for some reason DHCP isn’t working properly (which is rare), you can manually set an IP address for your console under “Manual Settings.” We recommend leaving this setting alone unless you know what you’re doing – messing with it could cause problems with your network connection.
Finally, scroll down and select “Do Not Use Proxy Server.”
Unless instructed otherwise by a technical support representative from Sony or your ISP, there’s no need to use a proxy server when connecting your PS4 to the internet. Selecting this option will ensure that all of your traffic goes directly through your router without being redirected elsewhere.
And that’s all there is to it!
After completing these steps, exit out of the Settings menu and enjoy gaming on your PlayStation 4!
Ps4 Ip Address Finder
In order to find your PS4’s IP address, you’ll need to first access the console’s network settings. To do this, go to Settings > Network in the main menu. From there, select “Set Up Internet Connection.”
Once you’re in the network settings menu, select “Use Wi-Fi” and then choose your router from the list of available networks. After selecting your router, you’ll be prompted to enter its password.
Once you’re connected to your router, scroll down to the “IP Address” setting and make note of the number that’s listed there.
This is your PS4’s IP address!
Ps4 Ip Address Settings Automatic Or Manual
When it comes to your PS4™ console’s network settings, you have the choice of using either automatic or manual IP address settings. So, which one should you use?
If you’re not sure, we recommend using automatic IP address settings.
With this option, your PS4™ console will automatically obtain an IP address that is compatible with your network. This is the easiest and most foolproof way to get online with your PS4™ console.
However, if you’re having trouble connecting to the Internet with your PS4™ console, or if you want to use a specific IP address for some reason, then you can always opt for manual IP address settings.
With this option, you will need to enter in your network’s IP information manually.
Here’s a quick overview of both methods:
Automatic IP Address Settings:
1. Go to [Settings] > [Network] > [Set Up Internet Connection].
2. Select [Use Wi-Fi], and then select the name of your wireless network from the list of available networks.
3. Enter your Wi-Fi password when prompted, and then select [Next].
4. Select [Do Not Use a Proxy Server], and then select [Next].
5. Your PS4™ console will now automatically obtain an IP address that is compatible with your network.” If asked “Which method do you want to use?”, select “Easy”.
Manual IP Address Settings:
1. Go to [Settings] > [Network] > [Set Up Internet Connection].
2 Choose either [Wired Connection] or[Wireless], depending on how you are connecting to the internet.
. If asked “Which method do you want to use?”, select “Custom”. For a wired connection, use an Ethernet cable connected from the back ofthePS4 directly into your modem or router port..Fora wirelessconnection ,select[Wi-Fi],andthenchooseyournetworkfromthelistofavailablenetworks..Enteryournetworkpasswordwhenprompted..Select[Next].
3 InputmanualsettingsfortheIPaddress,,SubnetMask,,DefaultGateway,,andPrimaryDNS.
Ps4 Ip Address Failed
If you’re trying to set up a PlayStation 4 console on your home network, and you see the error message “PS4 IP Address Failed,” it means that your PS4 can’t connect to your router. This can be caused by a number of things, including:
– Your router’s firewall is blocking incoming connections from the PS4.
– Your router is not configured properly for the type of connection you’re using (wireless or wired).
– There’s something wrong with your network cable.
If you’re seeing this error, here are some things you can try:
– Make sure your router’s firewall is turned off. If it’s not, turn it off and try again.
– Check your router’s documentation and make sure it’s properly configured for the type of connection you’re using (wireless or wired).
– Try using a different network cable.
Conclusion
If you want to change your IP address on PS4, there are a few things that you need to do. First, you will need to go into the Settings menu and then scroll down to the Network settings. From here, you will need to select the Set Up Internet Connection option.
Once you have selected this option, you will need to choose either WiFi or LAN depending on how you are connected to the internet. After selecting your connection type, you will be given a list of options for your internet connection. Select Custom and then enter in all of the required information for your connection type.
After entering in all of the required information, scroll down and select Do Not Use Proxy Server. Finally, save your changes and exit out of the Settings menu.
