How To Bake With Silicone Molds
Welcome, aspiring bakers and culinary enthusiasts! As a professional chef, I am delighted to share with you the secrets of baking with silicone molds. This innovative and versatile tool has taken the baking world by storm, revolutionizing the way we create delectable treats. Whether you are a seasoned baker or just starting your culinary journey, this guide will equip you with the knowledge and skills to create stunning desserts with ease. So, grab your apron, preheat your oven, and let’s dive into the wonderful world of baking with silicone molds!
How to Bake with Silicone Molds: A Simple Guide
Welcome to our guide on how to bake with silicone molds! Silicone molds have become increasingly popular in the baking world, thanks to their flexibility, durability, and ability to create intricate shapes. Whether you’re a beginner or a seasoned baker, using silicone molds can add a touch of creativity and elegance to your baked goods. In this guide, we will walk you through the essentials of baking with silicone molds, including the necessary ingredients, general information, and step-by-step instructions. Let’s get started!
Ingredients:
- 1 cup all-purpose flour
- 1/2 teaspoon baking powder
- 1/4 teaspoon salt
- 1/2 cup unsalted butter, softened
- 1 cup granulated sugar
- 2 large eggs
- 1 teaspoon vanilla extract
- 1/2 cup whole milk
General Information:
- Making Difficulties: Easy
- Preparation Time: 15 minutes
- Cooking Time: 20-25 minutes
- Servings: 12 cupcakes
Instructions:
Step 1: Prepare the Ingredients
Before starting the baking process, make sure you have all the ingredients on hand. Measure out one cup of all-purpose flour, half a teaspoon of baking powder, and a quarter teaspoon of salt. Set them aside in separate bowls for easy access during the mixing process. Also, ensure that your unsalted butter is softened at room temperature, as this will make it easier to incorporate into the batter.
In a separate bowl, combine one cup of granulated sugar, two large eggs, and one teaspoon of vanilla extract. Whisk the mixture until it becomes smooth and the sugar has dissolved. Now, you’re ready to move on to the next step!
Step 2: Mix the Dry and Wet Ingredients
Take the bowl of softened butter and gradually add the dry ingredients (flour, baking powder, and salt) to it. Using an electric mixer or a wooden spoon, mix the ingredients together until well combined. The mixture should resemble coarse crumbs at this stage.
Add in the sugar-egg-vanilla mixture and continue mixing until the batter becomes smooth and creamy. Be sure not to overmix, as this can result in dense cupcakes. Once the batter is ready, it’s time to add the final element – the milk.
Step 3: Incorporate the Milk
Slowly pour half a cup of whole milk into the batter and stir gently until the milk is fully incorporated. This step helps to moisten the batter and create a tender texture in the cupcakes. Remember to scrape down the sides of the bowl to ensure all the ingredients are evenly mixed.
Step 4: Preheat and Prep the Silicone Molds
Preheat your oven to 350°F (175°C) and prepare your silicone molds by lightly greasing them with cooking spray or brushing them with melted butter. This will prevent the cupcakes from sticking to the molds once baked. Alternatively, you can place cupcake liners inside the molds if you prefer a cleaner and easier removal process.
Silicone molds are known for their non-stick properties, but greasing or lining them will provide an extra layer of assurance. Once the molds are prepared, arrange them on a baking sheet for stability during the baking process.
Step 5: Fill the Silicone Molds
Using a spoon or a piping bag, carefully fill each silicone mold with the cupcake batter. Ensure that the batter is evenly distributed among the molds, filling each one about two-thirds full. Leaving some space for the cupcakes to rise will result in a perfectly baked final product.
If you accidentally spill batter on the edges of the molds, wipe it off gently with a clean cloth or paper towel. This will help maintain the neat appearance of your cupcakes and prevent any excess batter from burning.
Step 6: Bake to Perfection
Place the baking sheet with the filled silicone molds into the preheated oven. Bake for approximately 20 to 25 minutes or until a toothpick inserted in the center of a cupcake comes out clean. Keep an eye on the cupcakes during the last few minutes to prevent over-baking, as each oven may vary in temperature.
Once baked, remove the baking sheet from the oven and let the cupcakes cool in the molds for a few minutes. This will allow them to set and firm up slightly before transferring them to a wire rack for complete cooling.
Step 7: Unmold and Enjoy!
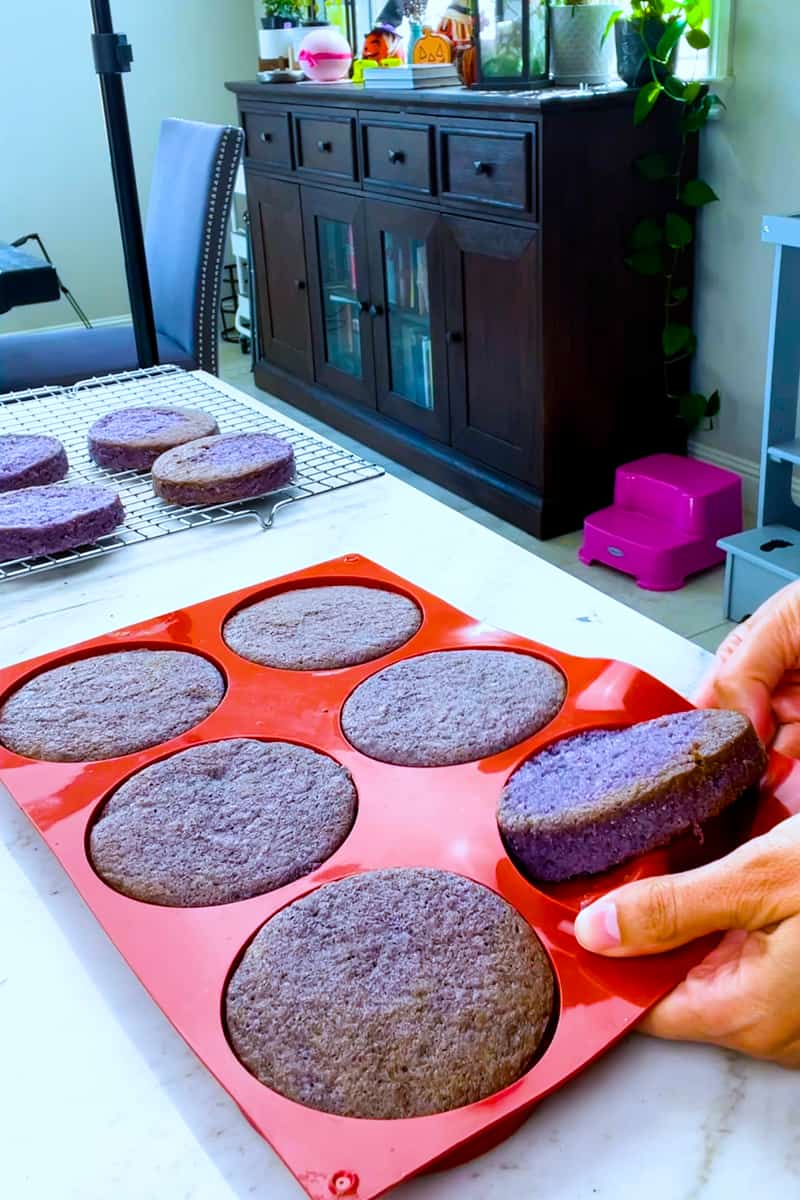
Once the cupcakes have cooled to room temperature, gently press the bottom of each silicone mold to release the cupcakes. The flexible nature of the silicone molds should make this process effortless. If you encounter any resistance, try twisting the mold slightly to loosen the cupcakes.
Transfer the cupcakes to a serving platter or individual dessert plates. At this point, you can choose to enjoy them as they are or add some icing, frosting, or decorative elements for an extra touch of sweetness and visual appeal. Get creative and have fun with your presentation!
There you have it – a comprehensive guide on how to bake with silicone molds. These versatile and user-friendly molds open up a whole new world of baking possibilities. From cupcakes and muffins to bread and intricate cake designs, silicone molds can elevate your baking creations to the next level. Remember to experiment, try different recipes, and most importantly, have fun in the process. Happy baking!
Silicone molds have revolutionized the way we bake, providing a non-stick and flexible alternative to traditional metal molds. Whether you’re a seasoned baker or just starting out, using silicone molds can produce beautiful and professional-looking desserts with ease. However, there are a few important things to keep in mind when working with these molds to ensure culinary success. From choosing the right mold to proper care and maintenance, here are some crucial tips for baking with silicone molds.
1. Quality Matters:
First and foremost, invest in high-quality silicone molds. Cheaper molds may be tempting, but they can be flimsy and prone to tearing or warping in the oven. Look for molds made from 100% food-grade silicone, which is free from harmful chemicals. High-quality molds will provide even heat distribution, resulting in evenly baked goods. Plus, they are more durable and will last longer, making them a worthwhile investment.
2. Prepare the Molds Properly:
Before using your silicone molds, it’s important to prepare them properly to ensure easy release and perfect shapes. Even though silicone molds are non-stick, greasing or spraying them with a light layer of oil or non-stick cooking spray is recommended. This step will help your baked goods slide out of the molds effortlessly once they are ready. Additionally, placing your silicone molds on a baking sheet will provide stability and make transferring them in and out of the oven a breeze.
3. Adjust Baking Time and Temperature:
When using silicone molds, it’s crucial to make adjustments to your baking time and temperature. Silicone has excellent heat conductivity, which means it bakes faster than traditional metal molds. Reduce the baking time slightly and keep an eye on your goods to avoid overcooking. Remember, silicone molds can also cool down quickly, so be aware of this when checking for doneness. A few extra minutes in the oven can make a huge difference, so keep a close eye on your treats as they bake.
4. Care and Maintenance:
Proper care and maintenance of your silicone molds will ensure their longevity and continued functionality. After each use, wash the molds with warm soapy water and a soft sponge or cloth. Avoid using abrasive tools or harsh cleaners, as they can damage the molds. Silicone is naturally non-stick, so cleaning should be a breeze. Once clean, allow the molds to air dry or pat them dry gently with a kitchen towel. It’s important to store your molds properly as well. Avoid stacking them, as this can cause warping or deformation. Instead, store them flat or hang them to maintain their shape.
Baking with silicone molds can be a game-changer for any home baker. By following these important tips, you can ensure beautiful and delicious results every time. So go ahead, choose high-quality molds, properly prepare them, adjust your baking time and temperature, and care for them diligently – you’ll be amazed at the stunning desserts you can create with silicone molds. Happy baking!
Frequently Asked Questions
When it comes to baking with silicone molds, there are a few things to keep in mind for successful results. Here are some commonly asked questions to help you navigate the process.
1. Can silicone molds be used in the oven?
Absolutely! Silicone molds are oven-safe and can withstand high temperatures. Just make sure to place them on a baking sheet for stability and easy removal from the oven.
The flexible nature of silicone molds allows for easy release of your baked goods once they are done. No more worries about cakes sticking to the pan!
2. How should I prepare silicone molds before baking?
Prior to using silicone molds, it is recommended to lightly grease them with a non-stick cooking spray or a thin coating of oil. This will further ensure easy release of your baked goods.
Another benefit of silicone molds is that they do not require any additional flouring or greasing like traditional pans. This saves you time and effort in the baking process.
3. Can silicone molds be used for all types of recipes?
Yes, silicone molds can be used for a wide variety of recipes, including cakes, muffins, cupcakes, bread, brownies, and even savory dishes like quiches. They are versatile and can withstand both sweet and savory flavors.
However, keep in mind that complex or intricate designs may not be as defined in silicone molds compared to traditional metal or glass pans. For detailed designs, consider using a different type of bakeware.
4. How should I handle silicone molds when they are hot?
When handling hot silicone molds, it is important to use oven mitts or heat-resistant gloves to protect your hands from burns. Silicone molds can retain heat, so exercise caution when removing them from the oven.
Once out of the oven, place the molds on a heat-safe surface or cooling rack to allow them to cool down before unmolding your baked goods. This will prevent any potential scorching or warping of the molds.
5. How should I clean and store silicone molds?
Cleaning silicone molds is a breeze! They are dishwasher safe, but can also be easily cleaned by hand with warm soapy water. Make sure to thoroughly dry the molds before storing them to prevent any moisture-related issues.
When it comes to storing silicone molds, stack them or lay them flat to prevent any deformation. Keep them in a cool, dry place away from direct sunlight to maintain their quality and durability for future baking adventures.