How To Bake With Silicone Molds
Welcome, aspiring bakers and culinary enthusiasts! Today, we embark on a delightful adventure in the world of baking, as we explore the art of creating delectable treats using silicone molds. As a professional chef, I am thrilled to guide you through this innovative and versatile baking technique that is sure to elevate your creations to new heights. Whether you’re a seasoned baker or just starting out on your culinary journey, this guide will equip you with the knowledge and skills needed to confidently bake with silicone molds. So, put on your apron, preheat your ovens, and let’s dive into the wonderful world of silicone mold baking!
How to Bake with Silicone Molds: Easy and Stylish Desserts
Baking is not only a delicious way to indulge our taste buds but also a creative way to express ourselves. With the right tools, such as silicone molds, you can easily elevate your desserts to a whole new level of elegance. In this guide, we will walk you through the process of baking with silicone molds, from selecting the right mold to achieving perfect results. Get ready to impress your friends and family with beautiful and tasty treats!
Ingredients:
- 1 ½ cups of all-purpose flour
- 1 teaspoon of baking powder
- ½ teaspoon of salt
- 1 cup of sugar
- ½ cup of unsalted butter, softened
- 2 large eggs
- 1 teaspoon of vanilla extract
- ¾ cup of milk
General Information:
- Making Difficulty: Easy
- Preparation Time: 15 minutes
- Cooking Time: 20-25 minutes
- Serving Size: 12 cupcakes
Instructions:
Step 1: Preheat the oven
Preheat your oven to 350°F (175°C) and grease your silicone molds with a non-stick cooking spray or a light coating of butter. This will ensure that your cupcakes come out easily and with a smooth surface.
Step 2: Prepare the batter
In a medium-sized bowl, whisk together the flour, baking powder, and salt. Set it aside. In a separate large bowl, cream together the softened butter and sugar until light and fluffy. Add the eggs, one at a time, beating well after each addition. Stir in the vanilla extract. Gradually add the dry ingredients, alternating with the milk, beginning and ending with the dry ingredients. Mix until just combined.
Step 3: Fill the molds
Using a spoon or a piping bag, fill each silicone mold about 2/3 full with the batter. Be careful not to overfill, as the batter will rise during baking. Gently tap the molds on the countertop a few times to remove any air bubbles.
Step 4: Bake to perfection
Place the filled silicone molds on a baking sheet and carefully transfer them to the preheated oven. Bake for 20-25 minutes or until a toothpick inserted into the center of a cupcake comes out clean. Keep in mind that baking time may vary depending on the size and shape of your silicone molds.
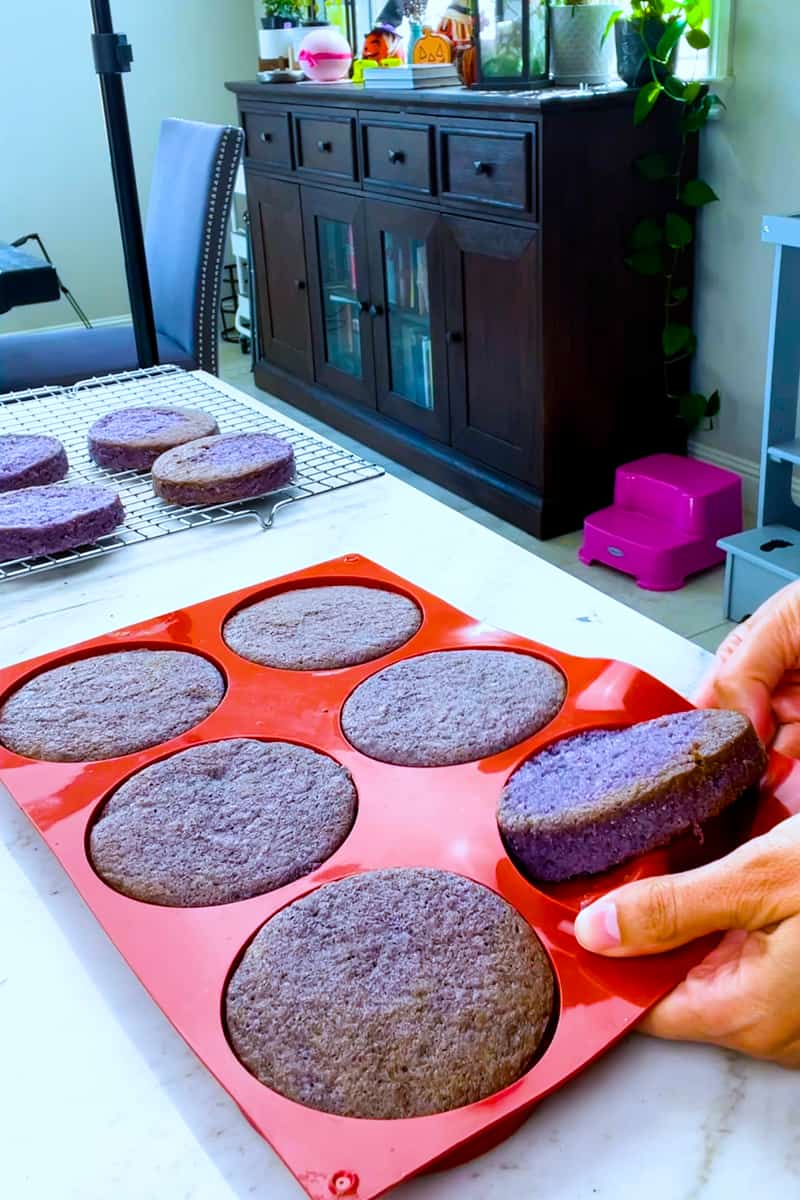
Step 5: Cool and remove from molds
Once baked, remove the silicone molds from the oven and let them cool for a few minutes on a wire rack. Gently twist or push the bottoms of the molds to release the cupcakes. They should come out easily, thanks to the non-stick properties of the silicone molds.
Step 6: Decorate to impress
Now comes the fun part – decorating your cupcakes! Let your creativity shine by using frosting, sprinkles, edible flowers, or whatever suits your taste. You can also use the silicone molds to create decorative shapes like hearts or stars and place them on top of the cupcakes for an extra touch of elegance.
Step 7: Enjoy and share
Once your cupcakes are beautifully decorated, it’s time to enjoy the fruits of your labor. Serve them at a gathering, share them with friends, or simply savor them all by yourself. These delectable treats are meant to be enjoyed and adored, so don’t hesitate to take a bite and relish the delightful flavors!
Experimenting with silicone molds opens up a world of possibilities in the baking realm. From intricate cake designs to perfectly shaped cookies, these molds are a game-changer for both professional bakers and baking enthusiasts. So go ahead, unleash your inner pastry chef, and have fun exploring the endless creative possibilities that baking with silicone molds has to offer!
Important Things to Keep in Mind When Baking with Silicone Molds
Silicone molds have become a go-to tool for bakers, offering flexibility, durability, and easy release of baked goods. Whether you’re a seasoned pro or a novice in the kitchen, using silicone molds can elevate your baking experience. However, there are a few important things to keep in mind to ensure successful results every time. From preparing the molds to temperature considerations, we’ve got you covered with all the details you need to know.
1. Proper Greasing
When using silicone molds, it may seem unnecessary to grease them since they are non-stick. However, a light greasing can help ensure an even release and prevent any sticking. You can use a non-stick spray or brush a thin layer of oil or butter onto the mold’s surface. Just be sure to use a minimal amount, as too much grease can cause your baked goods to spread or lose their shape. Additionally, if you’re making intricate designs, consider using a pastry brush to ensure the grease reaches all the nooks and crannies.
2. Sturdy Support
Silicone molds are flexible, which makes them easy to handle. However, this flexibility can also cause your baked goods to lose their shape while in the oven. To prevent this, it is essential to provide sturdy support for the molds during baking. Placing the molds on a sturdy baking tray or using a silicone baking mat will help them maintain their shape during the baking process. This support is particularly vital when baking delicate or intricate designs that require precise shape retention.
3. Temperature Considerations
Silicone molds are known for their high heat resistance, but it’s still crucial to consider temperature when baking with them. While they can withstand high temperatures, it’s best to avoid sudden temperature changes. Always preheat your oven before placing the silicone molds inside, and avoid placing them directly on a hot baking tray or rack. Gradual temperature changes will allow your baked goods to bake evenly and prevent any damage to the molds.
4. Easy Removal
One of the main advantages of using silicone molds is their easy release. However, there are a few tips to ensure a smooth and successful removal process. After your baked goods are done, allow them to cool in the mold for a few minutes before attempting to remove them. This will help them set and minimize the risk of breakage. To remove the baked goods, gently push from the bottom of the mold or flex the sides to release them. For more intricate designs, you can also try placing the mold in the freezer for a short period before removing the baked goods, as this can help them pop out more easily.
Baking with silicone molds opens up a world of possibilities in the kitchen. By keeping these important tips in mind – proper greasing, sturdy support, temperature considerations, and easy removal – you’ll achieve picture-perfect results every time. So go ahead, experiment with different shapes and designs, and create delicious baked goods that will wow your family and friends. Happy baking!
Frequently Asked Questions
Are you ready to explore the world of baking with silicone molds? Get ready to create delicious treats with ease and convenience. Here are some commonly asked questions to help you get started.
1. Can I use silicone molds for baking any type of food?
Yes, silicone molds are incredibly versatile and can be used to bake a wide range of foods. From cakes and cookies to muffins and breads, silicone molds are perfect for all types of baked goods. You can even use them for making chocolates, jellies, and other sweet treats.
The flexible nature of silicone molds makes it easy to remove your baked goods without any hassle. Just make sure to grease the molds or use a non-stick spray before filling them with batter or dough.
2. How do I prepare silicone molds before using them?
Before using silicone molds, it’s important to prepare them properly to ensure the best results. Start by washing them with warm, soapy water to remove any dust or residue. Rinse well and dry thoroughly.
Next, apply a thin layer of cooking oil or non-stick spray to the molds. This will help prevent sticking and make it easier to remove your baked goods once they’re ready. Allow the oil or spray to set for a few minutes before you start filling the molds.
3. Do I need to adjust the baking time or temperature when using silicone molds?
In most cases, you don’t need to make any adjustments to the baking time or temperature when using silicone molds. Silicone is a great conductor of heat, which means your baked goods will cook evenly. However, it’s always a good idea to keep an eye on your baked goods towards the end of the recommended baking time, as oven temperatures may slightly vary.
If you’re using silicone molds with intricate designs or smaller cavities, you may need to reduce the baking time slightly to ensure the centers of your baked goods are fully cooked. It’s always best to refer to your recipe and make any necessary adjustments accordingly.
4. Can I use silicone molds in the microwave or freezer?
Yes, silicone molds are microwave and freezer safe, making them a versatile tool in the kitchen. You can use silicone molds to bake in the oven, then transfer your baked goods directly into the freezer for storage. They are also perfect for making homemade frozen treats like ice cream or popsicles.
When using silicone molds in the microwave, make sure to follow the recommended cooking times and power settings in your recipe. Silicone molds heat up quickly in the microwave, so be cautious when handling them to avoid burns.
5. How do I clean and store silicone molds?
Cleaning silicone molds is a breeze. After using them, simply wash them with warm, soapy water or place them in the dishwasher. If there are any stubborn stains, you can soak them in a mixture of baking soda and water.
Once clean and dry, store your silicone molds in a cool, dry place. Avoid stacking them, as this can cause deformation. If you’d like to stack them, place a piece of parchment paper or a silicone baking mat in between each mold to prevent them from sticking together.