How To Bake Tyson Chicken Tenders
Welcome to the wonderful world of cooking! Today, we are going to dive into the art of baking Tyson chicken tenders. Whether you’re a seasoned chef or a beginner in the kitchen, this simple yet delicious recipe is sure to satisfy your taste buds. Get ready to savor the crispy, golden-brown coating that locks in the tender and juicy chicken inside. So, put on your apron, preheat that oven, and let’s embark on a culinary journey that will leave you craving for more. Let’s get baking!
How to Bake Tyson Chicken Tenders: A Delicious and Easy Recipe
Chicken tenders are a beloved dish that both kids and adults enjoy. If you’re looking for a quick and tasty meal, baking Tyson chicken tenders is a fantastic option. Not only are they crispy on the outside and juicy on the inside, but they are also incredibly easy to make. In this recipe, we will guide you through the process step-by-step, ensuring that your chicken tenders turn out perfectly every time.
Ingredients:
- 1 package of Tyson chicken tenders
- 1 cup of all-purpose flour
- 2 teaspoons of paprika
- 1 teaspoon of garlic powder
- 1 teaspoon of onion powder
- 1 teaspoon of salt
- 1/2 teaspoon of black pepper
- 2 large eggs, beaten
- 1/4 cup of milk
- 1 cup of breadcrumbs
- Non-stick cooking spray
General Information:
- Making Difficulty: Easy
- Preparation Time: 10 minutes
- Cooking Time: 20 minutes
- Total Time: 30 minutes
- Servings: 4 people
Instructions:
Step 1: Preheat the Oven and Prepare the Breading
Preheat your oven to 425°F (220°C). Line a baking sheet with aluminum foil and lightly coat it with non-stick cooking spray. In a shallow bowl, combine the flour, paprika, garlic powder, onion powder, salt, and black pepper. Mix well to ensure the spices are evenly incorporated.
In another shallow bowl, whisk together the beaten eggs and milk. Set aside.
Step 2: Coat the Chicken Tenders
Take one Tyson chicken tender and coat it in the flour mixture, making sure it is fully covered. Shake off any excess flour. Dip the coated chicken tender into the egg mixture, allowing any excess to drip off. Finally, coat the chicken tender in breadcrumbs, pressing gently to adhere the breadcrumbs to the chicken. Place the coated chicken tender onto the prepared baking sheet. Repeat this process with the remaining chicken tenders.
Note: It’s best to use one hand for dipping the chicken in the flour and egg mixture and the other hand for coating it in breadcrumbs. This will prevent your hands from becoming too sticky.
Step 3: Bake the Chicken Tenders
Once all the chicken tenders are coated and placed on the baking sheet, lightly spray them with non-stick cooking spray. This will help them crisp up in the oven. Place the baking sheet in the preheated oven and bake for 15-20 minutes, or until the chicken tenders are golden brown and cooked through.
Note: The cooking time may vary slightly depending on the thickness of the chicken tenders, so make sure to keep an eye on them to prevent overcooking.
Step 4: Serve and Enjoy
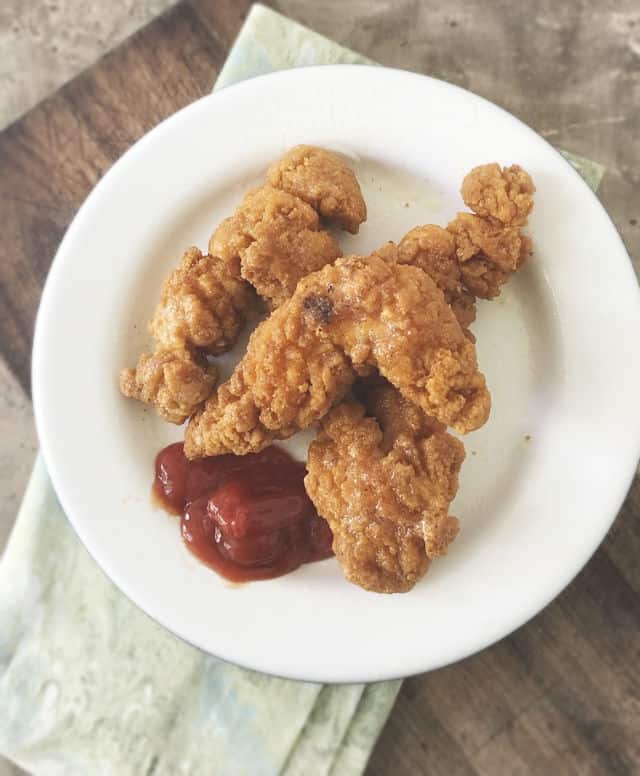
Once the Tyson chicken tenders are done baking, remove them from the oven and allow them to cool slightly. Serve them hot as a main dish or as a delicious appetizer with your favorite dipping sauces, such as barbecue, honey mustard, or ranch. Enjoy the crispy exterior and tender interior of these mouthwatering chicken tenders!
Step 5: Storage and Reheating
If you have any leftovers, store them in an airtight container in the refrigerator for up to 3 days. To reheat the chicken tenders, preheat your oven to 350°F (175°C) and place them on a baking sheet. Bake for 8-10 minutes or until heated through. Avoid microwaving the tenders to maintain their crispy texture.
Step 6: Experiment with Flavors
While the classic seasoning blend in this recipe is delicious, feel free to experiment with different flavors. Add a pinch of cayenne pepper for some heat or substitute the paprika with smoked paprika for a smoky flavor. You can also add grated Parmesan cheese to the breadcrumbs for an extra savory twist.
Step 7: Tips for Perfect Chicken Tenders
To achieve the best results when baking Tyson chicken tenders, keep the following tips in mind:
1. Make sure the chicken tenders are evenly coated with the flour, egg, and breadcrumb mixture for a crispy and flavorful exterior.
2. Lightly spray the coated chicken tenders with non-stick cooking spray before baking to help them brown and become crispy.
3. Use a baking sheet lined with aluminum foil to make cleanup easier.
4. Check the internal temperature of the chicken tenders with a meat thermometer to ensure they reach a safe minimum internal temperature of 165°F (74°C).
By following these steps and tips, you’ll have perfectly baked Tyson chicken tenders that are sure to be a hit with family and friends. Enjoy this simple yet delicious meal anytime you’re craving a tasty and satisfying dish!
Important Things to Keep in Mind: How to Bake Tyson Chicken Tenders
Craving some delicious, crispy chicken tenders? Look no further! Tyson chicken tenders are the perfect choice for a quick and easy meal that everyone will love. But before you start preheating your oven, there are a few important things to keep in mind to ensure your chicken tenders come out perfectly cooked and packed with flavor. From choosing the right dipping sauce to getting the perfect golden brown crust, here are the essential tips for baking Tyson chicken tenders.
The first thing you need to do is preheat your oven to 400°F (or 200°C). This high heat will create that irresistible crunch on the outside while keeping the chicken tender and juicy on the inside. While it’s tempting to rush the preheating process, don’t skip this crucial step. Preheating your oven ensures that the chicken tenders cook evenly and at the right temperature from the start.
Next, make sure you line a baking sheet with parchment paper or aluminum foil. This not only prevents the chicken tenders from sticking to the pan, but it also makes cleanup a breeze. Pro tip: Give the parchment paper a light spray of cooking oil to ensure maximum crispiness. Arrange the Tyson chicken tenders on the baking sheet in a single layer, leaving a little space in between each one. This allows the hot air to circulate around the tenders, resulting in an even, crispy coating all around.
Now, let’s talk about the golden brown crust that makes these chicken tenders so addictive. To achieve that perfect color, it’s essential to brush the tops of the chicken tenders with a little oil or melted butter before baking. This will promote browning and give the chicken a beautiful, appetizing appearance. Don’t be afraid to get creative with seasonings, too. Sprinkle some garlic powder, paprika, or even a dash of cayenne for an extra kick of flavor. Just remember to go light on the salt, as Tyson chicken tenders are already seasoned.
Finally, it’s all about timing. The secret to perfectly baked chicken tenders lies in cooking them at the right temperature for the right amount of time. For Tyson chicken tenders, bake them for about 15-18 minutes, flipping once halfway through. Cooking times may vary depending on your oven and the size of your chicken tenders, so keep a close eye on them. When they’re ready, the chicken tenders should be golden brown, crispy on the outside, and cooked through on the inside. To be sure, use a meat thermometer to check that the internal temperature reaches 165°F (74°C).
So there you have it – the essential tips for baking Tyson chicken tenders to perfection. Remember to preheat your oven, line the baking sheet, brush with oil, and cook at the right temperature for the right amount of time. With these pointers in mind, you’ll have a mouthwatering batch of chicken tenders that will rival any restaurant’s. Serve them with your favorite dipping sauces, such as barbecue, honey mustard, or ranch, and enjoy the perfect combination of crispy and tender that Tyson chicken tenders are known for.
Frequently Asked Questions
Welcome to our Frequently Asked Questions section where we provide answers to common queries about baking Tyson chicken tenders.
1. Can I bake Tyson chicken tenders straight from the freezer?
Yes, you can bake Tyson chicken tenders straight from the freezer. Preheating the oven to the recommended temperature is crucial to ensure even cooking. Place the frozen tenders on a baking sheet lined with parchment paper and bake according to the package instructions. Remember to flip the tenders halfway through to ensure they cook evenly.
Keep in mind that the cooking time may be slightly longer than indicated on the package, as frozen tenders take longer to cook compared to thawed ones. Always check for doneness by ensuring the internal temperature reaches 165°F (74°C) and the tenders are golden brown and crispy.
2. What temperature and cooking time should I use to bake Tyson chicken tenders?
For the best results, preheat your oven to 400°F (200°C). This temperature allows the chicken tenders to cook evenly while developing a crispy exterior. The cooking time may vary depending on the size and thickness of the tenders, but it typically ranges from 18 to 22 minutes.
Remember to flip the chicken tenders halfway through the cooking time to ensure they cook evenly on both sides. To be certain they are fully cooked, use a meat thermometer to check if the internal temperature reaches 165°F (74°C). Adjust the cooking time accordingly if needed.
3. How can I make Tyson chicken tenders extra crispy?
To achieve extra crispy Tyson chicken tenders, try the following tips. First, before you preheat the oven, coat the tenders in a thin layer of cooking oil, such as vegetable or canola oil. This helps create a crispier texture. Next, place the tenders on a wire rack set inside a baking sheet. Elevating them on the rack allows hot air to circulate all around, resulting in a crispier coating.
Lastly, when you flip the tenders halfway through the cooking time, use a pair of tongs instead of a spatula. This prevents the delicate crust from breaking and helps maintain its crispy texture. With these steps, you can enjoy extra crispy Tyson chicken tenders straight from your oven.
4. Can I add seasoning or spices to Tyson chicken tenders before baking?
Yes, you can add seasoning or spices to Tyson chicken tenders before baking to enhance their flavor. Before coating the tenders in the breading or batter, you can sprinkle them with salt, pepper, garlic powder, paprika, or any other spices you enjoy. This will infuse the chicken with delicious flavors.
If you prefer a more intense flavor, you can also marinate the tenders for a few hours or overnight in your preferred marinade before breading them. This will allow the flavors to penetrate the meat, resulting in a tastier final product. Experiment with different seasonings and spices to create a flavor profile that suits your palate.
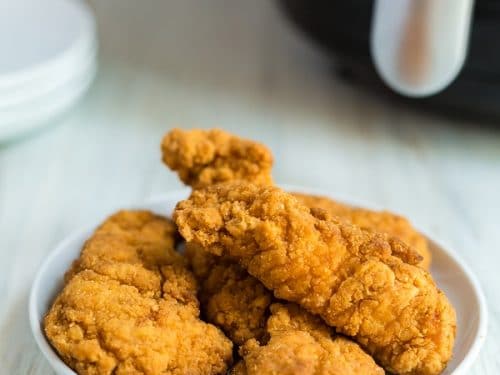
5. Can I use an air fryer to bake Tyson chicken tenders?
Yes, you can use an air fryer to bake Tyson chicken tenders. Preheat the air fryer to 400°F (200°C) and arrange the chicken tenders in a single layer in the fryer basket. Cook for approximately 10 to 12 minutes, flipping the tenders halfway through, until they reach an internal temperature of 165°F (74°C) and the coating is crispy.
Keep in mind that the cooking time may vary depending on the size and thickness of the tenders and the specific brand and model of your air fryer. It’s always a good idea to consult the manufacturer’s instructions and adapt accordingly. Enjoy your crispy and delicious Tyson chicken tenders cooked in the air fryer!
How To Cook: Tyson Frozen Chicken Tenders in the Oven
In conclusion, mastering the art of baking Tyson chicken tenders can elevate your culinary skills to new heights. By following the step-by-step instructions and tips shared in this guide, you can achieve perfectly crispy and delicious chicken tenders every time. Whether you’re a seasoned chef or a beginner in the kitchen, this recipe is a great way to impress your family and friends with an easy yet satisfying meal. So why not put on your chef’s hat, roll up your sleeves, and get ready to create a mouthwatering dish that will leave everyone craving for more. Happy baking!