How To Bake Sourdough Bread
As a professional chef, I believe there’s something truly magical about the process of baking sourdough bread. The intoxicating aroma that fills the kitchen, the satisfying crackle of the crust, and the perfect balance of tangy flavors make it a true culinary masterpiece. If you’ve ever dreamed of creating your own artisanal loaf, then you’re in for a treat. In this guide, I’ll take you through the step-by-step process of baking sourdough bread, from creating and maintaining your starter to achieving that coveted airy crumb. Get ready to embark on a delicious journey that will have you kneading, proofing, and baking your way to bread-baking bliss. Let’s dive in and uncover the secrets of making the perfect sourdough loaf, right in the comfort of your own kitchen.
How to Bake Sourdough Bread: A Guide to Creating Artisanal Delights
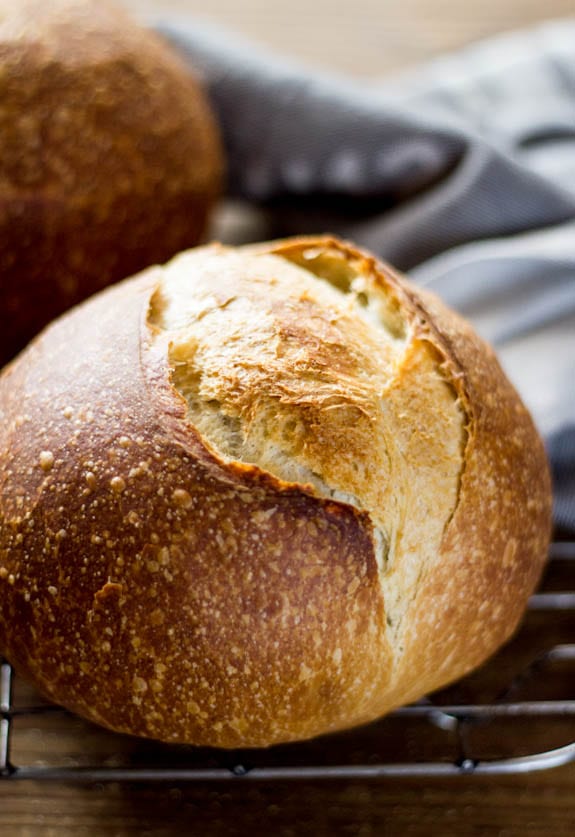
Welcome to the world of sourdough bread! In this guide, we will take you on a flavorful journey, teaching you how to bake your own artisanal sourdough bread from scratch. With its tangy flavor, crisp crust, and airy texture, sourdough bread has captured the hearts of bread enthusiasts around the world. So, put on your apron, roll up your sleeves, and let’s get baking!
Ingredients:
- 500g bread flour
- 350g water
- 100g sourdough starter
- 10g salt
General Information:
- Making Difficulties: Intermediate
- Preparation Time: 15 minutes
- Cooking Time: 40 minutes
- Total Time: 15 hours (including resting and proofing time)
Instructions:
Step 1: Create the Sourdough Starter
Making your own sourdough starter is a fun and rewarding process that requires a bit of patience. In a clean glass jar, combine 50g of bread flour and 50g of water. Stir well until no dry flour remains. Cover the jar loosely with a clean cloth and let it sit at room temperature for 24 hours. After 24 hours, discard half of the mixture and feed it with another 50g of flour and 50g of water. Repeat this process daily for about a week or until your starter is bubbly and doubles in size within a few hours.
To test if your starter is ready, drop a spoonful of it into a glass of water. If it floats, it’s good to go. Congratulations, you have a lively sourdough starter!
Step 2: Mix the Dough
In a large mixing bowl, combine 350g of water and 100g of sourdough starter. Stir until the starter is fully dissolved in the water. Add 500g of bread flour into the bowl and mix well with a wooden spoon or your hands until the dough comes together. Let it rest for 30 minutes to allow the flour to fully hydrate.
After the resting period, sprinkle 10g of salt over the dough and incorporate it by folding and stretching the dough. This folding and stretching process should be repeated every 30 minutes for the next 2 hours. It helps to develop the gluten and strengthen the dough.
Step 3: Bulk Fermentation
After the folding and stretching process, cover the bowl with a damp cloth and let the dough go through bulk fermentation. This process typically takes around 4-6 hours, depending on the temperature of your kitchen. During this time, the dough will rise and develop its characteristic sour flavor.
Every 30 minutes for the first 2 hours, perform a series of folds to strengthen the dough. To fold, gently stretch one side of the dough and fold it towards the center. Repeat this process for all four sides of the dough. This helps to build structure and redistribute the yeast and beneficial bacteria.
Step 4: Shape the Dough
Once the dough has completed its bulk fermentation, gently transfer it onto a lightly floured surface. Divide the dough into two equal portions if you’d like to make two loaves. Use your hands to shape the dough into tight rounds by folding the edges towards the center, creating tension on the surface.
Place the shaped dough onto parchment paper and cover with a cloth. Let it rest at room temperature for an additional 2 hours to allow the dough to rise and develop flavor.
Step 5: Preheat and Slash
During the last 30 minutes of the dough’s final rise, preheat your oven to 450°F (230°C) with a cast iron dutch oven or a baking stone inside. These retain heat well and will help you achieve a crispy crust. If using a dutch oven, preheat it with the lid on.
Once the oven is preheated, carefully transfer the dough with the parchment paper onto the hot dutch oven or baking stone. Using a sharp knife or a bread lame, make slashes on the surface of the dough to allow for proper expansion during baking.
Step 6: Bake and Cool
Put the lid on the dutch oven and bake the bread for 20 minutes. Then, remove the lid and continue baking for another 20 minutes or until the crust is golden brown. If using a baking stone, place a shallow pan of water on the bottom rack to create steam, which will contribute to a crisp crust.
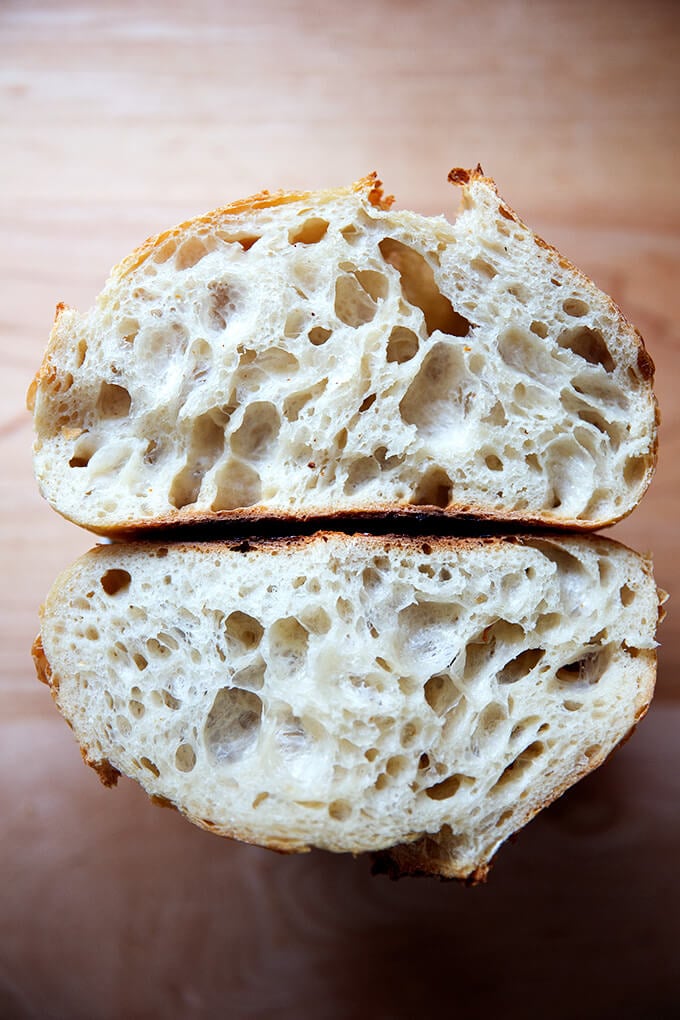
Once baked, carefully remove the bread from the oven and transfer it onto a wire rack to cool completely. Allow the bread to cool for at least 1 hour before slicing. This waiting period allows the crumb structure to set, ensuring a moist interior.
Step 7: Enjoy!
Congratulations! You’ve successfully baked your own delicious sourdough bread. Slice it thickly, spread some homemade butter, or pair it with your favorite cheese. Savor every bite of your artisanal creation and share it with your loved ones. There’s nothing quite like the taste and satisfaction of homemade sourdough bread.
With this guide, you’ve learned the secrets of making sourdough bread, from creating a lively starter to mastering each step of the baking process. The key to perfecting your technique is practice and observation. Experiment with different flours, hydration levels, and fermentation times to find your own signature loaf. Remember, baking is an art, and each loaf is a unique expression. Enjoy the process and happy baking!
Important things to keep in mind when making this ‘how to bake sourdough bread’ recipe
Sourdough bread has been gaining popularity lately, with its tangy flavor and rustic crust. If you’re new to baking or just want to perfect your sourdough technique, it’s important to keep a few key things in mind. From creating a strong starter to mastering fermentation, here are some essential tips to help you become a sourdough bread expert.
1. Start with a strong sourdough starter
The foundation of any delicious sourdough bread is a healthy and active starter. It’s important to feed and nurture your starter regularly so that it becomes strong and full of life. A well-fed starter should have a pleasant sour aroma and be bubbly and active. Remember to use filtered water and organic flour when feeding your starter to avoid any unwanted contaminants. And don’t be discouraged if your starter takes a few tries to get right – it’s all part of the sourdough journey.
2. Give the dough enough time to ferment
Patience is key when it comes to sourdough bread. Unlike commercial yeast, which can produce a loaf of bread in just a few hours, sourdough relies on natural fermentation. This means you’ll need to give your dough enough time to develop those complex flavors. The general rule of thumb is to let your dough ferment overnight, or for at least 12-18 hours, at room temperature. This allows the wild yeast in your starter to work its magic and create a beautifully textured and flavorful loaf.
3. Master the art of shaping the dough
Shaping the dough is where the magic happens. The way you shape your dough can greatly affect the final outcome of your bread. To achieve that perfect round loaf with an open crumb structure, make sure to handle the dough gently and with slightly wet hands to prevent sticking. Use a bench scraper to fold and stretch the dough, creating tension on the surface for a better rise during baking. Don’t be afraid to experiment with different shapes and techniques – it’s all part of the fun!
4. Get to know your oven
Every oven is different, and understanding how your oven functions is crucial for baking an exceptional sourdough loaf. Familiarize yourself with the hot spots and temperature variations in your oven by using an oven thermometer. Preheating your oven to the correct temperature is also essential for achieving a well-risen and evenly baked loaf. If your crust is browning too quickly, you can cover the bread with foil halfway through baking to prevent it from burning. And don’t forget to let your bread rest for at least 30 minutes after baking to allow the flavors to develop fully.
In conclusion, baking sourdough bread is a delightful and rewarding process that requires time, practice, and a touch of artistry. By starting with a strong starter, allowing ample fermentation time, mastering dough shaping, and getting to know your oven, you’ll be well on your way to creating mouthwatering sourdough bread that will impress your friends and family. So roll up your sleeves, embrace the sourdough journey, and get ready to enjoy the tangy and delicious results of your labor. Happy baking!
Frequently Asked Questions
Are you ready to embark on a delicious journey of baking your very own sourdough bread? Before you get started, we’ve compiled some commonly asked questions to help guide you through the process and troubleshoot any issues that may arise. Let’s dive in!
1. How do I create a sourdough starter?
To create a sourdough starter, mix equal parts of flour and water and let it sit in a warm spot. Over time, natural yeasts from the air will colonize the mixture, fermenting it and giving it a tangy flavor. Feed the starter regularly by discarding a portion and replenishing it with fresh flour and water. It may take a week or longer for your starter to become active, but be patient – the results will be worth it!
If your starter doesn’t seem as active as expected, try adjusting the feeding ratio or the temperature at which it’s stored. Remember, each starter is unique, so don’t be discouraged if it takes a few tries to get it just right.
2. How long should I proof my dough?
The proofing time of your sourdough bread dough can vary depending on various factors, including room temperature and the strength of your starter. As a general guideline, the first proofing, also known as bulk fermentation, typically takes 3 to 4 hours. During this time, the dough will rise and develop flavor.
After the bulk fermentation, shape your dough and let it undergo the second proofing, or final rise. This can take anywhere from 1 to 4 hours. Keep an eye on the dough and look for visual cues, such as a noticeable increase in size and a slight jiggle when gently shaken. Remember, it’s better to slightly underproof than to overproof, as an overproofed dough can lead to a dense and less flavorful loaf.
3. Can I use all-purpose flour instead of bread flour?
Yes, you can use all-purpose flour instead of bread flour when baking sourdough bread. However, keep in mind that all-purpose flour has a slightly lower protein content compared to bread flour, which affects gluten development. As a result, your bread may be slightly less chewy and have a slightly different texture. That being said, many bakers have successfully baked delicious sourdough loaves using all-purpose flour, so don’t hesitate to give it a try!
If you prefer a higher protein content for better gluten development, you can also try mixing all-purpose flour with a small portion of whole wheat flour, which has a higher protein content. This can help improve the texture and structure of your bread.
4. How do I achieve a crispy crust on my sourdough bread?
To achieve a crispy crust on your sourdough bread, there are a few key factors to consider. Firstly, make sure your oven is preheated to a high temperature, around 450-500°F (230-260°C), before baking. Secondly, create steam in the oven during the initial stages of baking by placing a pan of hot water on the lower rack or spritzing water into the oven using a spray bottle. This moisture helps the crust develop a crispy texture.
Additionally, using a preheated baking stone or a cast-iron Dutch oven can also contribute to a crispy crust. These baking vessels retain heat, helping to create a beautiful crust. Finally, allow your bread to cool completely on a wire rack after baking. This will help the crust retain its crispy texture.
5. How do I prevent my sourdough bread from turning out dense?
If your sourdough bread is turning out dense, it could be due to a few possible reasons. Firstly, check the hydration level of your dough. Too much flour or not enough water can result in a denser loaf. Adjust the hydration as needed by adding a bit more water or flour during the mixing and kneading process.
Another potential cause of a dense loaf is insufficient gluten development. Ensure you thoroughly knead your dough, allowing the gluten to develop and create the necessary structure. Consider using the stretch-and-fold technique during bulk fermentation to strengthen the gluten. Lastly, be cautious not to overproof your dough, as mentioned earlier, as an overproofed dough can become dense when baked.
YOUR FIRST SOURDOUGH (Sourdough Bread For Complete Beginners)
In conclusion, mastering the art of baking sourdough bread is a skill that every aspiring chef should strive to achieve. From the complex process of creating and maintaining a sourdough starter, to the careful preparation and baking techniques, every step is a testament to the patience and dedication required in the culinary world.
The unique flavor, texture, and aroma of sourdough bread cannot be replicated, making it a true delicacy for bread lovers. By understanding the science behind fermentation and the symbiotic relationship between wild yeast and bacteria, you can unlock a world of possibilities in your bread-making adventures.
Remember, practice makes perfect. Don’t be discouraged if your first few loaves don’t turn out as expected. Embrace the learning process, experiment with different flours, hydration levels, and baking times, and soon you’ll be creating your own signature sourdough bread that will amaze your friends, family, and customers.
So, roll up your sleeves, dust off your apron, and dive into the wonderful world of sourdough baking. With passion, patience, and perseverance, you can become a master of this ancient craft and delight in the satisfaction of knowing that you’ve created something truly special with your own hands.
Now, go forth and bake with confidence, for the world is waiting to experience the magic of your homemade sourdough bread. Happy baking!