How To Bake Ribs
Welcome, aspiring chefs and barbecue enthusiasts! Today, we embark on a mouth-watering journey into the world of ribs. Baking ribs to perfection is an art form that requires patience, skill, and a whole lot of love for flavors that make your taste buds dance with joy. Whether you’re a seasoned chef or a passionate home cook, mastering the art of baking ribs will elevate your culinary repertoire to new heights. So, grab your aprons, sharpen your knives, and let’s dive into the tantalizing world of how to bake ribs! Get ready to impress your family and friends with tender, juicy, and finger-licking goodness that will have them begging for seconds. Let’s get started!
How to Bake Ribs: A Finger-Lickin’ Guide
Indulge in the tantalizing aroma and succulent flavor of baked ribs with this step-by-step recipe. Whether you’re hosting a backyard barbecue or craving a hearty meal, baking ribs is a surefire way to satisfy your carnivorous desires. So roll up your sleeves, put on your chef’s hat, and let’s dive into the delicious world of baked ribs.
Ingredients:
- 3 racks of pork ribs
- 1 cup of your favorite barbecue sauce
- 1/4 cup brown sugar
- 2 tablespoons paprika
- 2 tablespoons chili powder
- 2 tablespoons garlic powder
- 2 tablespoons onion powder
- 1 tablespoon salt
- 1 tablespoon black pepper
General Information:
- Making Difficulties: Easy
- Preparation Time: 15 minutes
- Cooking Time: 2.5-3 hours
- Serves: 6-8 people
Instructions:
Step 1: Preparing the Ribs
Start by removing the silverskin from the back of the racks of ribs. This tough membrane can prevent flavors from penetrating the meat. To remove it, simply loosen one corner of the membrane using a butter knife or your fingers, then grip it with a paper towel and pull it off completely.
Pro Tip: If the membrane proves stubborn, use a pair of pliers to get a better grip and make the removal process easier. It’s all about finesse!
Once the membranes are removed, it’s time to season the ribs. In a bowl, combine the brown sugar, paprika, chili powder, garlic powder, onion powder, salt, and black pepper. Mix well to create a flavorful rub.
Pro Tip: Feel free to experiment with the spice levels according to your taste preferences. Add a dash of cayenne pepper for some extra heat or a pinch of cinnamon for a hint of sweetness.
Generously coat both sides of the racks of ribs with the rub, ensuring even coverage. Massage the seasoning into the meat, allowing it to adhere and enhance the flavors as it bakes.
Step 2: Preheating the Oven
Preheat your oven to 300°F (150°C). While the oven is heating up, wrap each rack of ribs individually in aluminum foil, creating a tight seal to trap in the moisture.
Pro Tip: For an extra layer of flavor, you can marinate the seasoned ribs in the refrigerator for a few hours or even overnight. This gives the spices time to penetrate the meat, resulting in a more robust taste.
Step 3: Slow and Steady Baking
Place the foil-wrapped racks of ribs on a baking sheet lined with parchment paper or a wire rack to elevate them slightly. This allows the heat to circulate evenly around the ribs, ensuring tender, juicy meat.
Slide the baking sheet into the preheated oven and let the ribs bake for 2.5-3 hours. The low and slow cooking method is key to achieving the perfect tenderness and flavor. The foil traps the moisture, infusing the ribs with moisture and preventing them from drying out.
Pro Tip: To test the doneness of the ribs, use a meat thermometer. Insert it into the thickest part of the meat, ensuring it doesn’t touch the bone. The internal temperature should reach around 195°F (90°C) for fall-off-the-bone perfection.
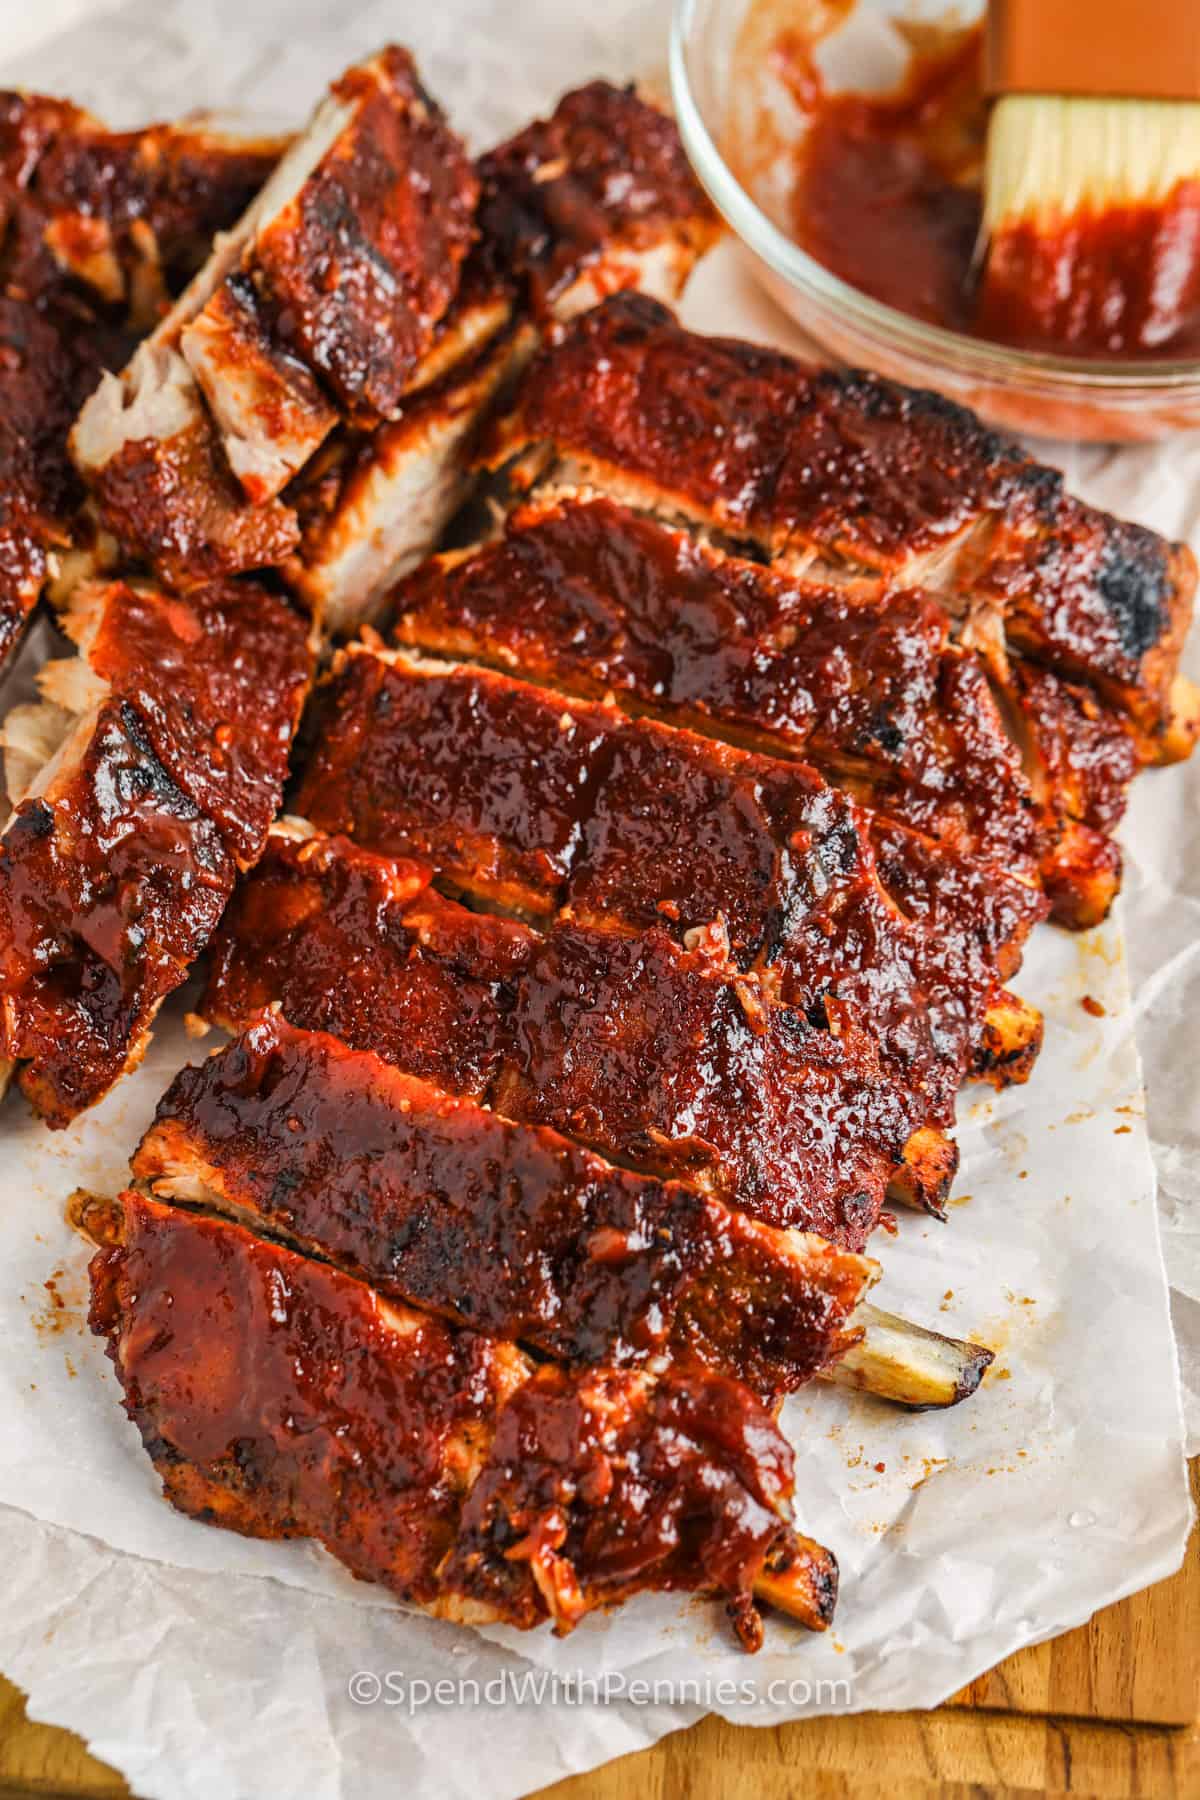
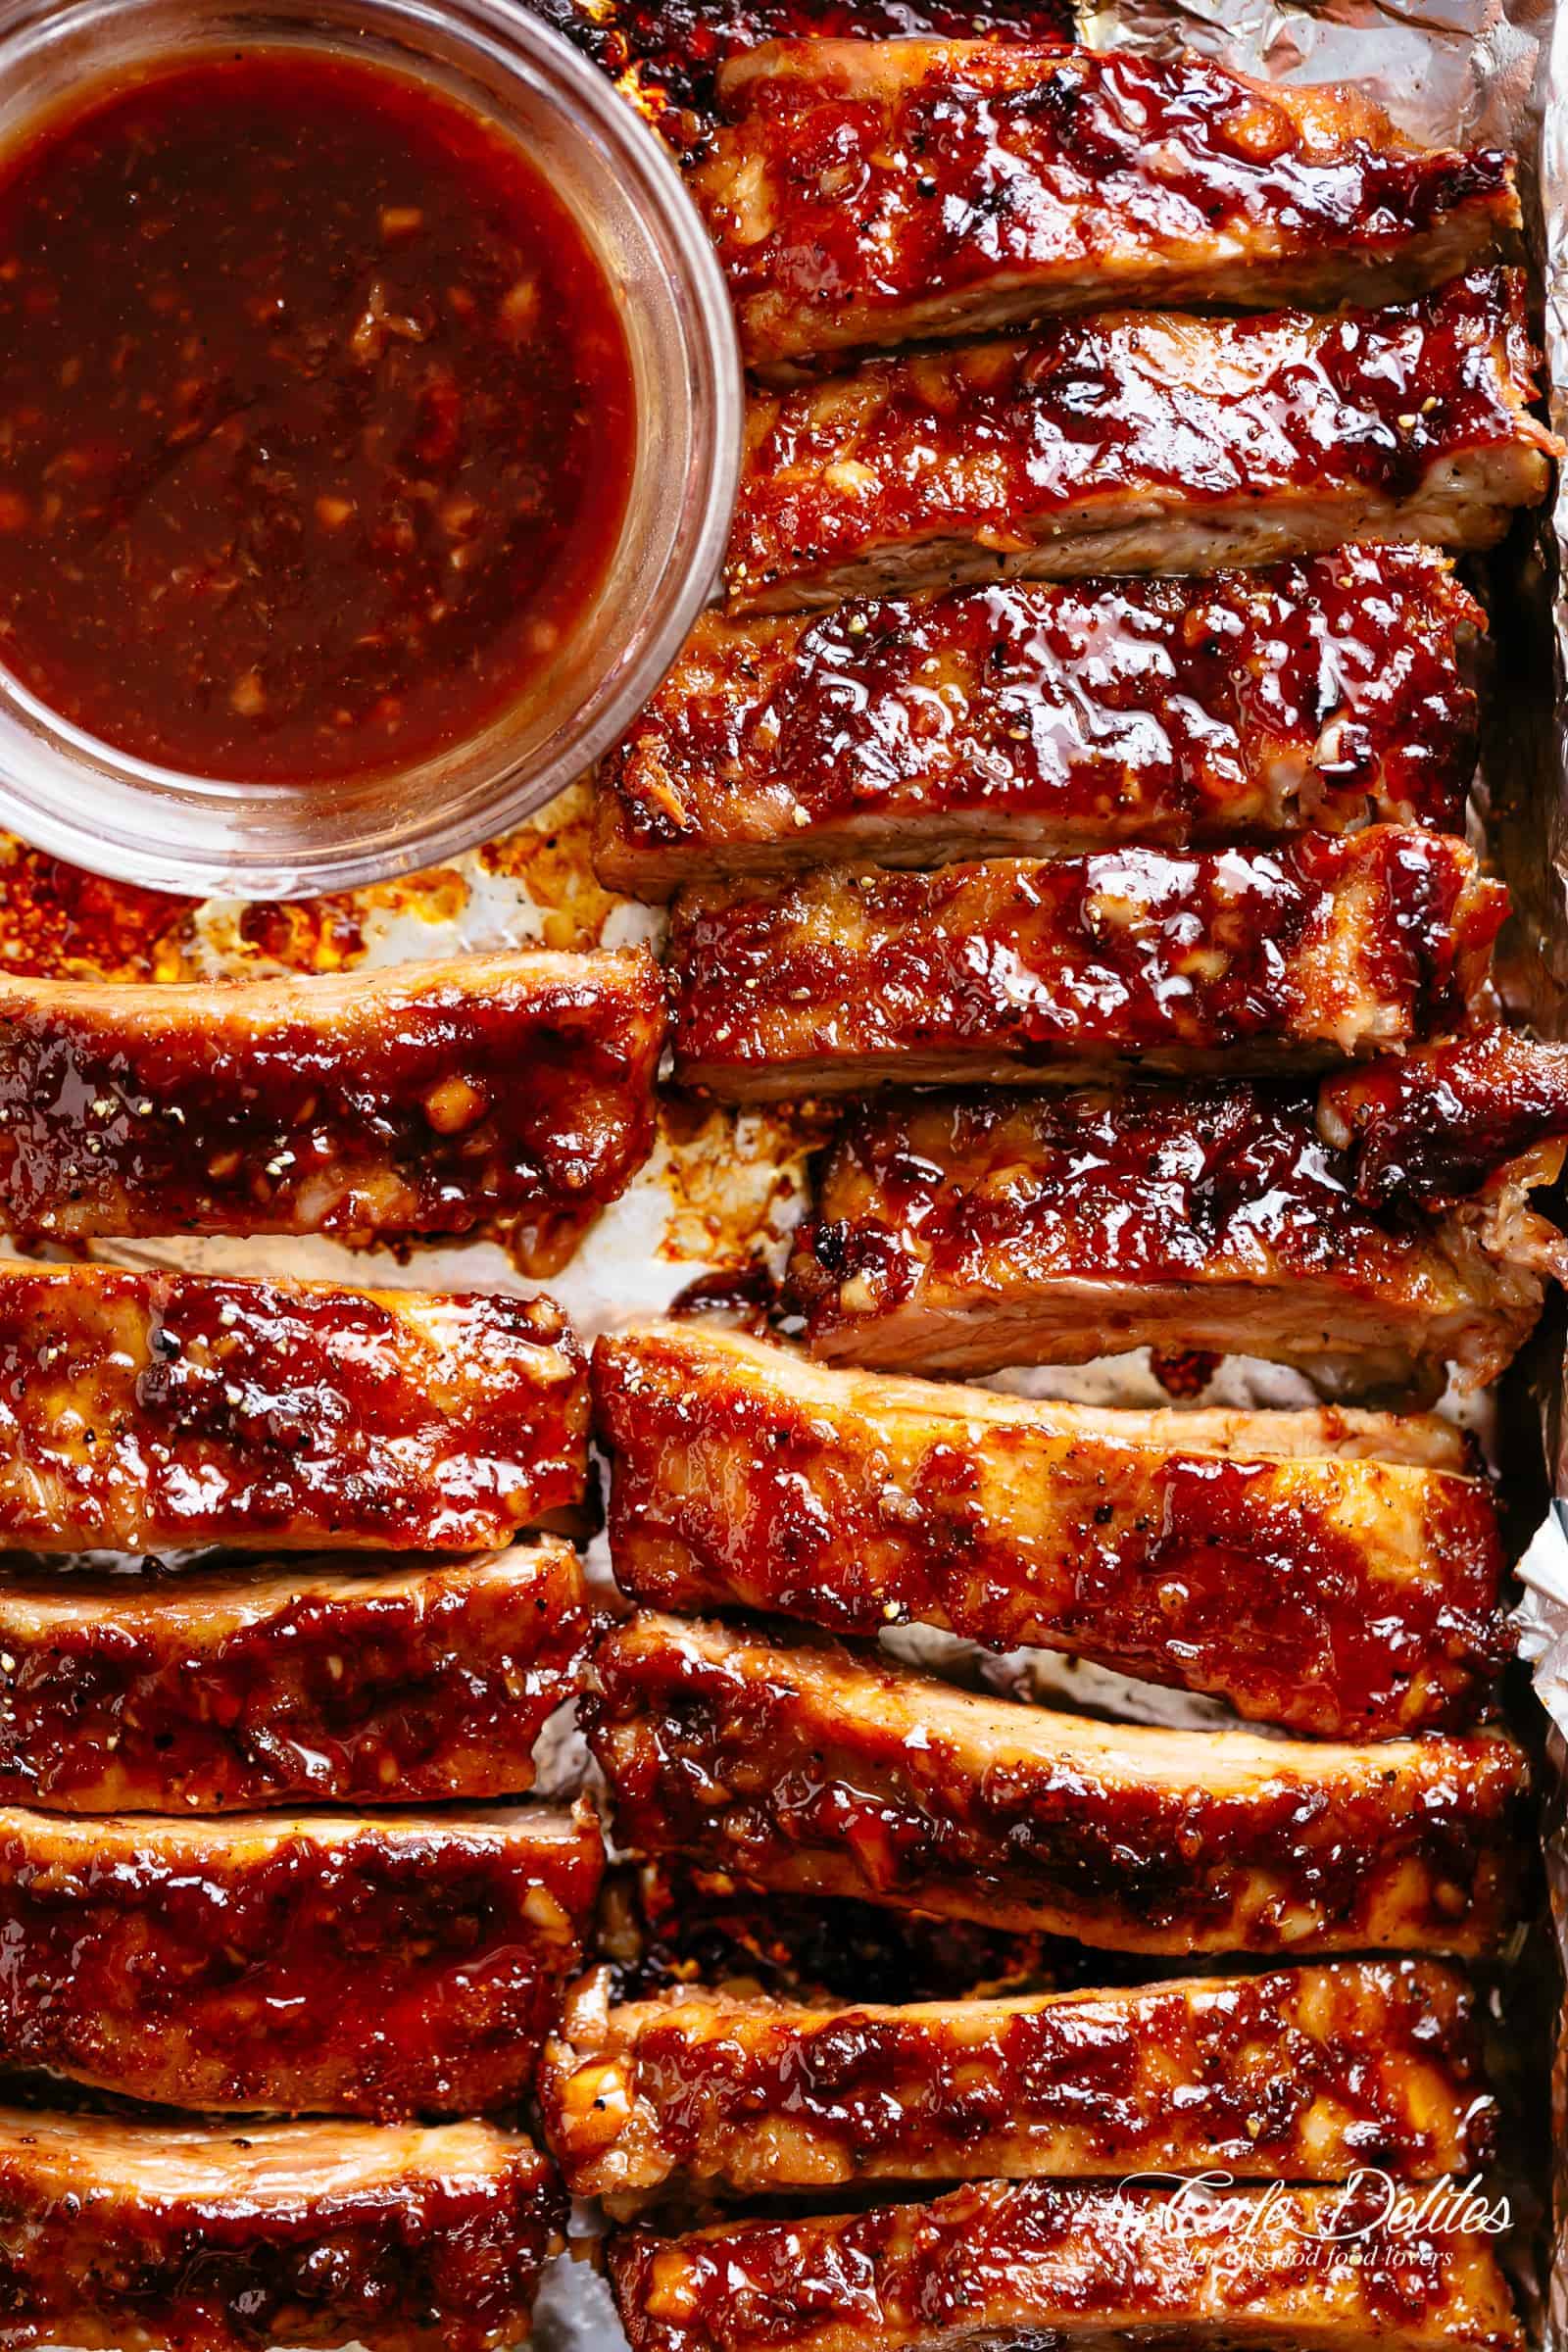
Step 4: Glazing with Barbecue Sauce
After the ribs have baked for a couple of hours, it’s time to unleash the full potential of your favorite barbecue sauce. Carefully remove the foil from each rack of ribs, being mindful of the escaping steam.
Generously brush the racks with the barbecue sauce, ensuring the meat is fully coated. Return the ribs to the oven, uncovered, and allow them to bake for an additional 30 minutes. This step adds a tantalizing glaze and enables the sauce to caramelize, intensifying the flavors.
Step 5: Rest, Slice, and Serve
Once the timer goes off, remove the mouthwatering racks of ribs from the oven and let them rest for a few minutes. This allows the juices to redistribute, resulting in a more succulent and tender bite.
Using a sharp knife or kitchen shears, carefully slice the racks into individual ribs. The meat should be so tender that it practically falls off the bone. Serve the ribs hot and watch as your guests dig in with delight.
Step 6: Sauce on the Side
While the ribs are a scrumptious star on their own, consider serving some extra barbecue sauce on the side for dipping. This allows each person to enjoy the ribs exactly how they like them, with a touch of extra sauce or seasoned to taste.
Pro Tip: If you want to elevate the flavor profile, consider serving the ribs with a tangy coleslaw or a refreshing cucumber-tomato salad. These sides provide a delightful contrast to the rich and smoky meat.
Step 7: Enjoy and Share the Joy
Now that the ribs are baked to perfection, it’s time to savor the fruits of your labor. Gather your loved ones, set the table, and enjoy the tantalizing experience of biting into juicy, fall-off-the-bone ribs.
Pro Tip: Don’t forget to have plenty of napkins on hand. Cooking and eating ribs can get delightfully messy!
Now that you’ve mastered the art of baking ribs, let your culinary creativity run wild. Experiment with different rubs, sauces, and cooking techniques to create your signature ribs that will leave everyone begging for seconds. Happy baking!
Important Things to Keep in Mind When Making This “How to Bake Ribs” Recipe
Get ready to tantalize your taste buds with delicious and tender ribs straight from your very own oven. While the idea of baking ribs may seem intimidating at first, fear not! With these important tips and tricks, you’ll be a rib-baking pro in no time. From selecting the perfect cut of meat to mastering the art of seasoning, let’s dive into the must-know details for making the best baked ribs ever.
1. Choosing the Right Cut of Ribs:
When it comes to baked ribs, the type of cut you select is crucial. Baby back ribs, known for their tenderness and delicate flavor, are a popular choice. Spare ribs, on the other hand, have more fat and connective tissue, resulting in a richer and more succulent taste. Whichever cut you opt for, ensure they are fresh, meaty, and evenly marbled for the best results.
2. Preparing the Ribs:
Before you dive into the baking process, it’s important to properly prepare your ribs. Start by removing the tough membrane on the back of the ribs. This allows the flavors to penetrate the meat more effectively and helps in achieving that fall-off-the-bone texture. Additionally, be sure to trim any excess fat, as it can lead to greasy and overly fatty ribs.
3. The Magic of Rubs:
The key to mouthwatering baked ribs lies in the perfect seasoning. Create your own spice rub using a combination of ingredients like brown sugar, salt, garlic powder, paprika, and cayenne pepper. Apply the rub generously to both sides of the ribs, ensuring an even coating. For an extra kick, let the seasoned ribs sit in the refrigerator for a few hours to allow the flavors to meld beautifully.
4. The Low and Slow Bake:
To achieve that tender and juicy texture, it’s crucial to bake the ribs low and slow. Preheat your oven to a temperature between 275-300 degrees Fahrenheit (135-149 degrees Celsius). Place the seasoned ribs on a baking sheet or in a roasting pan and cover tightly with aluminum foil. This will create a steamy environment and help the ribs retain their moisture. Bake for approximately 2-3 hours, until the meat is tender and easily pulls away from the bone.
Keep these important tips in mind, and soon you’ll be savoring mouthwatering, melt-in-your-mouth ribs that are sure to impress your family and friends. Enjoy the tantalizing aroma and the tender goodness that can only come from a perfectly baked rack of ribs. Happy cooking!
Frequently Asked Questions
Welcome to our collection of frequently asked questions on how to bake ribs. Whether you’re a seasoned chef or a beginner cook, we’ve got you covered with answers to common inquiries. Read on to learn more about the art of baking ribs to perfection.
1. What is the best way to prepare ribs for baking?
Before baking ribs, it’s important to give them a little TLC. Start by removing the thin membrane that covers the back of the ribs to ensure tenderness. Then, season them generously with a dry rub or marinade of your choice. Allow the ribs to sit and absorb the flavors for at least a few hours before baking. This will enhance their taste and tenderness.
Additionally, consider using indirect heat for baking. This means placing the ribs on a baking rack or in a roasting pan and cooking them in the oven at a lower temperature for a longer period of time. This method allows the ribs to cook slowly and become tender while also infusing them with smoky flavors.
2. Should I wrap the ribs in foil while baking?
Wrapping the ribs in foil during the baking process can be a game-changer. Known as the “Texas Crutch” technique, it helps to tenderize the meat and keep it moist. To use this technique, simply place the seasoned ribs on a large sheet of foil and tightly wrap them. Make sure there are no gaps for steam to escape.
Then, bake the wrapped ribs at a low temperature for a couple of hours. This method effectively steams the ribs in their own juices, resulting in fall-off-the-bone tenderness. For a crisper exterior, you can unwrap the foil during the last 30 minutes of baking and let the ribs develop a nice crust.
3. How long does it take to bake ribs?
The cooking time for baked ribs can vary depending on the temperature and size of the ribs. As a general rule, baking ribs at 300°F (150°C) will take about 2 to 3 hours. However, larger racks might require an extra 30 to 60 minutes to achieve maximum tenderness.
Keep in mind that these are just rough estimates, and it’s always a good idea to use a meat thermometer to ensure the ribs are cooked to the proper internal temperature of 145°F (63°C). Personal preferences for meat doneness may vary, so adjust the cooking time accordingly.
4. How can I achieve a flavorful crust on the ribs?
Creativity is key when it comes to adding a flavorful crust to baked ribs. One popular technique is applying a glaze during the last stages of baking. This can be a barbecue sauce, as it adds a tangy and slightly sweet flavor. Brush the sauce onto the ribs and let them bake for a few more minutes, allowing the glaze to caramelize and form a beautiful crust.
Another option is to broil the ribs for a few minutes after they are fully cooked. This method helps to create a crispy and caramelized exterior. Just make sure to keep a close eye on them as broiling can quickly turn from golden-brown to burnt.
5. Can I bake ribs in advance?
Absolutely! Baking ribs in advance can be convenient, especially when hosting a gathering or planning a busy week ahead. After baking the ribs to perfection, let them cool down and then refrigerate them in an airtight container. When you’re ready to serve, simply reheat them in the oven at a low temperature until warmed through.
To prevent the ribs from drying out during reheating, you can brush them with a bit of barbecue sauce or broth before placing them in the oven. This will help keep them moist and tender, ready to be enjoyed whenever you’re ready to dig in.
How to make BBQ Ribs in the Oven | Oven Baked Ribs Recipe
In conclusion, mastering the art of baking ribs is a skill that every aspiring chef should strive for. By following these steps, you can create succulent and flavorful ribs that will leave your guests craving for more. Remember to choose the right cut of ribs, marinate them to enhance the taste, and slow bake them to achieve that fall-off-the-bone tenderness. Don’t forget to experiment with different rubs and sauces to personalize your recipe. With practice and dedication, you will soon become a master of baking ribs, impressing your family and friends with your culinary prowess. So, go ahead and fire up that oven – it’s time to get baking and let the delicious aroma fill your kitchen!