As the autumn season approaches, it’s time to embrace the rich flavors and delightful aromas that come with it. And what better way to celebrate than by indulging in some homemade pumpkin seeds? As a professional chef, I’m here to guide you through the art of baking these little gems to perfection. From selecting the right pumpkin to seasoning and roasting them, get ready to embark on a culinary journey that will leave your taste buds dancing with delight. So, grab your apron, sharpen your knives, and let’s dive into the wonderful world of baking pumpkin seeds!
How to Bake Pumpkin Seeds: A Delicious and Nutritious Snack
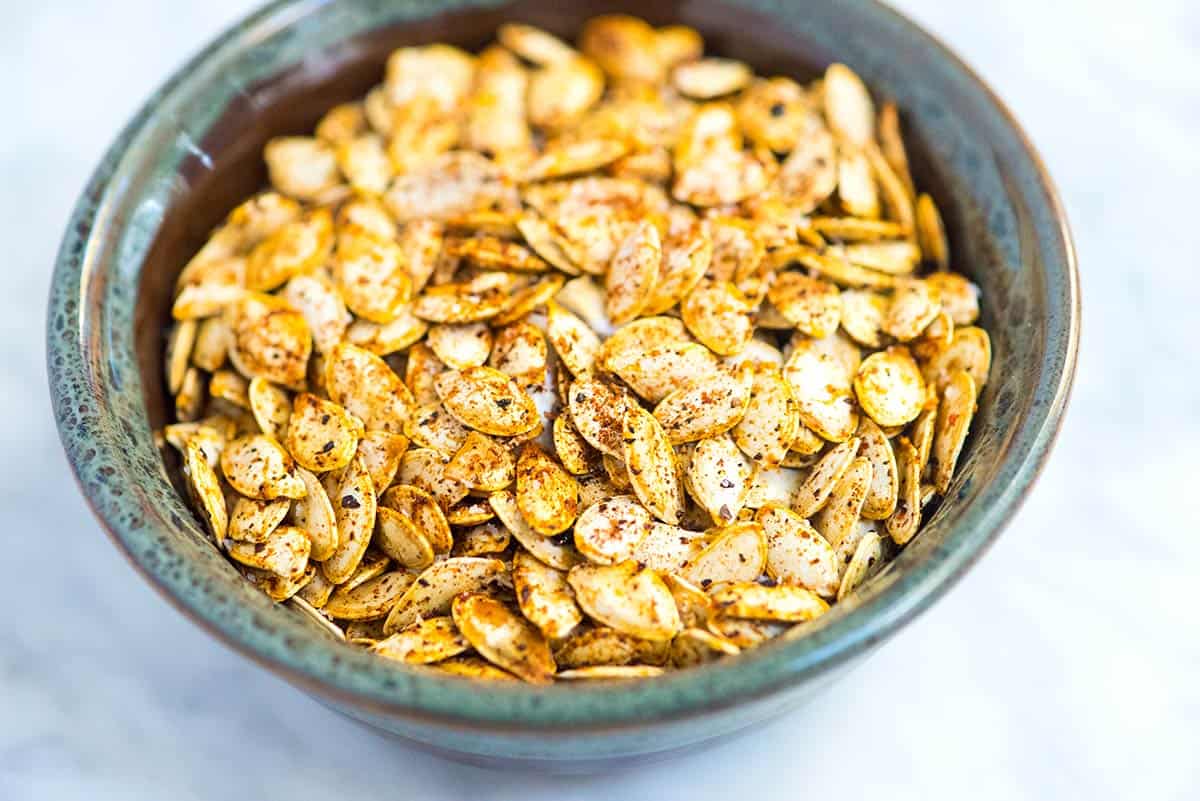
Pumpkin seeds, also known as pepitas, are a versatile and nutritious snack that can be enjoyed in various ways. Whether you’re looking for a crunchy topping for a salad or a satisfying nibble to curb your cravings, baked pumpkin seeds are the perfect choice. Loaded with essential nutrients like magnesium, zinc, and healthy fats, these seeds offer a host of health benefits.
Ingredients:
– Fresh pumpkin seeds
– Olive oil
– Sea salt
– Optional seasonings: cinnamon, paprika, cayenne pepper, garlic powder
General Information:
– Making Difficulty: Easy
– Preparation Time: 10 minutes
– Cooking Time: 20 minutes
– Total Time: 30 minutes
– Serves: 4
Instructions:
Step 1: Harvesting and Cleaning
First, you need to extract the seeds from the pumpkin. Cut open the pumpkin and scrape out the seeds with a spoon, separating them from the flesh and fibers. Place the seeds in a colander and rinse them under cold water to remove any remaining pulp or debris. Pat the seeds dry with a paper towel or clean kitchen towel.
Step 2: Preheat the Oven
Preheat your oven to 325°F (163°C). This temperature allows the pumpkin seeds to roast evenly without burning.
Step 3: Seasoning the Seeds
In a bowl, toss the dried pumpkin seeds with a drizzle of olive oil and a pinch of sea salt. You can also experiment with different seasonings like cinnamon for a sweet twist or paprika and cayenne pepper for a spicy kick. Mix well to coat the seeds evenly.
Step 4: Spreading on a Baking Sheet
Spread the seasoned pumpkin seeds in a single layer on a baking sheet. Make sure they are evenly distributed for uniform roasting. Avoid overcrowding the seeds as they won’t crisp up properly.
Step 5: Roasting in the Oven
Place the baking sheet with the pumpkin seeds in the preheated oven. Bake for about 10 minutes, then remove the sheet and give it a gentle shake to loosen the seeds. This ensures they roast evenly and prevents any sticking. Return the sheet to the oven for another 10 minutes or until the seeds turn golden brown. Keep a close eye on them as they can burn quickly.
Step 6: Cooling and Storing
Once the pumpkin seeds are golden and crispy, remove them from the oven and let them cool completely on the baking sheet. This allows them to become even crispier and ensures they don’t lose their crunch. Once cooled, transfer the baked pumpkin seeds to an airtight container or resealable bag for storage. They can be stored at room temperature for up to 2 weeks, although they’re so delicious they may not last that long!
Step 7: Enjoying the Deliciousness
You can now indulge in the delightful and wholesome snack of baked pumpkin seeds. Enjoy them as a standalone snack or add them to your favorite dishes. Sprinkle them over salads, soups, or roasted vegetables for an extra crunch and nutty flavor. You can also use them as a topping for yogurt or incorporate them into granola bars for added texture. The possibilities are endless!
By following these simple steps, you’ll have a batch of perfectly baked pumpkin seeds ready to satisfy your cravings and provide a nutritious boost. Don’t be afraid to experiment with different seasonings and flavors to create your own signature blend. So go ahead and savor this delicious and wholesome snack that’s both easy to make and incredibly satisfying.
Remember, baking pumpkin seeds is not only a tasty endeavor but also a fantastic way to reduce waste and make the most of every part of the pumpkin. So, the next time you carve up a pumpkin for Halloween or prepare a delicious pumpkin dish, save those seeds and transform them into a delectable treat. Happy snacking!
Important Things to Keep in Mind When Making ‘How to Bake Pumpkin Seeds’ Recipe
Pumpkin seeds are not just a delicious and healthy snack but also a versatile ingredient that can elevate many recipes. Whether you’re making roasted pumpkin seeds as a standalone snack or adding them as a crunchy topping to your salads, there are a few important things to keep in mind to ensure that you end up with perfectly toasted and flavorful seeds. So, before you head to the kitchen, here are some tips and tricks to make the most out of your pumpkin seed baking adventure.
When it comes to pumpkin seeds, the first step is to clean them thoroughly. Pumpkin seeds are often encased in a thin layer of pulp, and removing it is essential for achieving a crispy and flavorful result. Start by scooping out the seeds from the pumpkin and then place them in a colander. Give them a good rinse under cold water, rubbing them in your hands to remove any clinging pulp. Once they are clean, pat them dry using a clean kitchen towel or let them air dry before proceeding with the recipe.
The next important step is to season the pumpkin seeds properly. While plain salted seeds are undoubtedly delicious, adding some extra flavor can take them to the next level. Whether you prefer a savory or sweet option, there are numerous seasoning combinations to experiment with. For savory seeds, you can try sprinkling them with spices like paprika, garlic powder, or rosemary. For a sweeter option, toss them in cinnamon and sugar or add a drizzle of honey. Whichever flavors you choose, make sure to coat the seeds evenly to ensure every bite is bursting with flavor.
Temperature and time are crucial factors in achieving perfectly baked pumpkin seeds. Preheating the oven to around 350°F (175°C) is generally the sweet spot for getting the seeds toasty without burning them. Baking time can vary depending on the size and freshness of the seeds, but as a general guideline, aim for around 20-30 minutes. To check if they are done, take one seed out and let it cool for a moment. If it’s crispy and golden, your seeds are ready. Keep in mind that they will continue to crisp up as they cool, so avoid overcooking them in the oven.
Lastly, storing your baked pumpkin seeds properly is essential to maintain their freshness and crunchiness. Once the seeds have cooled completely, transfer them to an airtight container. Glass jars or sealed plastic bags work well for this purpose. Store them in a cool, dry place away from direct sunlight, as exposure to heat and humidity can cause the seeds to become stale. If stored correctly, your roasted pumpkin seeds can stay fresh for up to a month, making them a convenient and healthy snack option whenever you need a quick bite.
So, armed with these helpful tips, you are now ready to embark on your journey to bake the perfect pumpkin seeds. Whether you’re making them for a cozy movie night or to enhance the flavors of your favorite dishes, these crunchy delights are sure to impress. Enjoy the process, get creative with your seasonings, and savor every delicious bite of your homemade baked pumpkin seeds.
# Frequently Asked Questions
## How do I prepare pumpkin seeds for baking?
To prepare pumpkin seeds for baking, start by removing them from the pumpkin and rinsing off any excess pulp. Once they’re clean, spread the seeds out on a baking sheet and let them dry overnight. This will ensure they get nice and crispy when roasted. Once dry, preheat your oven to 350°F (175°C). Toss the seeds in a bowl with some melted butter or oil and your desired seasonings like salt, cinnamon, or garlic powder. Spread the seeds out on the baking sheet again, making sure they’re in a single layer. Bake them for about 10-15 minutes, until they’re golden brown and crunchy. Allow them to cool before enjoying your homemade pumpkin seed snack!
## Can I bake pumpkin seeds without boiling them first?
Yes, you can bake pumpkin seeds without boiling them first. Boiling pumpkin seeds can help make them extra tender before roasting, but it’s not necessary. If you prefer a crunchier texture, you can skip the boiling step. Simply remove the seeds from the pumpkin, rinse off any pulp, and then dry them thoroughly before baking. This will give you a crispier result. However, if you enjoy a softer texture, try boiling the seeds in salted water for about 10 minutes before drying and baking them.
## What are some creative seasonings I can use for baked pumpkin seeds?
There are endless possibilities for seasoning your baked pumpkin seeds! Beyond the classic salted version, you can experiment with a variety of flavors. Try adding some sweetness with cinnamon and sugar, or give them a savory kick with garlic powder, paprika, or chili powder. If you’re feeling adventurous, sprinkle some parmesan cheese, ranch seasoning, or even curry powder on your pumpkin seeds. Don’t be afraid to get creative and mix different seasonings together to find your perfect flavor combination!
## How long can I store baked pumpkin seeds?
Properly stored, baked pumpkin seeds can last for several weeks. To maximize their shelf life, make sure they are completely cool before storing them in an airtight container, such as a glass jar or a zip-top bag. Keep them in a cool, dry place away from direct sunlight. This will help maintain their crunchiness and prevent them from becoming stale. Enjoy them as a snack or use them as a delicious topping for salads, soups, or roasted vegetables.
## Can I use pumpkin seeds from a store-bought pumpkin for baking?
Yes, you can use pumpkin seeds from a store-bought pumpkin for baking. The seeds you find inside store-bought pumpkins are perfect for roasting and enjoying as a snack. Simply follow the same steps as you would with fresh pumpkin seeds. Make sure to rinse off any excess pulp, dry them thoroughly, season to your liking, and then bake until they’re golden brown and crunchy. Store-bought pumpkin seeds can be a convenient alternative if you don’t have access to fresh pumpkins or if you’re looking for a quick and easy snack option.

How-To Roast Pumpkin Seeds
In conclusion, baking pumpkin seeds is a simple yet delightful way to make the most out of this seasonal treat. By following the step-by-step guide provided, you can transform ordinary pumpkin seeds into a crunchy and flavorsome snack that will surely impress your friends and family. Whether you choose to experiment with different spices or stick to the classic salted version, baking pumpkin seeds is a versatile and enjoyable culinary adventure. So, grab your pumpkins, get those seeds out, and let your creativity shine in the kitchen. Happy baking!