Welcome, aspiring bakers and pie enthusiasts! As a professional chef, I am thrilled to share with you the art of baking the perfect pie crust. Whether you’re a novice in the kitchen or a seasoned pro, mastering the delicate balance of flakiness and tenderness in a pie crust is a skill that will elevate your baking game to new heights. Join me on this culinary journey, as we delve into the secrets, techniques, and tips that will transform your pies from ordinary to extraordinary. Get your rolling pins ready and prepare to embark on a delightful adventure in the world of pie crusts!
How to Bake the Perfect Pie Crust: A Step-by-Step Guide
Introduction: A buttery, flaky pie crust is the foundation for many delicious sweet and savory pies. Whether you’re a novice in the kitchen or a seasoned baker, mastering the art of pie crust is a skill that will elevate your desserts to new heights. In this step-by-step guide, we’ll take you through the process of making and baking the perfect pie crust. Get ready to impress your family and friends with your homemade pastry prowess!
Ingredients:
– 2 ½ cups all-purpose flour
– 1 teaspoon salt
– 1 cup unsalted butter, cold and cubed
– 6 tablespoons ice water
General Information:
– Difficulty: Intermediate
– Preparation time: 30 minutes
– Cooking time: 10-15 minutes (pre-baking) and variable per pie recipe
Now, let’s jump into the instructions on how to bake a flawless pie crust.
Instructions:
Step 1: Prep the Ingredients
Start by gathering all the necessary ingredients. Measure the flour and salt, and combine them in a large mixing bowl. Cut the cold butter into small cubes and keep it chilled until ready to use. Fill a separate cup with ice water, as this will help keep the butter cold while incorporating it into the dough.
To make the best pie crust, it’s essential to work with cold ingredients. This ensures that the butter stays solid until it’s baked, resulting in a flaky and tender crust.
Step 2: Cut the Butter Into the Flour
Now, it’s time to incorporate the butter into the flour. Using a pastry cutter or your fingertips, work the cold butter into the flour mixture until it resembles coarse crumbs. It’s okay to have some larger pea-sized pieces of butter remaining.
This step is crucial as it creates layers in the crust and helps to achieve the desired flakiness.
Step 3: Add the Ice Water
Next, drizzle the ice water into the flour-butter mixture, one tablespoon at a time. Use a fork or your hands to gently mix the dough together until it starts to come together. Be careful not to overmix at this stage; you want the dough to hold its shape when pressed together.
The amount of water needed may vary slightly, so add it gradually until the dough reaches the desired consistency. The dough should be moist enough to hold together, but not sticky.
Step 4: Form the Dough
Transfer the dough onto a clean, lightly floured surface. Gently shape it into a ball and divide it in half. Flatten each half into a disc shape, about 1 inch thick. Wrap each disc tightly in plastic wrap and refrigerate for at least 1 hour, or overnight for even better results.
Chilling the dough allows the gluten to relax and the butter to firm up again, resulting in a more tender and flaky crust.
Step 5: Roll Out the Dough
Once the dough has chilled, remove one disc from the refrigerator. On a lightly floured surface, roll out the dough into a circle, about 12 inches in diameter. Rotate the dough frequently as you roll to prevent sticking and to create an even thickness.
When rolling out the dough, be gentle and avoid applying too much pressure, as this can make the crust tough.
Step 6: Transfer the Dough to the Pie Plate
To transfer the rolled out dough to the pie plate, carefully drape it over your rolling pin. Lift the dough and position it over the plate, ensuring it is centered. Gently press the dough into the bottom and sides of the plate, making sure it fits snugly.
Trim any excess overhang, leaving about half an inch to create a fluted edge later on.
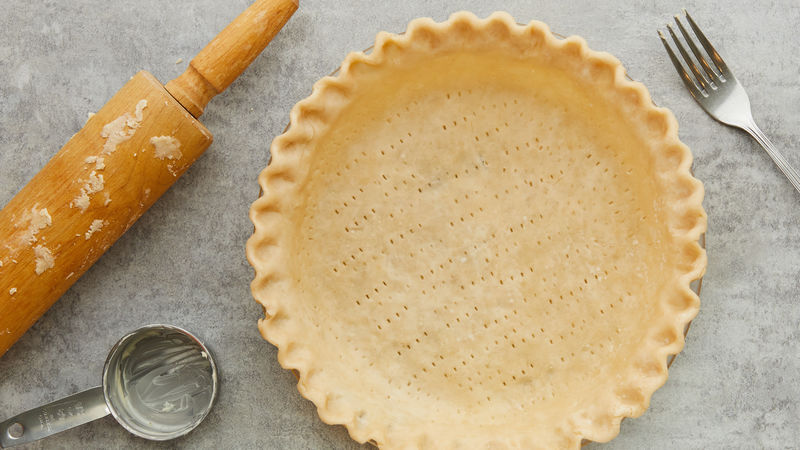
Step 7: Pre-bake the Crust (Blind Baking)
Some pie recipes call for a pre-baked crust. If your pie recipe requires this step, preheat your oven to 425°F (220°C). Line the pie crust with parchment paper or aluminum foil and fill it with pie weights or dried beans to prevent it from puffing up.
Bake the crust for 10-15 minutes or until it turns a light golden brown. Remove the weights and parchment paper, and continue baking for a few more minutes until the crust is fully cooked. Allow it to cool completely before filling with your desired pie filling.
Pro tip: Brushing the pre-baked crust with beaten egg white and baking it for an additional minute will create a barrier, preventing the crust from becoming soggy when filled with juicy fillings.
And there you have it! Follow these simple steps, and you’ll be on your way to mastering the art of baking the perfect pie crust. Whether it’s a classic apple pie or a savory quiche, your pies will be the talk of the town. Happy baking!
Remember, practice makes perfect, so don’t be discouraged if your first attempt isn’t flawless. With each pie you bake, you’ll gain confidence and discover your own techniques to personalize your crust. Embrace the process, have fun, and enjoy the flavorful rewards of your labor.

Important things to keep in mind when making the perfect pie crust
Creating a flaky and delicious pie crust is an art form that can take your baked goods to the next level. Whether you’re a seasoned baker or a pie-crust novice, there are a few important things to keep in mind when making the perfect pie crust. From choosing the right ingredients to mastering the technique, these tips will help you achieve crust perfection every time.
1. Use the right flour: When it comes to making pie crust, the type of flour you use can make a big difference. Opt for all-purpose flour, which strikes the perfect balance between protein content and tenderness. Avoid bread flour, which has a higher protein content and can result in a tougher crust. Additionally, make sure your flour is fresh to ensure optimal texture and flavor.
2. Chill your ingredients and equipment: Keeping your ingredients and equipment cold is essential for achieving a flaky and tender crust. Ensure that your butter or shortening is cold before using it, as this will help create those sought-after layers. Likewise, chill your mixing bowl, pastry cutter, or food processor before beginning the dough-making process. This will prevent the fat from melting too quickly and resulting in a tough crust.
3. Don’t overwork the dough: When it comes to mixing and kneading your pie dough, less is more. Overworking the dough can lead to the development of gluten, which can result in a tough crust. Once your dough has come together, it’s best to stop mixing. Some small chunks of butter or shortening are perfectly fine—they will create steam pockets during the baking process, resulting in a flaky texture.
4. Allow the dough to rest: After mixing your pie dough, it’s important to let it rest in the refrigerator for at least 30 minutes. This allows the gluten to relax and the fats to firm up, making the dough easier to roll out and preventing shrinking during the baking process. Wrap the dough tightly in plastic wrap to prevent it from drying out and developing a tough texture.
Making the perfect pie crust requires attention to detail and a little bit of patience. By using the right ingredients, chilling your dough and equipment, avoiding overworking the dough, and allowing it to rest, you’ll be well on your way to creating a pie crust that will have everyone asking for seconds. So, whether you’re making a classic apple pie or a savory quiche, remember these important tips and get ready to impress with your baking skills!
Frequently Asked Questions
Are you ready to perfect your pie crust? Look no further! We’ve compiled some frequently asked questions to help you on your journey to baking the perfect pie crust.
1. What is the secret to a flaky pie crust?
Creating a flaky pie crust requires a delicate balance of fat, flour, and moisture. The secret lies in using cold ingredients and not overworking the dough. Start by chilling your fat (such as butter or shortening) and water in the refrigerator for at least 30 minutes. Then, mix together the cold fat, flour, and a pinch of salt until the mixture resembles coarse crumbs.
Next, gradually add ice-cold water, one tablespoon at a time, and gently mix until the dough just comes together. Be careful not to overmix, as this can result in a tough crust. Once the dough has formed, shape it into a disk, wrap it in plastic wrap, and let it rest in the refrigerator for at least 1 hour before rolling it out.
2. Can I use oil instead of butter or shortening for my pie crust?
Absolutely! Using oil instead of butter or shortening can yield a delicious and flaky pie crust. Replace the solid fat with an equal amount of vegetable oil and reduce the water slightly. Start by mixing the oil and flour until the mixture resembles coarse crumbs. Then, gradually add cold water, one tablespoon at a time, until the dough comes together.
Remember, though, that an oil-based crust may have a slightly different texture and flavor compared to a butter or shortening-based crust. It is also important to note that an oil-based crust may be softer and more delicate, so handle it with care when rolling it out and transferring it to the pie dish.
3. Should I blind bake my pie crust?
Blind baking, or pre-baking the crust before adding the filling, is often necessary for pies with fillings that require little or no baking, or for fillings that might make the crust soggy. To blind bake your pie crust, start by rolling out the dough and placing it in a pie dish. Prick the bottom of the crust with a fork to prevent it from puffing up during baking.
Next, line the crust with parchment paper or aluminum foil and fill it with pie weights (such as dried beans or ceramic pie weights). Bake the crust in a preheated oven at the recommended temperature for about 15 minutes. Then, remove the parchment paper and pie weights, and continue baking until the crust is golden brown. Let it cool before adding the filling.
4. How can I prevent my pie crust edges from burning?
Burning pie crust edges can be prevented by using a few simple techniques. One option is to cover the edges of the crust with a pie crust shield or aluminum foil. This will protect the edges from direct heat and prevent them from browning too quickly.
Alternatively, you can apply an egg wash or milk to the edges of the crust. This will add a nice shine and help in creating a golden-brown crust without burning. Just be sure to apply the wash before baking and keep an eye on the crust towards the end of the baking time to avoid overbrowning.
5. Can I freeze my pie crust dough?
Absolutely! Freezing pie crust dough is a great way to make ahead and save time. After preparing the dough, shape it into a disk, wrap it tightly in plastic wrap, and place it in a freezer-safe bag or container. It can be kept in the freezer for up to 3 months.
When you’re ready to use the dough, simply thaw it in the refrigerator overnight. Once thawed, allow the dough to sit at room temperature for a few minutes before rolling it out. Note that frozen pie crust dough may require a slightly longer baking time, so keep an eye on it while it bakes, and adjust accordingly.