How To Bake Oranges For Garland
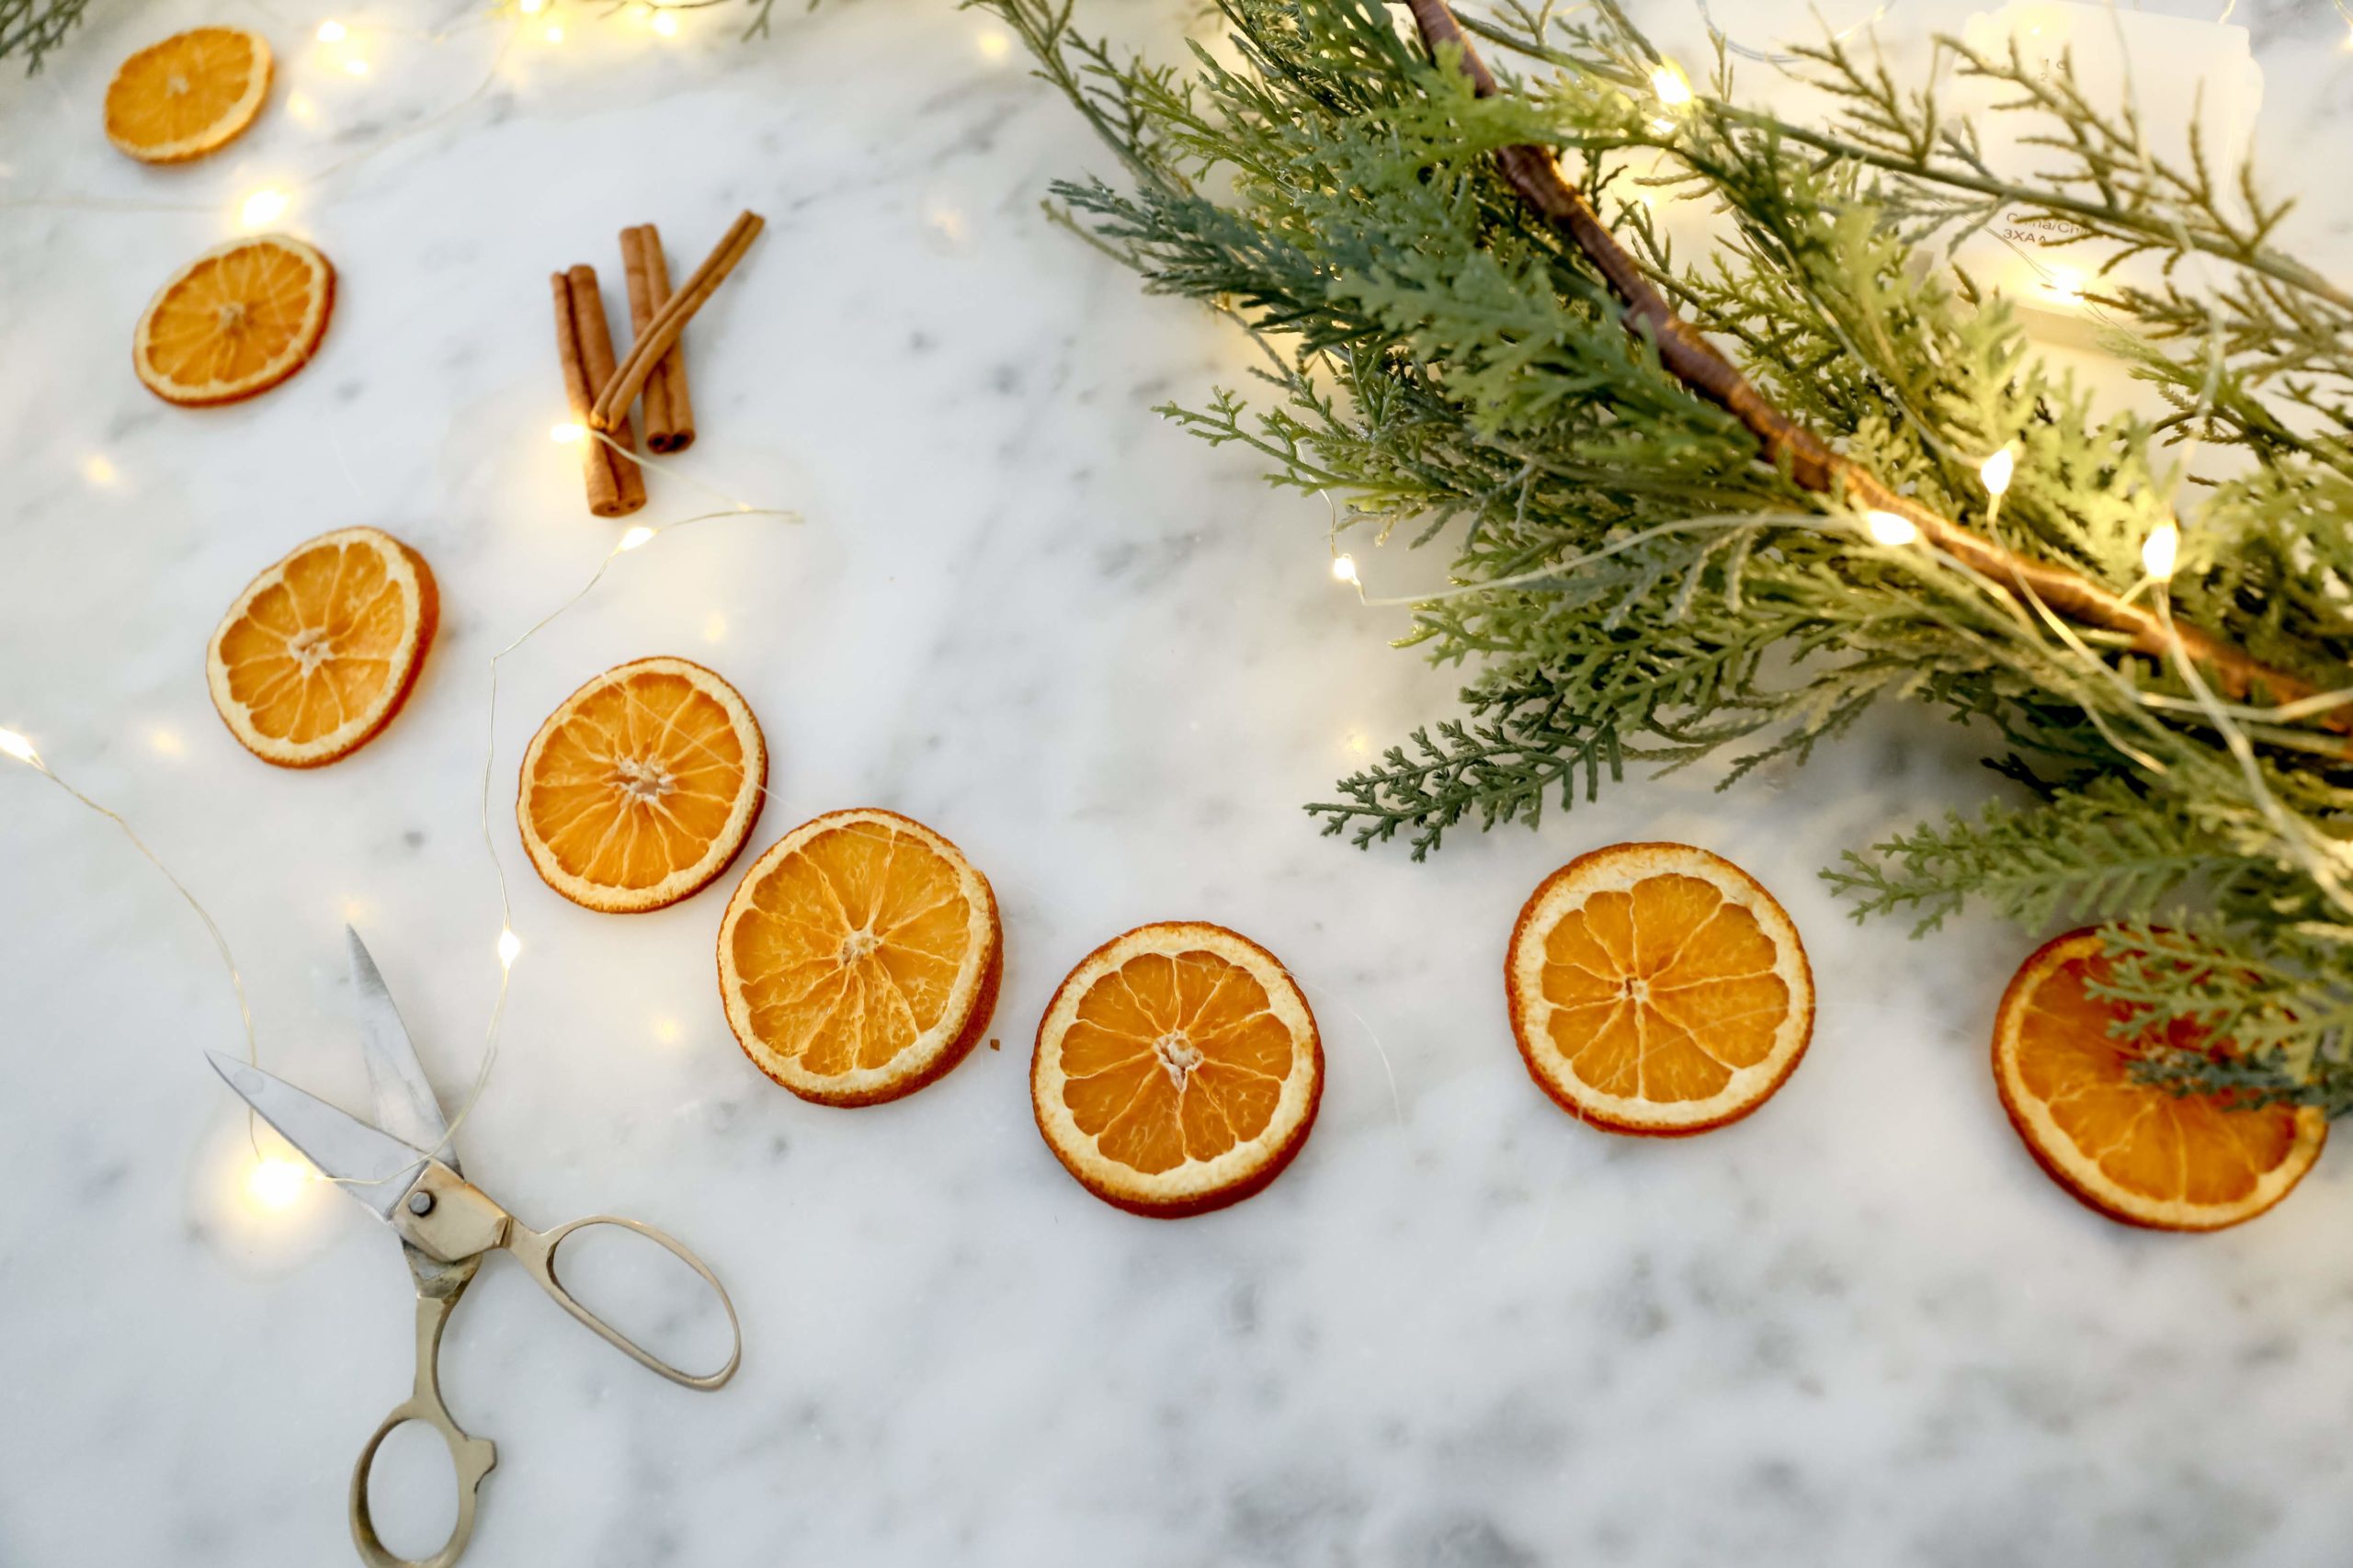
As a professional chef, I’m constantly on the lookout for unique and creative ways to add a touch of warmth and beauty to my kitchen. And what better way to do so than by crafting a stunning garland out of baked oranges? The delightful aroma that fills the air as the oranges slowly transform into fragrant, golden slices is simply irresistible. In this guide, I’ll be sharing with you my tried-and-true method for baking oranges for garland, a festive and charming addition to any home decor. So, grab your apron and let’s get started on this delightful culinary journey!
How to Bake Oranges for Garland
Get ready to add a touch of holiday magic to your home with this delightful recipe for baking oranges for garland. The warmth and aroma of baked oranges are sure to create a festive atmosphere, and the garland can be used to adorn your Christmas tree, mantel, or any other space that needs a little extra sparkle. Let’s dive into the recipe and create a beautiful and fragrant decoration for your home!
Ingredients:
- 4-5 fresh oranges
- 1 cup granulated sugar
- 1 tablespoon ground cinnamon
- 1 teaspoon ground cloves
- 1 teaspoon ground nutmeg
- Satin ribbon or twine
General Information:
- Making Difficulty: Easy
- Preparation Time: 15 minutes
- Cooking Time: 2-3 hours
- Servings: Varies depending on the size of the garland
Instructions:
Step 1: Prepare the Oranges
Gently wash the oranges under running water to remove any dirt or debris. Pat them dry with a clean kitchen towel. Preheat your oven to 200°F (93°C).
Slice the oranges into thin round slices, about 1/4 inch thick. Remove any seeds from the slices if necessary. Set aside.
Step 2: Create the Spiced Sugar Mixture
In a small bowl, combine the granulated sugar, ground cinnamon, ground cloves, and ground nutmeg. Mix well until all the ingredients are evenly incorporated.
Spread a thin layer of the spiced sugar mixture on a large plate or baking sheet. This will be used to coat the orange slices later on.
Step 3: Coat the Orange Slices
Take each orange slice and press it firmly onto the spiced sugar mixture, ensuring that both sides are coated with a thin layer of sugar and spices. Place the coated slices on a wire rack set over a baking sheet, ensuring that they are not overlapping.
Once all the orange slices are coated and arranged on the wire rack, transfer them to the preheated oven.
Step 4: Bake the Orange Slices
Place the wire rack with the orange slices in the oven and bake for 2-3 hours, or until the slices are dehydrated and slightly curled at the edges. The baking time may vary depending on the thickness of the slices and the moisture content of the oranges.
Keep an eye on the orange slices as they bake, flipping them halfway through the baking time to ensure even dehydration. The slices should be firm and dry to the touch but still retain their vibrant color.
Step 5: Let the Orange Slices Cool
Once the orange slices are baked to perfection, remove them from the oven and let them cool completely on the wire rack. They will continue to harden as they cool, so don’t worry if they are slightly soft when first taken out of the oven.
Step 6: Thread the Orange Slices
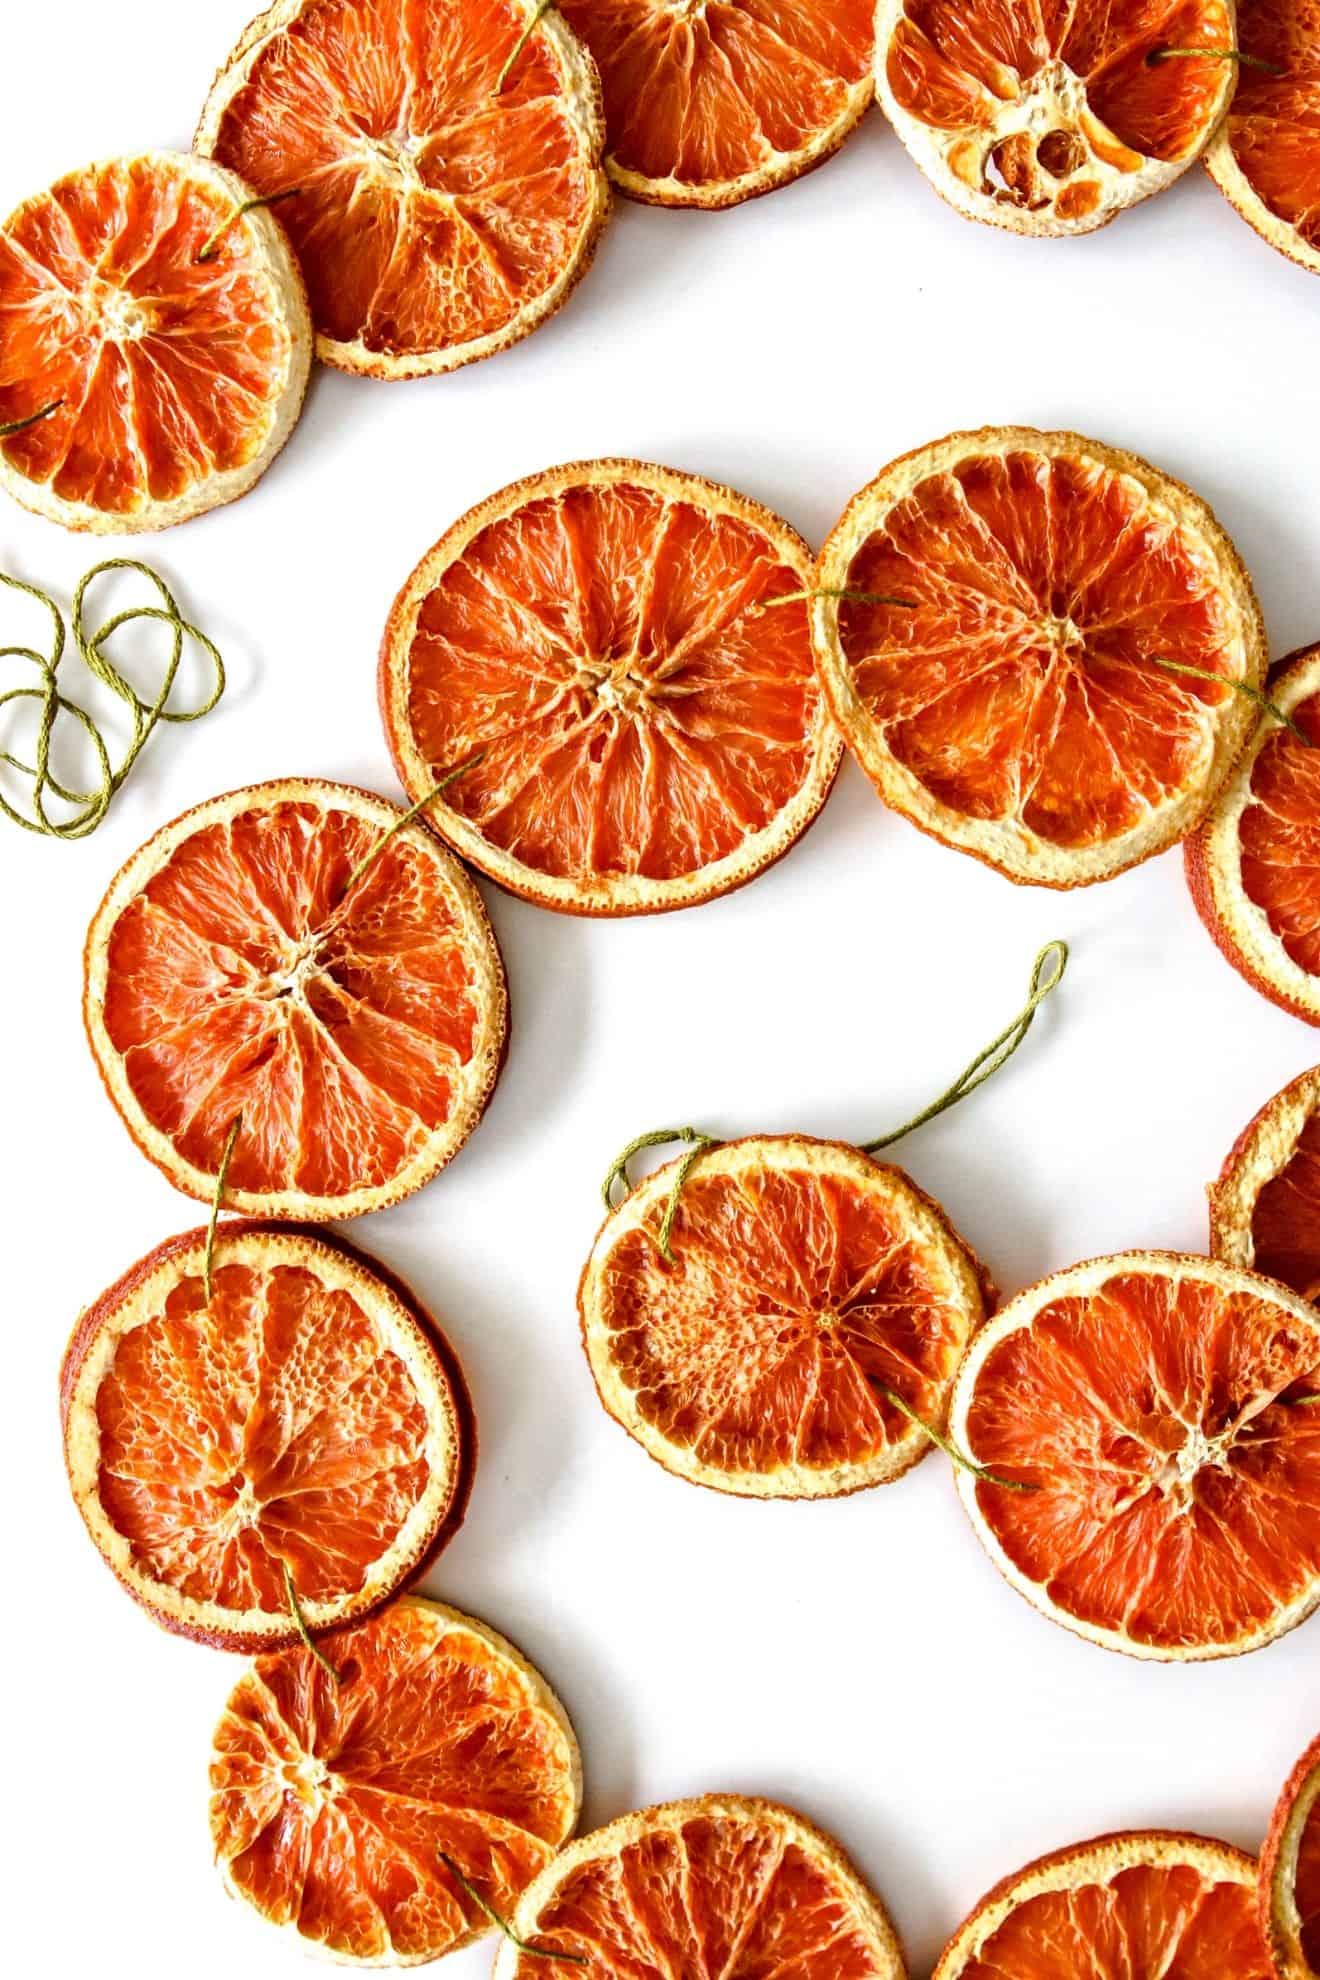
Once the orange slices have cooled, use a needle or skewer to carefully pierce a small hole through the center of each slice. Thread a satin ribbon or twine through the holes, alternating the orange slices with a few inches of space in between each one.
Continue threading the slices until you have created a garland of your desired length. You can adjust the spacing between the slices to suit your preference.
Step 7: Hang and Enjoy!
Find the perfect spot to hang your beautiful orange garland. It could be on your Christmas tree, draped along the mantel, or even used as a festive decoration for parties and gatherings.
As the garland hangs, it will release a delightful citrusy and spiced aroma, filling your home with the scent of the holidays. Remember to keep an eye on the garland and discard any oranges that show signs of spoilage or excessive drying.
Now, step back and admire your handiwork. The baked orange garland adds a touch of natural beauty and elegance to any space, creating a cozy and welcoming ambiance. Enjoy the festive season and the warmth it brings!
Important things to keep in mind when making this “How to Bake Oranges for Garland” recipe
Have you ever wanted to create a festive and beautifully scented garland for your home during the holiday season? Look no further than this delightful recipe for baking oranges. Baking oranges not only enhances their sweet aroma but also transforms them into stunning, dried ornaments that can be used to create the perfect festive touch in your home. However, there are a few important things to keep in mind when making this recipe to ensure the best results.
1. Choose the right oranges
Selecting the right type of oranges is crucial for this recipe. You want to opt for thick-skinned oranges, such as navel or blood oranges, as they tend to hold their shape and retain their vibrant color during the baking process. Avoid using overly ripe or soft oranges, as they may become mushy and lose their visual appeal. Additionally, ensure that the oranges are clean and free from any blemishes or bruises.
2. Slice evenly for consistent results
Consistency is key when it comes to baking oranges for garland. Make sure to slice the oranges evenly, approximately ¼ inch thick. This will allow them to dry evenly and maintain a uniform appearance once baked. Using a sharp knife or a mandoline slicer can help achieve perfectly even slices. Taking the time to slice the oranges with precision will ensure that each slice turns out beautifully.
3. Properly prepare the oranges
Before placing the orange slices in the oven, it’s important to prepare them properly. Patting the slices dry with a paper towel will remove any excess moisture, allowing them to bake evenly and avoid becoming too sticky. Additionally, lightly greasing a baking sheet or lining it with parchment paper will prevent the orange slices from sticking to the surface. Giving these extra steps some attention will ensure that your baked oranges come out picture-perfect.
4. Monitor the baking time and temperature
Finding the right balance between baking time and temperature is crucial for achieving the desired results. Preheat your oven to a low temperature, around 200°F (93°C), to gently and slowly dry out the oranges without burning them. The baking time will vary based on the thickness of the orange slices and the moisture content of the fruit. Generally, it takes about 2-3 hours for the slices to fully dry out. Keep an eye on them throughout the baking process to avoid overcooking or undercooking. Once they are crisp and no longer moist to the touch, they are ready to be taken out of the oven.
By keeping these important factors in mind, you can create a stunning garland using baked oranges that will fill your home with a delightful citrusy scent and add a touch of natural elegance to your holiday decor. So, gather your ingredients, slice those oranges, and let the baking begin!
Frequently Asked Questions
Welcome to our Frequently Asked Questions about baking oranges for garland! In this section, we’ll address common queries you may have about this festive and aromatic DIY project. Whether you’re looking to add a touch of natural beauty to your holiday decorations or want to create a unique gift, baking oranges for garland is a fun and creative activity. Let’s dive into some of the questions you may have.
1. How do I prepare the oranges for baking?
To prepare the oranges for baking, you’ll first need to gather the necessary ingredients and supplies. Start by preheating your oven to a low temperature, around 200°F (95°C). While the oven is warming up, slice the oranges into thin, uniform rounds, approximately 1/4 to 1/2 inch thick. You can use a sharp knife or a mandoline slicer for this step. Once the oranges are sliced, gently pat them dry with a paper towel to remove any excess moisture, as this helps with the drying process.
Next, place the orange slices on a baking sheet lined with parchment paper. Make sure to leave some space between each slice to allow for proper air circulation. You can also sprinkle the slices with cinnamon, cloves, or other festive spices if you’d like to add a fragrant touch. Finally, pop the baking sheet into the preheated oven and let the oranges bake until they are fully dried, which typically takes around 2-3 hours. Remember to rotate the baking sheet halfway through to ensure even drying.
2. Can I use any type of oranges for baking garland?
Yes, you can use various types of oranges for baking garland. Some popular options include navel oranges, blood oranges, and even mandarins. The choice of oranges primarily depends on your preference for color and taste. Navel oranges are commonly used as they have a vibrant orange color, while blood oranges add an appealing reddish hue. Mandarins, on the other hand, are smaller and can offer a different look to your garland.
Regardless of the type of orange you choose, it’s important to pick firm and ripe fruits. This ensures that the slices will hold their shape during the baking process and maintain their vibrant color. Avoid using overly soft or damaged oranges, as they may not dry properly and could affect the overall appearance and texture of your garland.
3. How long can I store the baked orange slices for garland?
Once your orange slices are baked and fully dried, they can be stored for an extended period. Properly dried orange slices can last for several months when stored correctly. To maximize their shelf life, it’s important to ensure that the slices are completely dry and free from any moisture before storing them.
You can store the dried orange slices in an airtight container or a sealed plastic bag. It’s best to place them in a cool, dry place away from direct sunlight, as exposure to heat and light can cause them to deteriorate faster. By storing them properly, you can enjoy their natural beauty and aroma throughout the holiday season and beyond.
4. How can I use the baked orange slices for garland?
Baked orange slices can be used in various ways to create stunning garlands. One popular method is to string the slices together with twine or thin ribbon, alternating them with other decorative elements like pinecones or cinnamon sticks. You can create a loop at each end of the garland to easily hang it on a mantel, staircase, or even on a Christmas tree.
Another option is to use the individual orange slices as decorative elements on wreaths, gift wraps, or table centerpieces. Simply attach them with a hot glue gun or tie them with a festive ribbon to add a touch of natural beauty to your holiday decor. The possibilities are endless, so feel free to unleash your creativity and experiment with different ways to incorporate the baked orange slices into your festive arrangements.
5. Are there any safety precautions I should follow when baking oranges for garland?
While baking oranges for garland is generally safe, it’s important to take a few precautions to ensure a smooth and hazard-free process. Firstly, always handle sharp knives and mandoline slicers with care to prevent accidental cuts. If you’re using an oven, be cautious when opening and closing the oven door, as it can get hot during the baking process.
Additionally, ensure proper ventilation in your kitchen by opening windows or turning on the exhaust fan, as the aroma from baking oranges can be potent. Lastly, never leave the oven unattended while baking the orange slices to minimize the risk of any mishaps. By following these safety measures, you can enjoy a safe and enjoyable baking experience while creating beautiful orange garlands.