As a professional chef, I am always on the lookout for innovative ways to elevate the flavors and textures of everyday ingredients. Today, I am excited to share with you a truly delightful technique that will transform the humble okra into a crispy, crunchy sensation. Yes, you heard it right! We are going to dive into the world of baking okra to achieve that irresistible crunch that will leave you wanting more. So, grab your apron, preheat your ovens, and get ready to embark on a culinary adventure as we uncover the secrets to baking okra to perfection. Get ready to amaze your taste buds and impress your friends and family with this simple yet scrumptious recipe. Let’s get started!
How to Bake Okra to be Crunchy: A Delicious and Healthy Snack
Okra, also known as ladyfingers, is a versatile and nutritious vegetable that is often overlooked. While it’s commonly used in soups and stews, baking okra is a fantastic way to highlight its natural flavors and achieve a satisfying, crunchy texture. Whether you’re looking for a delicious side dish or a healthy snack, this recipe will guide you through the process of baking okra to perfection.
Ingredients:
– 1 pound of fresh okra
– 2 tablespoons of olive oil
– 1 teaspoon of salt
– 1 teaspoon of paprika
– ½ teaspoon of garlic powder
– ½ teaspoon of onion powder
– ¼ teaspoon of black pepper
– Optional: a pinch of cayenne pepper for added heat
General Information:
– Difficulty: Easy
– Preparation Time: 10 minutes
– Cooking Time: 25-30 minutes
– Servings: 4
Instructions:
Step 1: Preheat the Oven and Prep the Okra
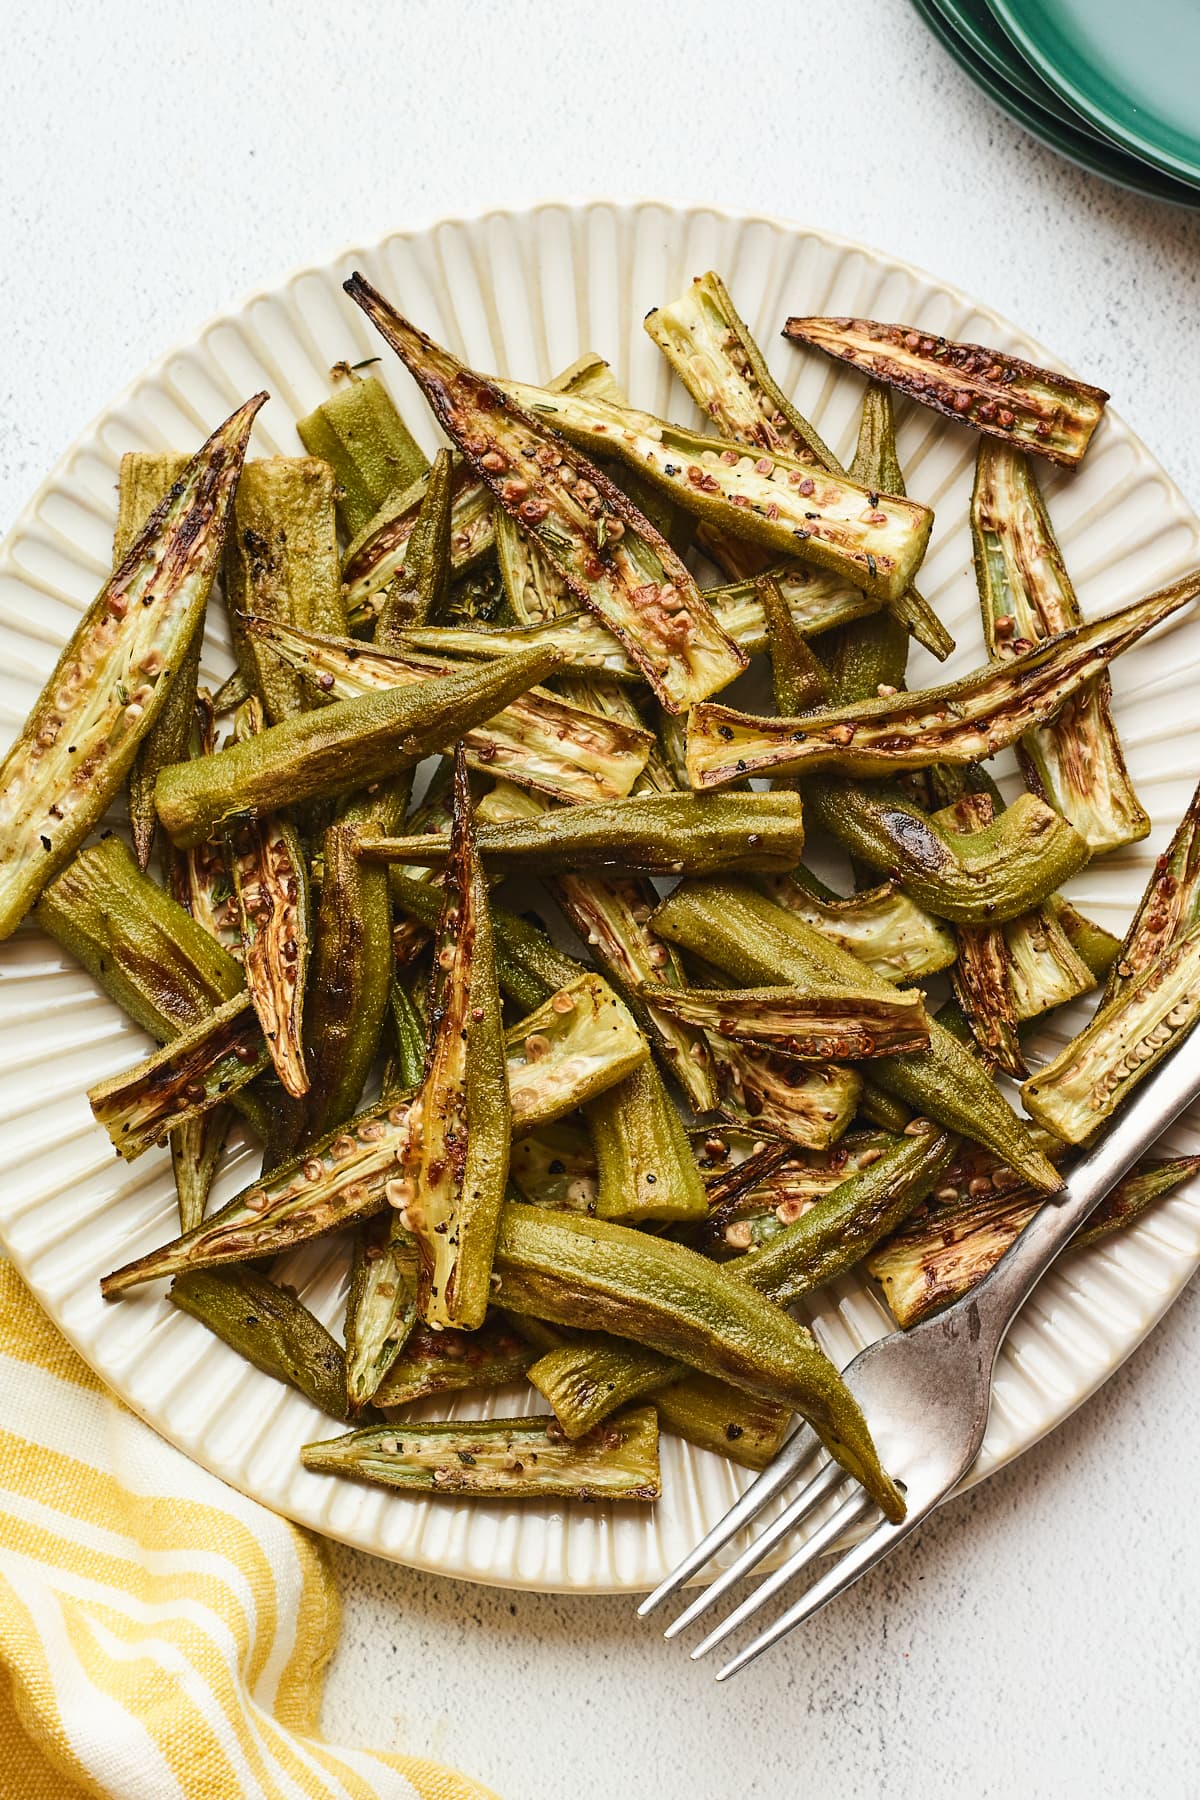
Begin by preheating your oven to 425°F (220°C). While the oven is heating up, wash the okra thoroughly under cold running water. Pat it dry using a clean kitchen towel or paper towels. Trim the stems off the okra pods, then slice them into uniform pieces of about ½ inch thick. Discard the tips of the okra if they are tough or woody.
Next, place the sliced okra in a large mixing bowl and drizzle the olive oil over it. Toss the okra gently to ensure every piece is coated evenly. Olive oil helps to achieve a crispy texture while adding a hint of richness to the flavor.
Step 2: Season the Okra
In a small bowl, combine the salt, paprika, garlic powder, onion powder, black pepper, and optionally, the cayenne pepper. Mix the spices well to ensure they are evenly integrated. Sprinkle the spice mixture over the okra in the mixing bowl, making sure to coat each piece thoroughly. This seasoning blend adds a savory and slightly spicy kick to the okra, enhancing its overall taste.
Using your clean hands, gently toss the okra once again to distribute the spices evenly. Be careful not to crush or break the okra pieces in the process. The spices will adhere to the okra, creating a flavorful coating that will crisp up nicely as it bakes.
Step 3: Arrange the Okra on a Baking Sheet
Take a large, rimmed baking sheet and line it with parchment paper or aluminum foil. Spread the seasoned okra pieces evenly on the baking sheet, making sure they are not overcrowded. The goal is to allow the heat to circulate around each piece, promoting even cooking and encouraging the desired crunchiness.
Step 4: Bake the Okra
Place the baking sheet in the preheated oven and let the okra bake for 25-30 minutes. Check on the okra occasionally, giving it a gentle stir with a spatula to ensure even browning. Keep in mind that baking times may vary slightly depending on your oven and the size of the okra pieces. The okra should turn golden brown and become crispy.
Step 5: Remove from the Oven and Let It Cool
Once the okra reaches your desired level of crispiness, carefully remove the baking sheet from the oven. Allow the okra to cool on the baking sheet for a few minutes. This will help the okra retain its crunchy texture as it cools.
Step 6: Serve and Enjoy!
Transfer the baked okra to a serving plate or bowl. It can be enjoyed either warm or at room temperature. Baked okra makes a delightful side dish to accompany grilled meats or roasted poultry. It is also a fantastic standalone snack, perfect for munching on while watching your favorite movies or shows.
Step 7: Storage
If you have any leftovers, store them in an airtight container in the refrigerator. Baked okra can maintain its crunchiness for up to 2-3 days when stored properly. However, keep in mind that its texture may become slightly softer over time. To re-crisp the leftovers, you can briefly heat them in a preheated oven or an air fryer.
Baking okra to be crunchy is a simple yet satisfying way to enjoy this nutritious vegetable. By following these easy steps, you can create a delicious and guilt-free snack or side dish that will be loved by both kids and adults alike. So go ahead, give it a try, and discover the joy of crispy baked okra!
Important things to keep in mind when making crunchy baked okra
Okra, also known as lady’s finger, is a versatile and nutritious vegetable that can be prepared in a variety of ways. One popular method is baking it to achieve a satisfying crunch. Baked okra makes for a delicious and healthy snack or a delightful addition to salads and other dishes. To help you master the art of crunchy baked okra, we have put together a list of important things to keep in mind. From choosing the right okra to seasoning it just right, these tips will ensure your baked okra turns out crispy and flavorful every time.
1. Select fresh and tender okra: When it comes to making crunchy baked okra, the quality of the main ingredient matters. Choose fresh, young okra pods that are about 3-4 inches long. Avoid ones that are too large or overripe as they tend to be fibrous and less flavorful. Look for bright green pods that are free from blemishes or spots.
2. Preparing the okra: Before you begin baking, it’s important to wash and dry the okra thoroughly. Moisture can hinder the crisping process, so make sure to pat the pods dry with a clean kitchen towel after rinsing them. You can also trim the tops and tails of the okra pods if desired, but it’s not necessary.
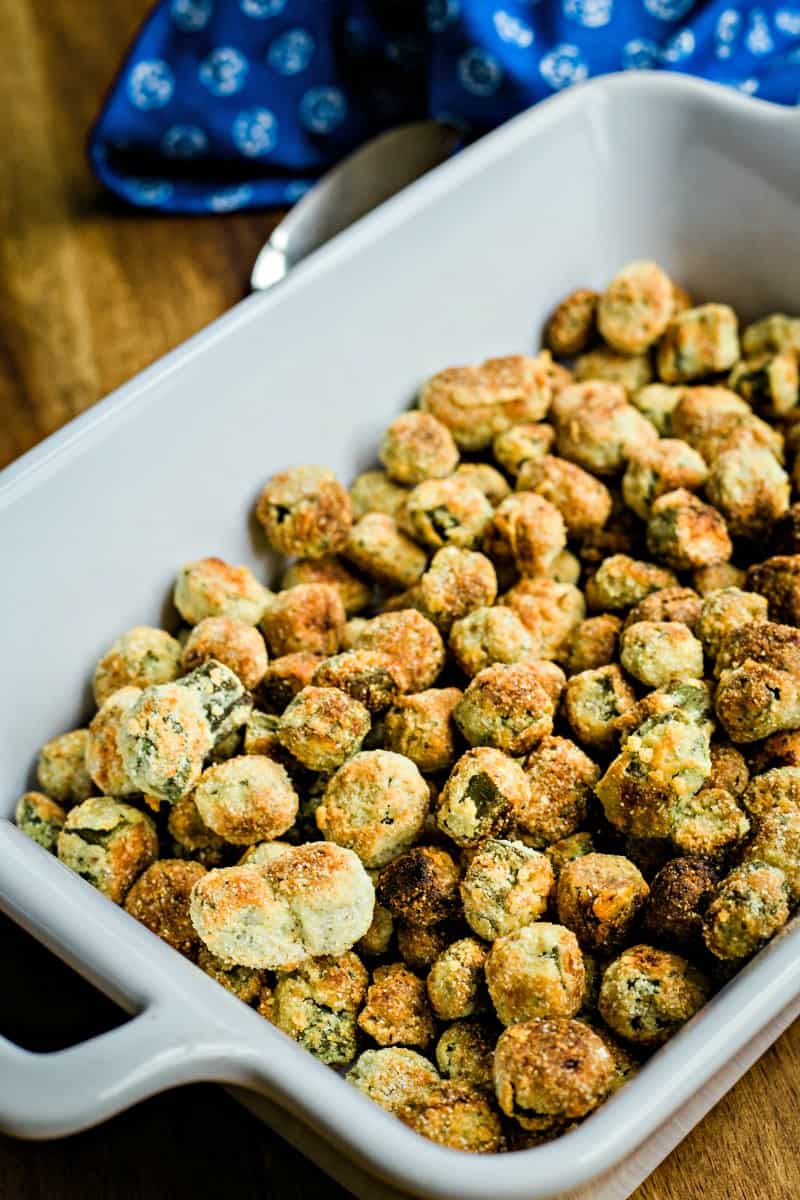
3. Coat the okra with the right ingredients: To achieve that perfect crunch, you’ll need to coat the okra with a mixture that helps the breading stick and adds flavor. A simple combination of cornmeal or breadcrumbs, along with your choice of spices, works wonders. Popular seasonings for baked okra include garlic powder, paprika, cayenne pepper, and salt. Toss the dry okra in the coating mixture until each pod is evenly coated.
4. Use the right baking method: To ensure your okra turns out crispy, it’s important to use the right baking method. Preheat your oven to a high temperature, typically around 425°F (220°C). Arrange the coated okra in a single layer on a baking sheet lined with parchment paper or a silicone baking mat. This allows the hot air to circulate around the okra, promoting even cooking and browning. Bake for about 15-20 minutes, flipping the pods halfway through, until they are golden brown and crispy.
When it comes to making crunchy baked okra, attention to detail is key. From choosing fresh okra to properly coating and baking it, these tips will help you achieve that delightful crispy texture. Remember, practice makes perfect, so don’t be afraid to experiment with different seasonings and cooking times to find your own favorite recipe. Happy baking!
Frequently Asked Questions
When it comes to baking okra to achieve that perfect crunch, you may have a few burning questions. Below are some answers to common queries about baking okra to be crunchy.
1. What’s the secret to getting crispy okra when baking?
The secret to getting crispy okra when baking lies in the preparation. Make sure to dry the okra completely before coating it with any seasoning or flour. This will help to remove moisture and prevent the okra from becoming soggy during baking. Additionally, using a hot oven temperature of around 425°F (220°C) will help to crisp up the okra quickly.
Another tip is to arrange the okra in a single layer on a baking sheet. This allows for optimal air circulation around each piece, resulting in more even browning and a crispier texture. Avoid overcrowding the baking sheet, as this can cause the okra to steam rather than crisp up.
2. How long should I bake okra to achieve a crunchy texture?
The baking time for achieving a crunchy texture in okra can vary slightly depending on the oven and the thickness of the okra slices. Generally, it’s best to bake okra for about 15-20 minutes. However, it’s important to keep an eye on it after the initial 15 minutes, as the cooking time can vary.
Start checking for doneness by touching the okra with a fork or tongs. If it feels crispy and starts to brown at the edges, it is likely ready to be taken out of the oven. Remember that okra may continue to crisp up slightly as it cools, so don’t worry if it’s not super crunchy straight out of the oven.
3. What can I use to make the okra coating crispy?
For a crispy coating on baked okra, you can use a variety of ingredients. One popular option is to use a mixture of breadcrumbs, cornmeal, and some spices. This combination adds both texture and flavor to the okra. Simply dip the okra in beaten egg or buttermilk, then coat it in the breadcrumb mixture before baking.
Alternatively, you can also try using a mixture of flour and cornstarch, which helps create a crispy texture. Season the flour mixture with your favorite herbs and spices to enhance the flavor. Another coating option is using a light batter made from a mixture of flour, egg, and water, which adds an extra layer of crispness to the okra.
4. Should I cut the okra into slices or leave them whole for baking?
Both cutting the okra into slices or leaving them whole can result in a crispy texture when baking. However, thinly sliced okra tends to cook more quickly and produces a slightly crunchier texture. Whole okra may take a bit longer to cook, but it can still become crispy on the outside while retaining a tender interior.
If you prefer a uniform crunch, slicing the okra can provide a consistent texture throughout. However, if you enjoy a mix of textures, leaving the okra whole can provide a delightful contrast between the crispy exterior and the soft interior.
5. Can I achieve a crunchy texture with frozen okra?
Achieving a crunchy texture with frozen okra can be a bit more challenging than with fresh okra. Frozen okra tends to have a higher moisture content, which can hinder the crisping process. However, it is still possible to get a crispy result by taking a few extra steps.
Before baking frozen okra, it’s essential to thaw it completely and pat it dry. This will help to remove as much moisture as possible. You may also want to consider using a slightly higher oven temperature and extending the baking time slightly to ensure the okra becomes golden and crispy. Keep in mind that the texture may not be as crunchy as with fresh okra, but it can still be enjoyable.
Okra Chips – Crispy Oven Baked!
In conclusion, mastering the art of baking okra to achieve the perfect crunch is a culinary skill worth developing. By following the simple steps outlined in this guide, you can transform this humble vegetable into a delightful and addictive snack or side dish. Remember to preheat your oven, coat the okra in a flavorful mixture, and arrange them in a single layer for even cooking. Patience is key as you wait for the okra to turn golden brown and crispy. With practice and a touch of creativity, you can elevate the humble okra to a whole new level of deliciousness. So go ahead, grab a bunch of okra, and get ready to enjoy a crispy treat that will leave you and your guests wanting more. Happy baking!