Welcome, aspiring bakers! As a professional chef, I understand the joy and satisfaction that comes from creating delicious, homemade bread. The aroma of freshly baked bread wafting through the kitchen, the warm and crusty exterior, and the soft and fluffy interior – it’s a sensory experience like no other. Today, I am excited to share with you my secrets on how to bake easy bread. Whether you are a beginner or a seasoned home baker, this guide will equip you with the knowledge and techniques to create mouthwatering loaves that will impress your family and friends. So roll up your sleeves, dust off your apron, and let’s dive into the wonderful world of bread baking!
How to Bake Easy Bread: A Foolproof Recipe
Freshly baked bread is a comforting staple in any kitchen. The aroma that fills the air, the warm, crusty crust, and the soft, fluffy interior make it hard to resist. If you’ve always wanted to try your hand at baking bread but have been intimidated by the process, fear not! This easy bread recipe is perfect for beginners and will have you baking delicious loaves in no time. So put on your chef’s hat and let’s get started!
Ingredients:
– 4 cups all-purpose flour
– 2 teaspoons instant yeast
– 2 teaspoons salt
– 2 cups warm water
General Information:
Preparing homemade bread can seem daunting at first, but with this recipe, you’ll find the process surprisingly simple. The dough requires minimal handling, and there’s no need for complicated techniques like kneading. The total time from preparation to serving is approximately 3 hours, with hands-on time only taking around 15 minutes. This recipe yields one loaf of bread, perfect for slicing and serving with your favorite spreads or using in sandwiches.
Now, let’s dive into the step-by-step instructions for baking this easy bread.
Instructions:
Step 1: Mixing the Dough
First, measure out 4 cups of all-purpose flour and transfer it to a large mixing bowl. Add 2 teaspoons of instant yeast and 2 teaspoons of salt. Whisk the dry ingredients together until well combined.
Next, pour in 2 cups of warm water. The water should be around 110°F (43°C) – warm to the touch, but not hot. Using a wooden spoon or your hands, mix the ingredients together until they form a sticky dough. Don’t worry if the dough seems too wet; it should be soft and slightly sticky.
Step 2: Letting the Dough Rise
Once the dough is mixed, cover the bowl with a clean kitchen towel or plastic wrap. Place it in a warm, draft-free spot and let it rise for about 1 hour, or until the dough has doubled in size. This step is crucial for developing flavor and creating a light, airy texture in the bread.
Step 3: Shaping the Loaf
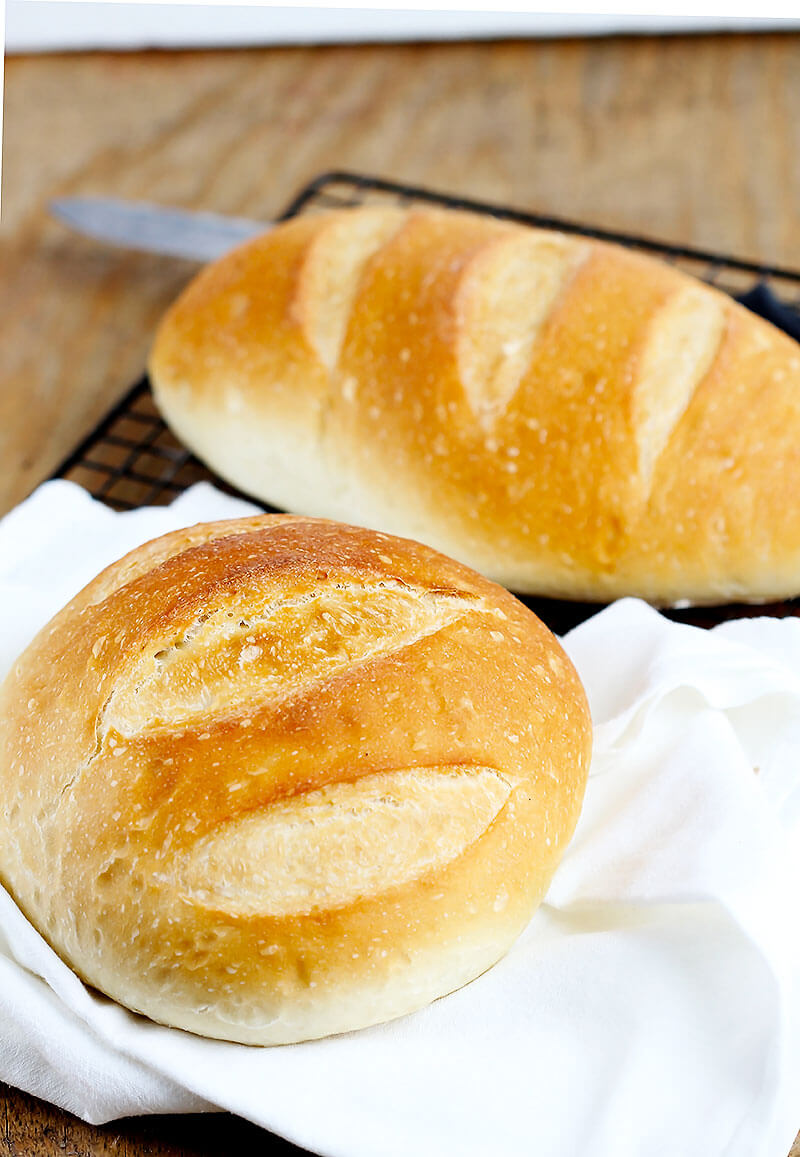
After the dough has risen, generously flour a clean surface. Turn the dough out onto the floured surface and sprinkle some flour on top to prevent sticking. Gently fold the dough over on itself a few times to shape it into a round loaf. It doesn’t need to be perfect—some uneven edges and folds will add character to the final loaf.
Step 4: Second Rise
Transfer the shaped dough to a baking sheet lined with parchment paper. Cover the dough loosely with the kitchen towel or plastic wrap and let it rise for another 30 minutes. This second rise allows the gluten to relax, resulting in a softer and more tender bread.
Step 5: Preparing to Bake
As the dough undergoes its second rise, preheat your oven to 450°F (230°C). Place a Dutch oven or a large, oven-safe pot with a lid in the oven as it heats. The pot should be large enough to accommodate the bread with some room to expand.
While the oven preheats, you may also slash the top of the loaf with a sharp knife or razor blade. This will give the bread room to expand during baking and create an attractive pattern on the crust.
Step 6: Baking the Bread
Once the oven has reached the desired temperature, carefully remove the hot pot from the oven. Remove the lid and gently transfer the risen loaf into the pot, seam side down. Be cautious not to touch the hot pot or lid with your bare hands.
Place the lid back on the pot and return it to the oven. Bake the bread, covered, for 30 minutes. Then, remove the lid and continue baking for an additional 15-20 minutes, or until the crust is golden brown and crisp.
Step 7: Cooling and Enjoying
Using oven mitts or a kitchen towel, carefully remove the pot from the oven. Transfer the baked bread to a wire rack to cool completely before slicing. This will allow the bread to develop its final texture and prevent it from becoming soggy.
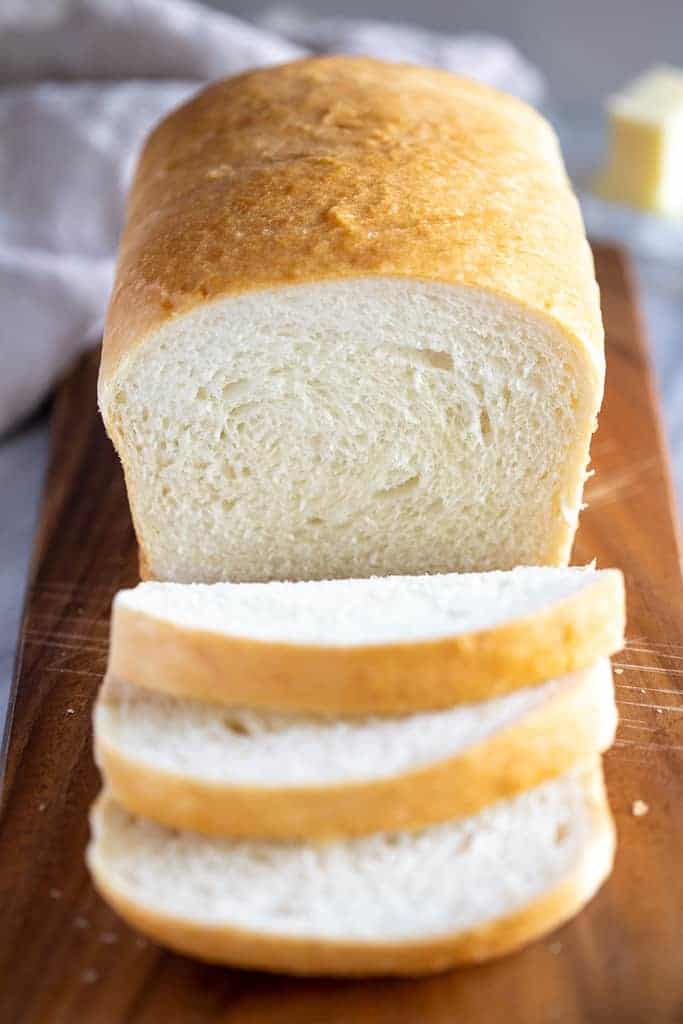
Once cooled, slice the bread to your desired thickness and serve with butter, jam, or any toppings of your choice. You can also use this bread for sandwiches or to make delicious toast.
And there you have it—a foolproof recipe for baking easy bread! With just a few simple steps, you can enjoy fresh homemade bread that will impress your family and friends. So why wait? Start baking and savor the intoxicating aroma of warm bread straight from your oven. Happy baking!
Important Things to Keep in Mind when Making Easy Bread
Are you ready to embark on the journey of baking homemade bread? There’s something so satisfying about kneading dough, watching it rise, and filling your home with the aroma of freshly baked bread. If you’re new to baking, don’t worry. With a few important tips in mind, you’ll be well on your way to making delicious, fluffy bread that will impress everyone who takes a bite. So, roll up your sleeves, grab a mixing bowl, and let’s get started!
1. Choose the Right Flour
When it comes to making bread, the type of flour you use is crucial. Opt for bread flour, which has a higher protein content than all-purpose flour. This will give your bread a strong structure and a chewy texture. If you can’t find bread flour, you can add vital wheat gluten to all-purpose flour to achieve similar results. Remember to measure your flour accurately, as too much or too little can greatly affect the final outcome of your bread.
2. Don’t Be Afraid of Kneading
Kneading is an essential step in bread baking, as it develops gluten and gives your bread its desirable texture. Many beginners are intimidated by kneading, but fear not! Start by lightly flouring your work surface and your hands, then use the heel of your hand to push the dough away from you and fold it back over itself. Repeat this motion for about 10 minutes, until the dough becomes smooth and elastic. If the dough sticks to your hands or the surface, use a dough scraper to gently lift it, adding more flour as needed. Don’t rush this process, as the more you knead, the better your bread will turn out.
3. Master the Art of Proofing
Proofing is the process of allowing the dough to rise, and it’s crucial for fluffy, airy bread. To ensure a successful proofing, make sure your dough is placed in a warm, draft-free area. This can be a turned-off oven with the light on or near a window on a sunny day. Cover the dough with a clean kitchen towel or plastic wrap to keep it from drying out. The proofing time will vary depending on the recipe and ambient temperature, so it’s important to keep an eye on the dough. It should roughly double in size before moving on to the next step.
4. Get Creative with Toppings and Fillings
Now that you have the basics down, it’s time to have some fun with your bread! Once you’ve shaped your dough, there are endless possibilities for adding flavor and visual appeal. You can brush the top of your bread with beaten egg for a shiny crust or sprinkle it with sesame seeds, poppy seeds, or herbs. If you’re feeling extra adventurous, try incorporating fillings like cheese, olives, or sun-dried tomatoes into your bread. Don’t be afraid to experiment and make the recipe your own!
By keeping these important tips in mind, your journey to baking easy bread will be a breeze. The world of bread baking is vast, and as you gain confidence and experience, you can explore different types of bread, flavors, and techniques. Remember, practice makes perfect, so keep honing your skills and enjoy the wonderful art of homemade bread baking. Now, let’s get that oven preheated and let the aroma of freshly baked bread fill your home!
Frequently Asked Questions
Welcome to our FAQ section on baking easy bread! Whether you’re a beginner or an experienced baker, we’ve got you covered. Read on to find answers to some commonly asked questions about baking delicious bread from scratch.
1. Can I bake bread without using yeast?
Yes, you can bake bread without yeast! There are many yeast-free bread recipes available that use alternative leavening agents like baking powder or baking soda. These agents work to create the rise and texture in your bread. Some examples of yeast-free bread include soda bread and quick breads like banana bread or zucchini bread. These recipes are perfect for those who are allergic to yeast or prefer not to use it.
Keep in mind that yeast-free bread may have a slightly different taste and texture compared to traditional yeast bread. Experiment with different recipes and enjoy the unique flavors that yeast-free bread can offer.
2. What type of flour should I use to make easy bread?
For easy bread recipes, all-purpose flour is a great option. It has a moderate protein content, which helps provide structure to the bread without making it too dense. All-purpose flour is readily available in most grocery stores and can be used in a wide variety of bread recipes.
If you want to experiment with different flavors and textures, you can also try using whole wheat flour or bread flour. Whole wheat flour adds a nutty flavor and more fiber to your bread, while bread flour has a higher protein content, resulting in a chewier texture. Just keep in mind that different flours may require adjustments in the amount of liquid or leavening agents used in the recipe.
3. Can I make bread without a bread machine?
Absolutely! You don’t need a bread machine to make delicious bread at home. In fact, many professional bakers prefer to bake bread by hand. All you need is a mixing bowl, your ingredients, and some patience. Kneading the dough by hand not only helps develop the gluten, but it can also be quite therapeutic!
There are plenty of easy bread recipes available that provide detailed instructions on how to mix and knead the dough by hand. The key is to follow the recipe closely, allowing for proper rising time and baking temperature. With a little practice, you’ll be able to bake beautiful loaves of bread without the need for a bread machine.
4. How do I know when bread is fully baked?
Knowing when your bread is fully baked can be a bit tricky, especially for beginners. A good indicator is the crust color. The crust should be golden brown and have a slightly crisp texture. If the crust is pale or overly dark, the bread may be underbaked or overbaked, respectively.
Another way to check for doneness is to tap the bottom of the bread. It should sound hollow. If it doesn’t, you can return it to the oven for a little longer. If you have a kitchen thermometer, you can also insert it into the center of the bread. The internal temperature should be around 190-200°F (88-93°C) for most bread recipes.
5. Can I freeze homemade bread?
Absolutely! Freezing homemade bread is a great way to extend its freshness. To freeze bread, first let it cool completely. Then, wrap it tightly in plastic wrap or place it in a freezer bag to prevent freezer burn. You can slice the bread before freezing to make it easier to thaw individual portions.
When you’re ready to enjoy the bread, simply remove it from the freezer and let it thaw at room temperature. If you prefer a warm slice, you can toast it in a toaster or warm it in the oven. Freezing homemade bread allows you to have fresh bread on hand whenever you want, without worrying about it going stale.