As a professional chef, I am passionate about sharing my knowledge and expertise when it comes to creating delicious dishes. One classic summer treat that never fails to satisfy is corn on the cob. There’s something so irresistible about the sweet, juicy kernels bursting with flavor. Today, I am here to guide you through the art of baking corn on the cob, ensuring that you achieve perfectly cooked, tender corn every time. So, grab your apron and let’s get ready to elevate this beloved dish to a whole new level of culinary delight!
How to Bake Corn on the Cob: A Delicious and Easy Recipe
Corn on the cob is a quintessential summer dish loved by many. The combination of juicy, sweet corn kernels and the smoky flavors from grilling or baking makes it an irresistible treat. In this recipe, we’ll explore how to bake corn on the cob to perfection, bringing out its natural sweetness and creating a delightful side dish or snack. So, let’s dive in and learn the art of baking corn on the cob!
Ingredients:
- 4 ears of fresh corn
- 4 tablespoons of unsalted butter, softened
- 1 teaspoon of salt
- 1/2 teaspoon of black pepper
General Information:
- Making Difficulties: Easy
- Preparation Time: 10 minutes
- Cooking Time: 20 minutes
- Serving Size: 4
Instructions:
Step 1: Preheat the Oven
Preheat your oven to 400 degrees Fahrenheit (200 degrees Celsius).
Baking corn on the cob is a fantastic alternative to grilling, especially if you don’t have access to an outdoor grill or it’s not the grilling season. It allows you to enjoy the same delicious flavors and caramelization of the corn kernels but in the comfort of your kitchen.
Step 2: Prepare the Corn
Peel back the husks of the corn but leave them attached at the base to create a natural holding handle.
Remove the silk threads from the corn by rubbing them off with your hands.
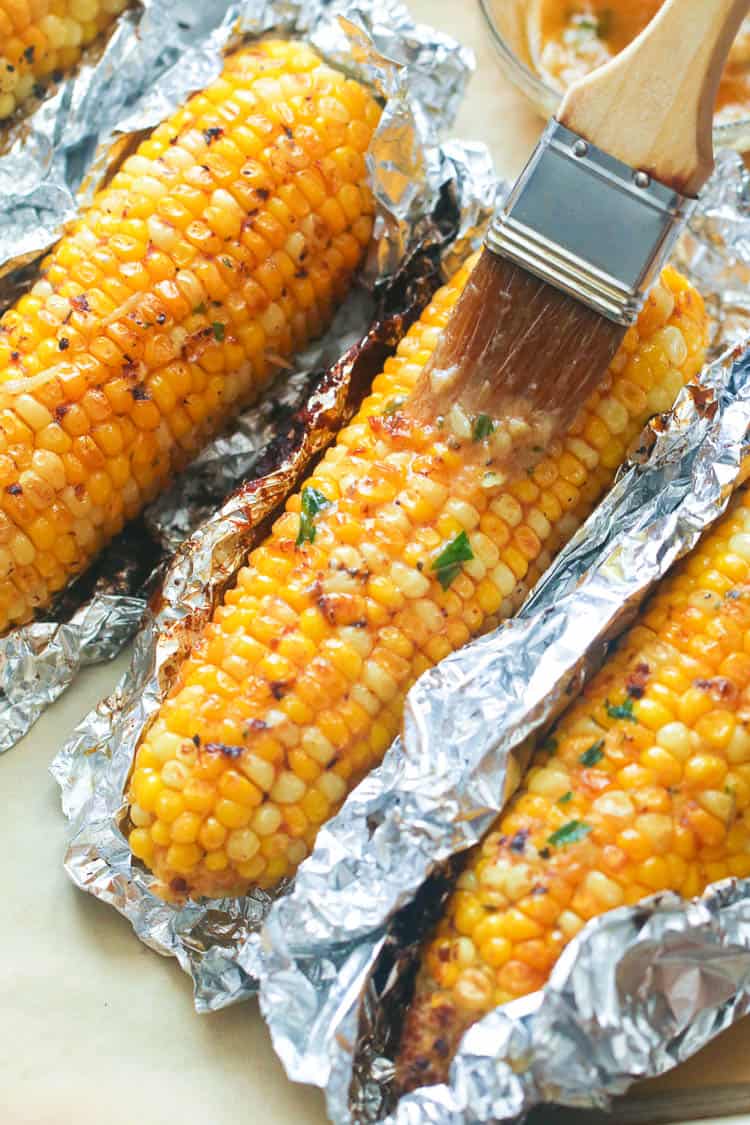
Step 3: Season the Corn
Spread the softened butter evenly over each ear of corn, using a pastry brush or your hands.
Sprinkle salt and black pepper over the buttered corn, ensuring that each ear is well-seasoned.
The butter helps to add richness and moisture to the corn while the salt and black pepper enhance the flavors and bring out the natural sweetness of the corn kernels.
Step 4: Wrap in Aluminum Foil
Individually wrap each ear of corn tightly in aluminum foil.
The foil helps to trap the heat and moisture, creating a mini oven-like environment for the corn to cook evenly and retain its juiciness.
Step 5: Bake the Corn
Place the foil-wrapped corn on a baking sheet, making sure they are not overcrowded.
Transfer the baking sheet to the preheated oven and bake for 20 minutes.
The baking time may vary slightly depending on the size and freshness of the corn, so keep an eye on them after the 15-minute mark. You’ll know they’re ready when the corn is tender and the aroma fills the air.
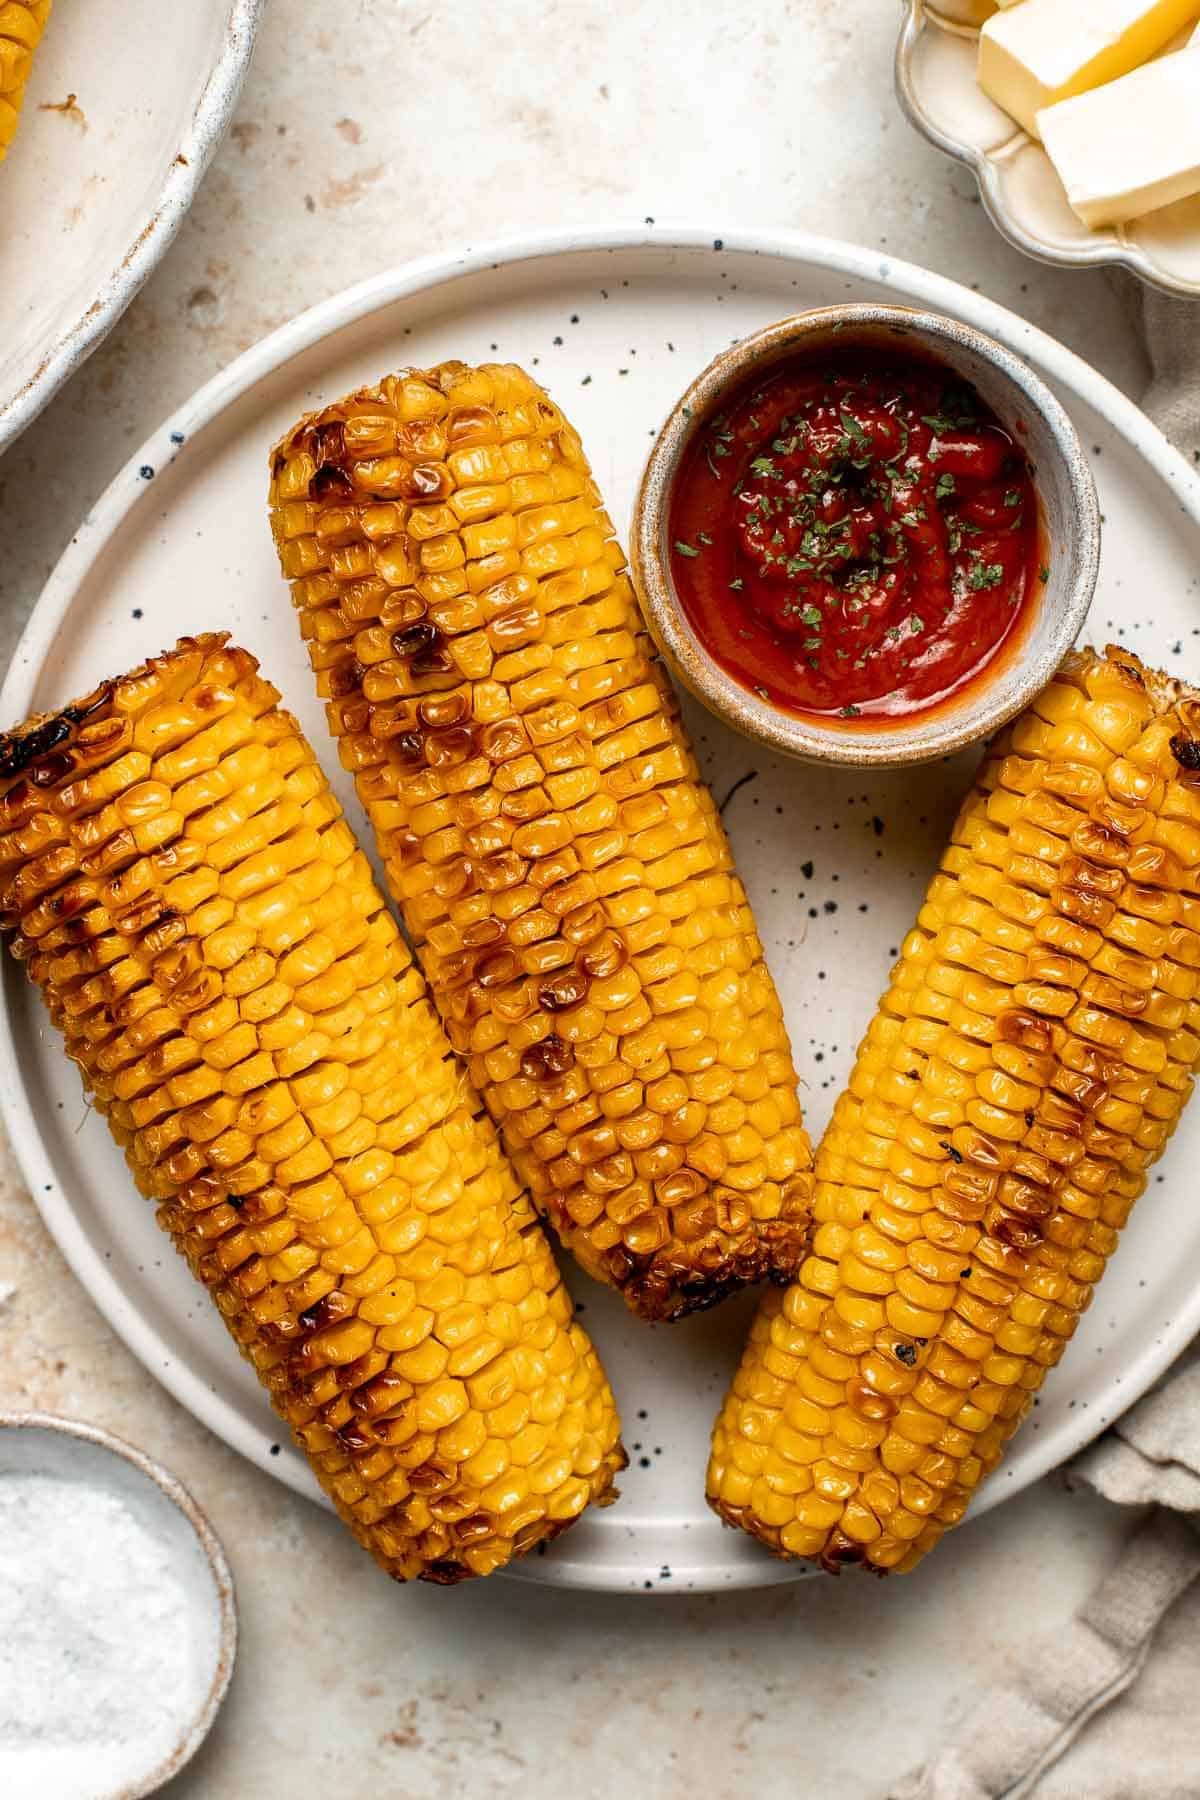
Step 6: Unwrap and Serve
Carefully remove the foil from each ear of corn, being mindful of the steam that may escape.
Place the baked corn on a serving platter or individual plates and serve while still hot.
Feel free to garnish with additional butter, salt, or your favorite herbs for an extra burst of flavor.
Step 7: Enjoy!
Indulge in the delightful combination of flavors as you enjoy your freshly baked corn on the cob. Whether as a side dish for a summer barbecue or a standalone snack, this recipe is sure to satisfy your taste buds and leave you craving more.
Remember to savor each juicy kernel and embrace the simple pleasure of enjoying the wonderful flavors of nature.
Baking corn on the cob is a fantastic way to enjoy this beloved summer treat without a grill. The high heat of the oven creates beautiful caramelization, resulting in a burst of sweetness in every bite. So next time you’re in the mood for corn on the cob, give this baking method a try. It’s easy, convenient, and produces delicious results. Happy baking!
Important Things to Keep in Mind When Making Deliciously Baked Corn on the Cob
Indulging in a mouthwatering ear of corn fresh off the grill is a summer essential. But before you toss those golden cobs onto the flames, there are a few important things to keep in mind to ensure your corn on the cob turns out perfectly juicy and full of flavor. From selecting the right corn to adding a delicious twist with various seasonings, here are some tips that will elevate your corn on the cob game to the next level.
1. Start with the Freshest Corn
When it comes to corn on the cob, freshness is key. Look for ears of corn with bright green husks and plump kernels that feel firm to the touch. The silk should also be a golden-brown color, indicating that the corn is mature and at peak sweetness. If you can, try to source your corn from a local farmer’s market or roadside stand, where you can guarantee its freshness. Remember, the sooner you cook your corn after it’s picked, the better the flavor will be.
2. Soak It Up
Before baking your corn on the cob, it’s important to soak it in water. This will prevent the husks from catching fire while on the grill and will steam the corn to perfection. Fill a large pot or basin with cold water and place the corn (husks and all) in, allowing it to soak for at least 20 minutes. This will also help ensure that the corn is juicy and tender.
3. Experiment with Seasonings
While plain butter and salt are always a classic choice, why not take your corn on the cob to the next level with some delicious seasonings? Get creative and experiment with different flavor combinations. Try brushing your corn with melted herb butter, sprinkling it with cayenne pepper for a spicy kick, or adding a sprinkle of Parmesan cheese and Italian herbs. You can even slather your corn with mayo and sprinkle it with chili powder for a unique Mexican twist. The possibilities are endless, and adding some extra seasonings will make your corn on the cob truly unforgettable.
4. Cooking Time and Temperature Matter
When it comes to baking corn on the cob, timing and temperature are crucial. Preheat your grill to medium-high heat and then place the corn (still in the husks) directly on the grates. Cook for about 20 minutes, turning the cobs occasionally to ensure even cooking. The husks will become charred and blackened, protecting the kernels inside and infusing them with smoky flavor. Remember, cooking times may vary depending on the size and freshness of your corn, so keep a close eye on it to avoid overcooking.
By keeping these important tips in mind, you’ll be well on your way to baking the most delicious corn on the cob you’ve ever tasted. Get creative with your seasonings, experiment with different cooking methods, and enjoy this summer staple to the fullest. So gather your friends and family, fire up the grill, and get ready for a corn on the cob feast that will have everyone begging for seconds. Happy grilling!
Frequently Asked Questions
In this section, we will answer some common questions about baking corn on the cob. Whether you’re grilling, roasting, or boiling, we’ve got you covered with tips and tricks to make your corn on the cob extra delicious.
1. Can I bake corn on the cob instead of grilling it?
Yes, you can definitely bake corn on the cob instead of grilling it. Preheat your oven to 375°F (190°C). Remove the husks and silk from the corn and place the corn directly on a baking sheet or wrap each ear of corn individually in aluminum foil. Bake for about 30 minutes, or until the corn is tender. For extra flavor, you can brush the corn with melted butter or olive oil before baking.
Baking corn on the cob is a great alternative if you don’t have access to a grill or if you prefer the convenience of using your oven. It results in tender and juicy corn that is still packed with flavor.
2. How do I keep the corn moist when baking it?
To keep your corn on the cob moist when baking, there are a few tricks you can try. First, you can brush the corn with melted butter or olive oil before baking to add moisture. Secondly, you can wrap each ear of corn individually in aluminum foil to create a steamy environment while it bakes. Lastly, you can also add a small amount of water to the baking sheet to create steam. These methods will help retain moisture and prevent the corn from drying out.
Remember to check the corn periodically while it bakes and add more butter, oil, or water if needed. Keeping the corn moist will ensure that it stays tender and delicious.
3. How long does it take to bake corn on the cob?
The baking time for corn on the cob can vary depending on the temperature of your oven and the size of the corn. In general, it takes about 30 minutes to bake corn on the cob at 375°F (190°C). However, if you prefer your corn to be more tender, you can extend the baking time by 5-10 minutes. It’s always a good idea to check the corn for doneness by piercing a kernel with a fork. If it’s tender, it’s ready to be enjoyed!
Remember that cooking times may vary, so it’s important to keep an eye on the corn while it bakes to ensure it doesn’t overcook and become too dry.
4. Can I season the corn before baking it?
Absolutely! Seasoning the corn before baking can elevate its flavor. You can simply sprinkle salt and pepper over the corn to enhance its natural sweetness. If you prefer a more adventurous flavor profile, you can try adding spices like chili powder, paprika, or garlic powder. Another delicious option is to brush the corn with melted butter and sprinkle it with a combination of herbs like parsley, basil, and thyme. The possibilities are endless!
By seasoning the corn before baking, you’ll infuse it with extra flavor that will make every bite even more enjoyable.
5. Can I bake frozen corn on the cob?
Yes, you can bake frozen corn on the cob. The process is similar to baking fresh corn. Preheat your oven to 375°F (190°C) and place the frozen corn directly on a baking sheet or wrap each ear of corn individually in aluminum foil. Bake for approximately 30-35 minutes, or until the corn is tender. Baking frozen corn on the cob may take a little longer than fresh corn, so keep an eye on it to avoid overcooking.
Baking frozen corn on the cob is a convenient option when fresh corn is not available, and it can still result in a delicious side dish or addition to your favorite recipes.
Oven Roasted Corn on the Cob – Easy, Southern Recipe!
In conclusion, mastering the art of baking corn on the cob is not only a delicious way to elevate your culinary skills, but it also brings out the natural sweetness and flavors of this beloved vegetable. By following the simple steps outlined in this guide, you can create a mouthwatering dish that will leave your family and friends begging for more. So go ahead, gather your fresh corn, preheat your oven, and let the delightful aroma of roasted corn fill your kitchen. With a little practice and experimentation, you’ll soon be serving up perfectly baked corn on the cob that will be the star of any meal. So don your chef’s hat, grab your apron, and let your baking skills shine as you enjoy the delectable taste of this classic summer treat. Happy baking!