How To Bake Chickpeas
Welcome, fellow food enthusiasts! Today, we embark on a culinary adventure that will tantalize your taste buds and satisfy your cravings for a healthy and flavorful snack. As a professional chef, I am delighted to guide you through the art of baking chickpeas to perfection. Whether you’re a seasoned cook or a beginner in the kitchen, this simple yet versatile recipe will surely become a staple in your repertoire. So, put on your apron, preheat your oven, and let’s dive into the world of crispy, irresistible baked chickpeas!
How to Bake Chickpeas: A Healthy and Crunchy Snack
Chickpeas, also known as garbanzo beans, are a versatile legume that can be enjoyed in a variety of dishes. These little powerhouses of nutrition are packed with protein, fiber, and essential vitamins and minerals. While chickpeas are commonly used in soups, salads, and curries, they can also be transformed into a delicious and healthy snack by baking them. In this guide, we will show you how to bake chickpeas to perfection, resulting in a crunchy and flavorful treat that you won’t be able to resist.
Ingredients:
- 2 cans of chickpeas (15 ounces each)
- 2 tablespoons of olive oil
- 1 teaspoon of salt
- 1 teaspoon of paprika
- ½ teaspoon of garlic powder
- ½ teaspoon of cumin
- Optional: additional seasonings of your choice, such as chili powder or dried herbs
General Information:
- Making Difficulties: Easy
- Preparation Time: 10 minutes
- Cooking Time: 40-45 minutes
- Servings: 4
Instructions:
Step 1: Preparing the Chickpeas
Start by preheating your oven to 400°F (200°C) and lining a baking sheet with parchment paper. Drain and rinse the chickpeas from the cans, then pat them dry with a clean kitchen towel or paper towels. It’s important to remove as much moisture as possible to ensure crispy results.
Transfer the dry chickpeas onto the prepared baking sheet and spread them out in a single layer. This will help them roast evenly and become crunchy. Take a few minutes to inspect the chickpeas and remove any loose skins that may be present. While the skins are edible, removing them will result in a smoother texture.
Step 2: Seasoning the Chickpeas
In a small bowl, combine the olive oil, salt, paprika, garlic powder, and cumin. Mix well until all the ingredients are evenly incorporated. Drizzle the seasoned oil mixture over the chickpeas on the baking sheet. Using your hands or a spoon, toss the chickpeas to ensure that each one is coated with the flavorful mixture.
Feel free to get creative with your seasonings! If you prefer a spicier snack, add a pinch of chili powder or cayenne pepper. For a herb-infused flavor, sprinkle some dried herbs like rosemary or thyme. The choice is yours.
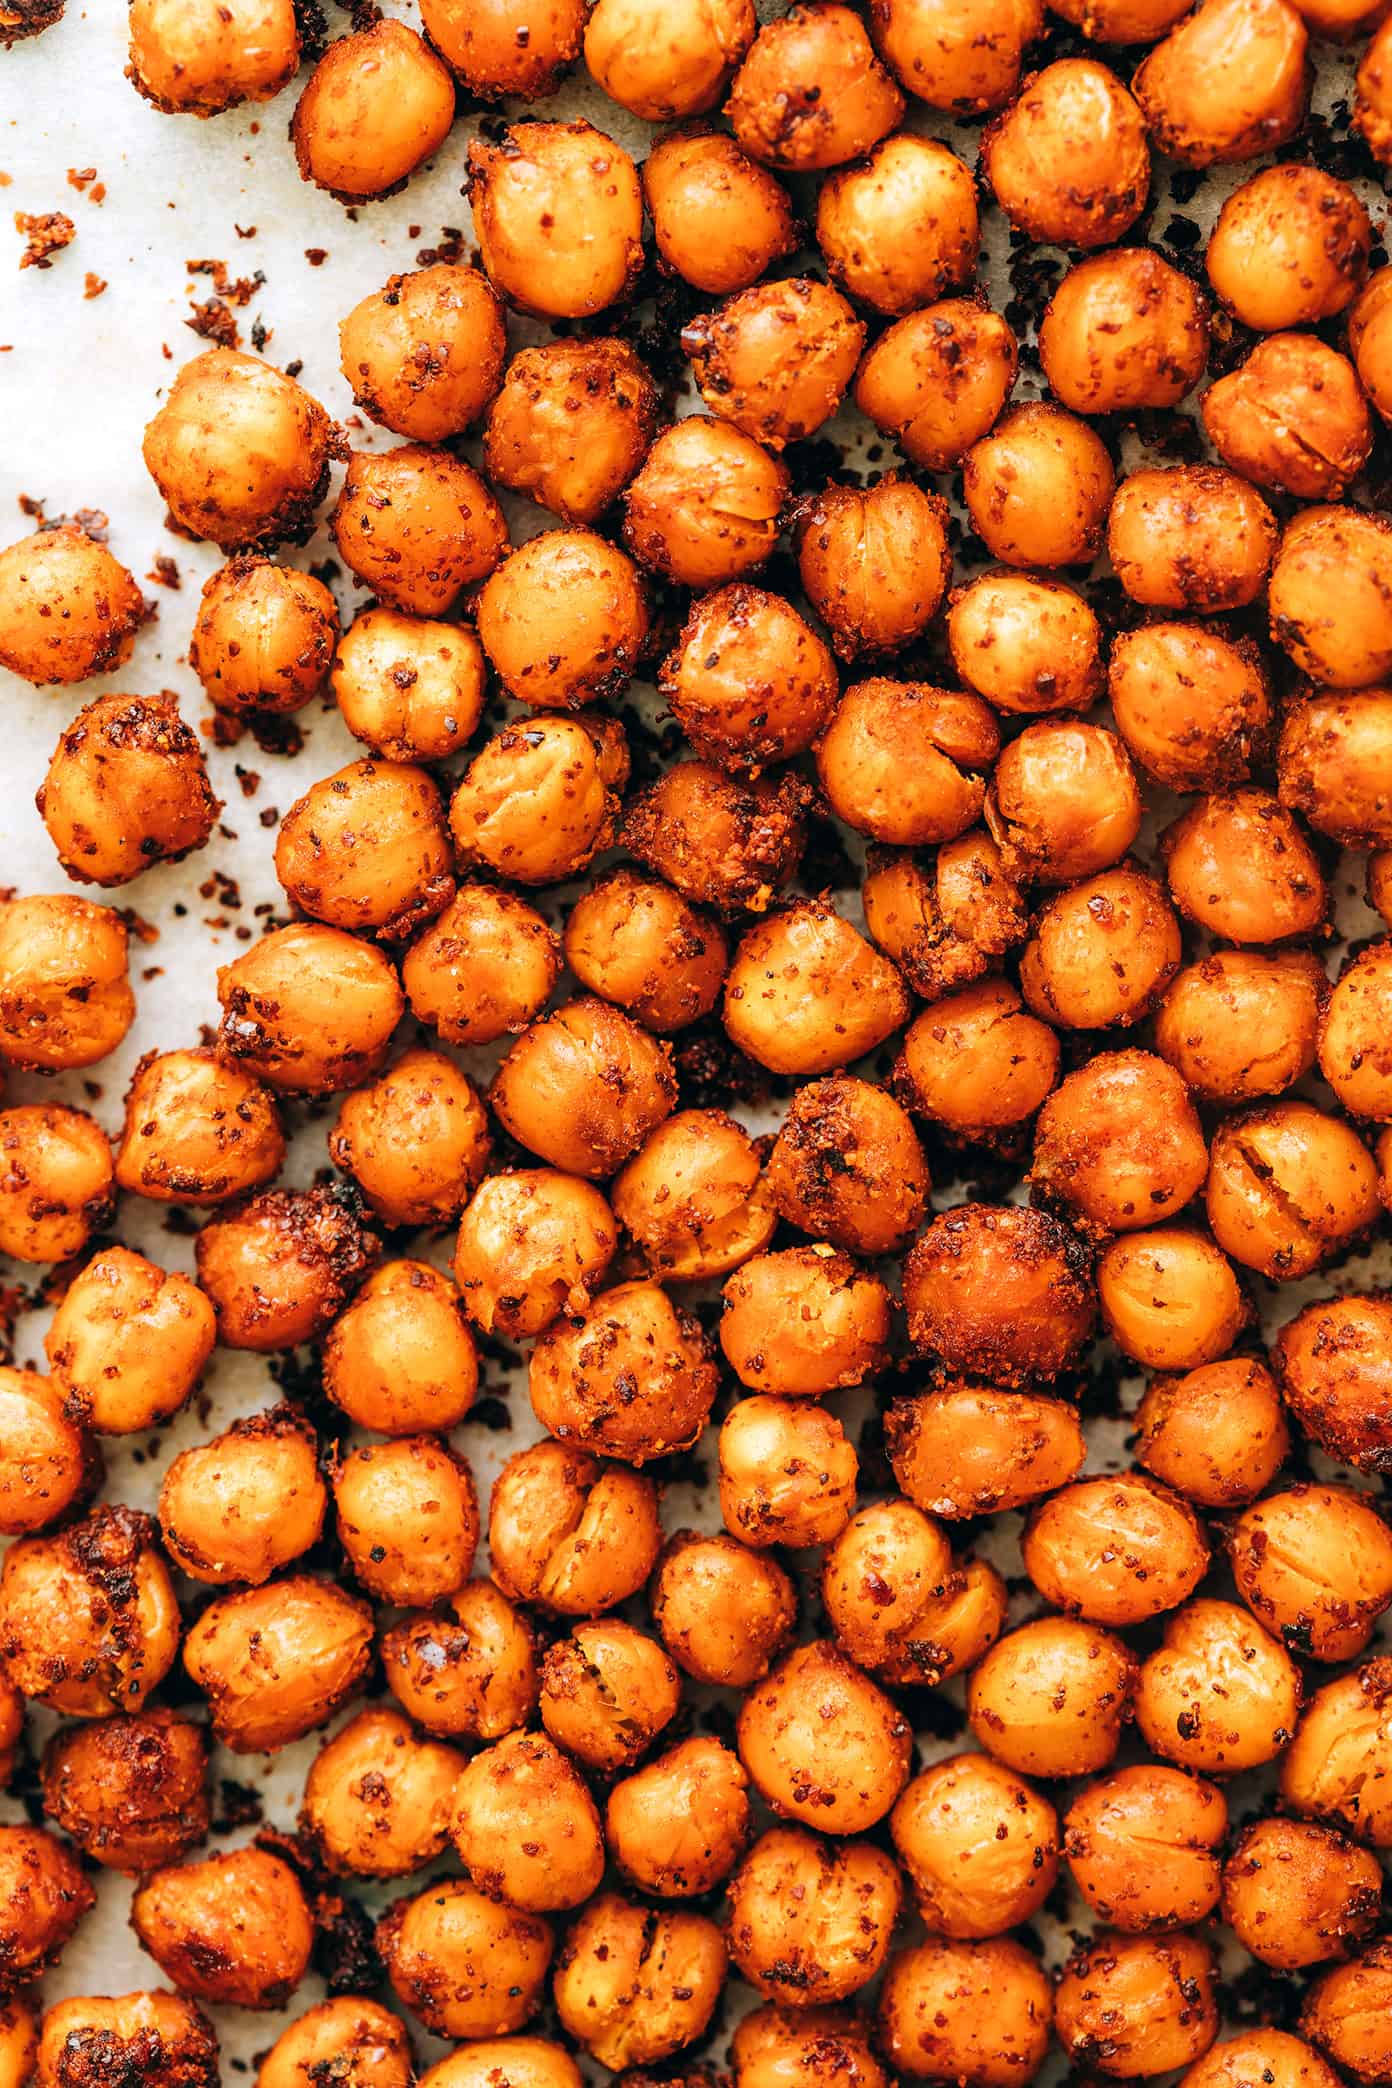
Step 3: Roasting the Chickpeas
Once the chickpeas are evenly coated with the seasoned oil, place the baking sheet in the preheated oven. Bake for 20 minutes, then remove the sheet from the oven and give it a good shake or stir to ensure that the chickpeas don’t stick together.
Return the baking sheet to the oven and continue baking for an additional 20-25 minutes, or until the chickpeas are golden brown and crispy. It’s essential to keep an eye on them during this stage to prevent any burning. The total baking time may vary depending on your oven, so adjust accordingly.
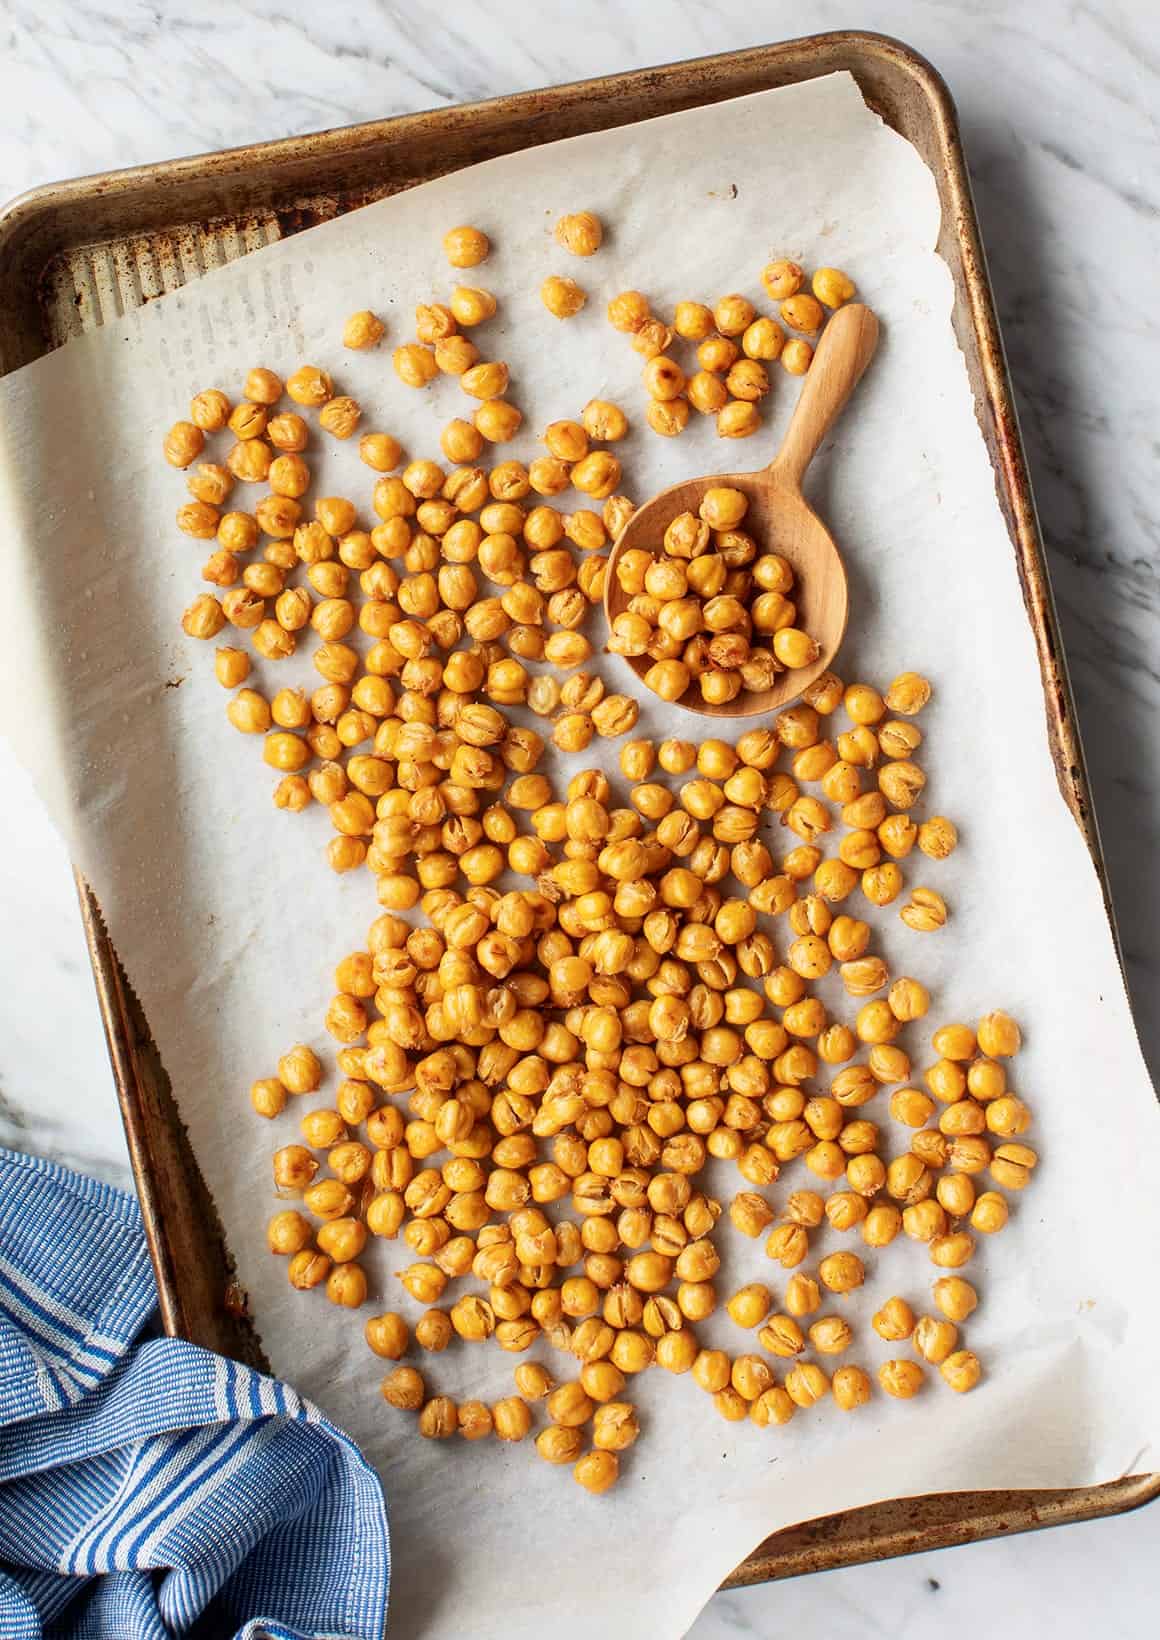
Step 4: Cooling and Storage
Once the chickpeas are done baking, remove them from the oven and allow them to cool completely on the baking sheet. As they cool, they will become even crispier. Keep in mind that they will be hot right out of the oven, so exercise caution when handling.
Once cooled, transfer the baked chickpeas to an airtight container or a resealable bag. They can be stored at room temperature for up to a week, although they are best enjoyed within the first few days to maintain maximum crunchiness.
Step 5: Enjoying the Baked Chickpeas
Now comes the best part: enjoying your homemade baked chickpeas! These crunchy bites make a great snack on their own, but they also work well as a topping for salads, soups, or even as a crunchy addition to a bowl of roasted vegetables. Get creative with your pairings and savor the flavors and textures.
Remember that chickpeas are incredibly versatile, so don’t hesitate to experiment with different seasonings and spices to suit your taste preferences. Whether you prefer a savory, spicy, or tangy flavor profile, the baked chickpeas can be customized to satisfy your cravings.
Step 6: Nutritional Benefits of Baked Chickpeas
In addition to being a delicious snack, baked chickpeas boast an impressive nutritional profile. They are an excellent source of plant-based protein, fiber, and complex carbohydrates. Chickpeas also provide essential minerals such as iron, magnesium, and folate.
By replacing unhealthy, store-bought snacks with baked chickpeas, you’ll be fueling your body with a wholesome treat that supports your overall well-being. Plus, they are a much better alternative to chips or other processed snacks when that afternoon snack craving hits.
Step 7: Get Creative!
Now that you know how to bake chickpeas to perfection, it’s time to unleash your culinary creativity. Experiment with different seasonings, spices, and herb combinations to create your own unique flavors. Whether you go for a sweet and spicy mix or a smoky and savory blend, there are endless possibilities to explore.
Don’t forget to share your favorite baked chickpea recipes with friends and family. They will surely appreciate this healthy and delicious snack option. So get baking, get creative, and enjoy the wonderful world of roasted chickpeas!
Baking chickpeas is a simple and rewarding process that allows you to transform this humble legume into a crispy and flavorful snack. By following these step-by-step instructions, you’ll be well on your way to creating a delicious and nutritious treat that will satisfy both your taste buds and your well-being. So gather your ingredients, preheat your oven, and get ready to savor the crunchy delight of baked chickpeas.
Important Things to Keep in Mind When Making Delicious Baked Chickpeas
Baked chickpeas have become all the rage in the culinary world, and it’s no surprise why. These crunchy, flavorful chickpeas make for a satisfying and nutritious snack or a delicious addition to salads and grain bowls. However, achieving the perfect baked chickpeas can be a bit tricky. To help you master this trending recipe, here are some important things to keep in mind.
Choose Quality Chickpeas
The first step to creating the ultimate baked chickpeas is selecting the best quality chickpeas. Opt for dried chickpeas instead of canned ones as they tend to have a firmer texture and allow for better seasoning absorption. Be sure to soak the dried chickpeas overnight to ensure even cooking and a crispy texture. Rinse them well before baking to remove any dirt or debris. Remember, the quality of your chickpeas sets the foundation for a successful baked chickpea dish.
Thoroughly Dry the Chickpeas
Moisture is the enemy when it comes to achieving perfectly crispy baked chickpeas. After soaking and rinsing the chickpeas, it’s crucial to pat them dry thoroughly. Use a clean kitchen towel or paper towels to remove as much moisture as possible. If the chickpeas are still damp before they hit the oven, they won’t crisp up properly, resulting in a disappointing texture. Take the time to ensure your chickpeas are completely dry, and you’ll be rewarded with delightfully crunchy bites.
Don’t Skimp on Seasoning
The key to transforming plain chickpeas into a flavorful snack lies in the seasoning. Whether you prefer spicy, savory, or sweet baked chickpeas, don’t be afraid to experiment with seasonings and spices. Olive oil, salt, and pepper are a great base, but feel free to get creative. Add a dash of cayenne pepper for heat, paprika for smokiness, or cinnamon for a touch of sweetness. Toss the seasoning with the dried chickpeas until they are evenly coated. Remember, the more seasoned, the more flavorful your baked chickpeas will be.
Monitor the Baking Time and Temperature
Baking chickpeas requires a delicate balance of time and temperature. Over-baking can result in dry, rock-hard chickpeas, while under-baking may leave you with soft, chewy ones. Preheat your oven to around 400°F (200°C) and spread the seasoned chickpeas in an even layer on a baking sheet. Roast them for approximately 30-40 minutes, stirring occasionally to ensure even browning. Keep a close eye on them during the last few minutes as they can quickly go from perfectly golden to burnt. The goal is to achieve a crunchy exterior and a tender, nutty interior.
In conclusion, mastering the art of baked chickpeas requires attention to detail and a bit of experimentation. By choosing quality chickpeas, thoroughly drying them, generously seasoning, and monitoring the baking time and temperature, you’ll be well on your way to creating a batch of irresistible baked chickpeas. So roll up your sleeves, heat up that oven, and get ready to experience the crunchy, flavorful goodness of this trendy snack.
Frequently Asked Questions
Are you looking to bake chickpeas but not sure where to start? Check out these commonly asked questions to help you get started on your chickpea baking journey!
1. How do I prepare dried chickpeas for baking?
To prepare dried chickpeas for baking, you’ll need to soak them first. Start by rinsing the chickpeas under cold water to remove any debris. Then, place the chickpeas in a large bowl and cover them with water. Let them soak overnight or for at least 8 hours. After soaking, drain and rinse the chickpeas again before proceeding with your recipe. Soaking helps soften the chickpeas, reducing their cooking time and ensuring a better texture.
Alternatively, you can also use canned chickpeas for baking. Just remember to drain and rinse them before using to remove any excess salt or preservatives.
2. Should I remove the outer skin of chickpeas before baking?
Removing the outer skin of chickpeas is not necessary for baking. The skin is edible and contains fiber, so you can keep it on if you prefer. However, some people find that removing the skin results in a crunchier texture. If you want to remove the skin, you can do so by rubbing the cooked chickpeas between your fingers to loosen the skin, then rinsing them under water to separate the skin from the chickpeas.
Ultimately, whether to remove the skin or not depends on your personal preference. Both options will yield delicious baked chickpeas!
3. How do I season and flavor chickpeas for baking?
Seasoning and flavoring chickpeas for baking is a fun and customizable process. You can start by simply tossing the chickpeas with olive oil, salt, and pepper for a basic and delicious flavor. From there, you can experiment with various spices and seasonings to suit your taste. Some popular options include paprika, cumin, garlic powder, chili powder, and dried herbs like rosemary or thyme.
For added flavor, you can also sprinkle nutritional yeast, grated Parmesan cheese, or even a bit of honey if you prefer a touch of sweetness. Remember to evenly coat the chickpeas with your seasoning mixture before baking for a well-flavored result.
4. What is the best temperature and time to bake chickpeas?
The best temperature to bake chickpeas is typically around 400°F (200°C). This high heat helps crisp up the chickpeas while keeping the inside tender. As for the baking time, it usually ranges from 25 to 35 minutes, depending on your desired level of crispiness. Keep an eye on the chickpeas as they bake and give them a quick shake or stir halfway through to ensure even browning.
It’s important to note that baking times may vary depending on your oven and the size of the chickpeas, so it’s always a good idea to check for doneness by testing a couple of chickpeas for desired texture before removing them from the oven.
5. How should I store baked chickpeas?
To store baked chickpeas, make sure they have completely cooled down first. Once cooled, transfer them to an airtight container or a zip-top bag. They can be stored at room temperature for up to 3 days, but for longer shelf life, it’s recommended to store them in the refrigerator. Properly stored, they can last for up to 1 week in the fridge.
When you’re ready to enjoy them again, you can crisp them up in a preheated oven for a few minutes if desired. Baked chickpeas also make a great addition to salads, soups, or as a crunchy topping for roasted vegetable dishes.
How to Make Oven Roasted Chickpeas – 4 Ways!
In conclusion, learning how to bake chickpeas can be a game-changer in your culinary journey. These little legumes are incredibly versatile and when roasted to crispy perfection, they become a delicious and nutritious snack or addition to any dish. By following the simple steps outlined in this guide, you can easily elevate your cooking skills and impress your friends and family with a delectable treat. So, don your chef’s hat, preheat your oven, and get ready to indulge in the crispy, flavorful goodness of baked chickpeas. Happy cooking!