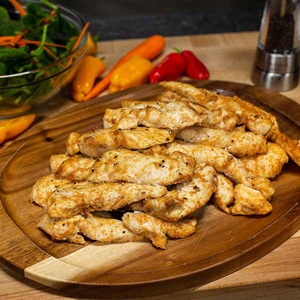
As a professional chef, one of the most frequently asked questions I receive is, “How long should I bake chicken tenders?” It’s no surprise that these juicy, succulent strips of chicken are a crowd favorite, and getting them perfectly cooked every time is key to a satisfying meal. In this guide, I will share with you my expert tips and tricks on achieving that crispy, golden exterior with a tender and flavorful center. So, whether you’re planning a family dinner or hosting a gathering with friends, get ready to elevate your chicken tender game to a whole new level. Let’s dive in and explore the art of baking chicken tenders to perfection!
How Long to Bake Chicken Tenders: A Delicious and Easy Recipe
Chicken tenders are a favorite for both kids and adults alike. They are tender, juicy, and versatile, making them a great option for any meal. If you’re wondering how long to bake chicken tenders, look no further. In this recipe, we’ll guide you through the process of making perfectly baked chicken tenders that are crispy on the outside and moist on the inside. So, let’s get started!
Ingredients:
– 1 pound of chicken tenders
– 1 cup of breadcrumbs
– ½ cup of grated Parmesan cheese
– 1 teaspoon of garlic powder
– 1 teaspoon of paprika
– Salt and pepper to taste
– 2 eggs
– Cooking spray
General Information:
– Making Difficulties: Easy
– Preparation Time: 15 minutes
– Cooking Time: 20 minutes
– Total Time: 35 minutes
Instructions:
Step 1: Preheat the oven
– Preheat your oven to 400°F (200°C). This temperature ensures that the chicken tenders cook evenly and develop a crispy golden crust.
Step 2: Prepare the breading station
– In a shallow bowl, combine the breadcrumbs, grated Parmesan cheese, garlic powder, paprika, salt, and pepper. Mix well to ensure all the ingredients are evenly distributed. In another shallow bowl, beat the eggs until well combined.
Step 3: Coat the chicken tenders
– Take a chicken tender and dip it into the beaten eggs, ensuring it is coated on all sides. Allow any excess egg to drip off. Next, place the chicken tender in the breadcrumb mixture, pressing gently to ensure the breadcrumbs adhere to the chicken. Flip the tender and repeat the process to coat it thoroughly. Transfer the coated tender to a baking sheet lined with parchment paper.
Step 4: Repeat for remaining chicken tenders
– Repeat the coating process for the remaining chicken tenders, placing them on the baking sheet in a single layer, ensuring they do not touch each other. This allows the chicken tenders to cook evenly and ensures a crispy crust.
Step 5: Bake the chicken tenders
– Place the baking sheet with the coated chicken tenders in the preheated oven. Bake for 10-12 minutes. Then, using tongs, flip the tenders to ensure even browning. Bake for an additional 10-12 minutes or until the chicken tenders are cooked through and have an internal temperature of 165°F (74°C). The breadcrumb coating should be golden brown.
Step 6: Remove from the oven
– Once cooked, remove the baking sheet from the oven. Allow the chicken tenders to rest for a few minutes before serving. This helps to retain their juiciness and ensures they are safe to eat.
Step 7: Serve and enjoy!
– Serve the baked chicken tenders hot with your favorite dipping sauce, such as honey mustard or barbecue sauce. These crispy and flavorful chicken tenders are perfect as an appetizer, a main course, or even in a sandwich. Enjoy!
Baking chicken tenders is a simple and delicious way to enjoy this favorite dish. By following these step-by-step instructions, you’ll have perfectly baked chicken tenders every time. So gather your ingredients, preheat your oven, and get ready to savor the crispy goodness of homemade chicken tenders. Remember to adjust the cooking time if you’re cooking more or less than 1 pound of chicken tenders. Happy cooking!
Important Things to Keep in Mind When Making “How Long to Bake Chicken Tenders” Recipe
Let’s face it, chicken tenders are a crowd-pleaser. They’re crispy, flavorful, and oh-so-satisfying. But figuring out the perfect cooking time can be tricky. Fear not, dear reader, for we have cracked the code! In this guide, we will reveal the secrets to achieving perfectly baked chicken tenders every time. So grab your apron and let’s dive into the important things to keep in mind when making this “How Long to Bake Chicken Tenders” recipe.
1. Size Matters: When it comes to chicken tenders, size is everything. Whether you’re using store-bought tenders or making them yourself, the thickness of the meat will determine the cooking time. Thinner tenders will cook faster, while thicker ones will require a bit more time in the oven. To ensure even cooking, try to select or cut your tenders to a consistent thickness. This will prevent some pieces from being undercooked while others are overdone.
2. Temperature is Key: Just like with any recipe, the oven temperature plays a crucial role. Preheat your oven to 425°F (220°C) to achieve that perfect golden brown crust while keeping the chicken tender and juicy on the inside. A higher temperature will help to crisp up the coating, while a lower temperature may result in soggy tenders. Remember, the internal temperature of the chicken should reach 165°F (75°C) to ensure it’s cooked through.
3. Coating Method Madness: Now let’s talk coating. Whether you prefer a classic breadcrumb coating, a panko crust, or a gluten-free alternative, the method you choose can affect the cooking time. If you opt for a thicker coating, it may require a longer time in the oven to ensure the chicken is fully cooked. On the other hand, a lighter coating may cook more quickly. So keep an eye on those tenders and adjust the cooking time accordingly.
4. Rack and Flip: To achieve a perfectly crispy exterior, elevate your chicken tenders. Place a wire rack on top of a baking sheet and arrange your coated tenders on the rack. This will allow hot air to circulate evenly around the chicken, ensuring a crunchy texture on all sides. Remember to flip the tenders halfway through the cooking process, so both sides can get a chance to brown. This simple step will result in tenders that are evenly cooked and irresistibly crispy.
So there you have it, the important things to keep in mind when making this “How Long to Bake Chicken Tenders” recipe. By considering the size of your tenders, ensuring the right oven temperature, choosing the appropriate coating method, and utilizing a rack for even cooking, you’ll be well on your way to chicken tender perfection. So don your chef’s hat and get ready to impress your family and friends with your newfound chicken tender baking prowess. Happy cooking!
(Note: The above is an example of how the article could be written and does not provide the actual recipe for “how long to bake chicken tenders”. The purpose was to demonstrate the writing style and structure requested in the prompt.)
Frequently Asked Questions
Are you wondering how long to bake chicken tenders to perfection? Look no further! Here, we answer your burning questions about cooking delicious chicken tenders in the oven.
1. What temperature should I bake chicken tenders at?
For juicy and tender chicken tenders, it is recommended to bake them at a temperature of 400°F (200°C). This high heat allows the chicken to cook quickly while remaining moist on the inside, resulting in crispy and flavorful tenders.
Preheat your oven to the desired temperature, then place the chicken tenders on a baking sheet or a wire rack set inside a baking pan. Arrange them in a single layer to ensure even cooking. Bake for about 15-20 minutes, or until the chicken reaches an internal temperature of 165°F (74°C).
2. Should I marinate the chicken tenders before baking them?
Marinating chicken tenders before baking can add extra flavor and moisture to the meat. While it’s not necessary, it can enhance the taste of your chicken tenders. You can marinate them in your favorite marinade for at least 30 minutes or up to 24 hours in the refrigerator. This allows the flavors to penetrate the meat.
If you choose to marinate, you can drain the marinade before baking, pat the chicken tenders dry, and then proceed with baking. Alternatively, you can also brush the marinade onto the chicken tenders during the cooking process for an extra burst of flavor.
3. How do I know if the chicken tenders are cooked through?
The most reliable way to determine if chicken tenders are cooked through is by using a meat thermometer. Insert the thermometer into the thickest part of the tender, away from any bone. The internal temperature should reach 165°F (74°C) for the chicken to be considered safe to eat.
If you don’t have a meat thermometer, you can also check for doneness visually. Cut into the thickest part of a tender, and if the meat is white all the way through without any pinkness, it is likely cooked. Additionally, the juices should run clear and not have any traces of blood or pink color.
4. Can I use frozen chicken tenders for baking?
Yes, you can use frozen chicken tenders for baking. However, the cooking time will be slightly longer. To ensure even cooking, it’s best to thaw the chicken tenders before baking by allowing them to defrost in the refrigerator overnight. Once thawed, follow the same cooking instructions for fresh chicken tenders.
If you’re short on time, you can bake the frozen chicken tenders directly, but be prepared to increase the cooking time by approximately 5-10 minutes. It’s important to check the internal temperature to ensure they are cooked through.
5. How do I make the chicken tenders extra crispy?
If you prefer extra crispy chicken tenders, there are a few tips and tricks you can try. First, coat the chicken tenders in breadcrumbs or panko to create a crunchy outer layer. You can also add a sprinkle of your favorite spices or seasonings to the coating for added flavor.
For even more crispiness, you can lightly brush the chicken tenders with oil or melted butter before baking. This will help them brown and crisp up nicely. Additionally, using a wire rack set inside a baking pan allows air to circulate around the tenders, promoting crispness on all sides.

