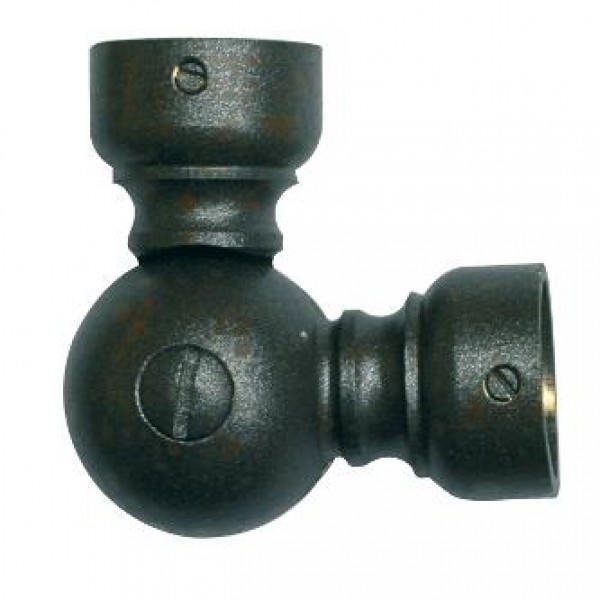
The curtain rod elbow connector is a device used to connect two curtain rods at a corner, allowing for a smooth and seamless transition. This connector is made with high-quality materials that ensure durability and strength, providing a reliable and long-lasting solution for your curtain hanging needs.
It is easy to install and versatile, allowing for various configurations and angles. Whether you are looking to create a cozy nook or divide a space, the curtain rod elbow connector is a practical and functional accessory that will enhance the functionality and aesthetics of your curtain setup.
Invest in this connector to achieve a polished and professional look for your curtains.
Why Choose A Curtain Rod Elbow Connector
A curtain rod elbow connector is a practical accessory for your window treatments. It allows you to seamlessly join two curtain rods at a perfect angle, ensuring smooth and even draping of your curtains. Achieve a polished and professional look for your windows with this versatile and easy-to-install connector.
Provides Flexibility For Window Treatments
- Curtain rod elbow connectors offer a versatile solution for window treatments. Here’s why you should consider choosing them:
- Customization: Curtain rod elbow connectors allow for easy customization of your window treatments. Whether you have an angled or bay window, these connectors help create a seamless and stylish look.
- Compatibility: These connectors are designed to work with different types of curtain rods and brackets, providing flexibility in terms of both style and functionality. You can easily adjust the positioning and angle of your curtains to suit your preferences and needs.
- Adjustable angles: With a curtain rod elbow connector, you can easily achieve different angles for your curtains. Whether you want your curtains to hang straight, create swags, or fit into a corner, these connectors allow you to achieve the desired look without any hassle.
- Room division: If you have a large room that needs dividing into smaller spaces, curtain rod elbow connectors can be a great solution. By using these connectors, you can hang curtains to create temporary partitions, giving you privacy when needed while maintaining an open and airy feel when desired.
- Versatile design options: Curtain rod elbow connectors come in a variety of designs and finishes, allowing you to find one that complements your existing decor. From classic, ornate designs to sleek and minimalistic options, you can easily find a connector that enhances the overall aesthetic of your room.
Allows For Easy Customization And Installation
- Choosing a curtain rod elbow connector provides several advantages when it comes to customization and installation:
- Easy installation: Curtain rod elbow connectors are designed to be simple to install. They usually come with clear instructions, making the installation process hassle-free even for those with limited DIY experience. Within no time, you can have your curtains beautifully hung, transforming the look of your space.
- Adjustable length: These connectors often come with adjustable lengths, making it easy to fit them to your specific window size. This ensures a perfect fit and eliminates the need for cutting or modifying the rods, saving you time and effort.
- Multiple curtain options: Curtain rod elbow connectors offer the flexibility to hang different types of curtains, such as sheer panels, drapes, or blackout curtains. This allows you to customize your window treatments according to your needs, whether it’s controlling light, privacy, or adding a touch of elegance to your space.
- Additional support: In situations where you have heavy curtains or require additional support, curtain rod elbow connectors can be a great solution. They provide added stability and durability, ensuring your curtains stay securely in place without any sagging or drooping.
- Easy adjustments: With a curtain rod elbow connector, making adjustments to your curtains is a breeze. Whether you want to change the height of the curtains or modify the angle, these connectors allow for quick and easy adjustments, giving you the freedom to create the perfect window display.
Enhances The Overall Aesthetic Of The Room
- The choice to incorporate a curtain rod elbow connector into your window treatments can significantly enhance the aesthetic appeal of your room. Here’s how:
- Seamless integration: By using a curtain rod elbow connector, you can achieve a seamless and polished look for your curtains. The connector helps create smooth transitions and eliminates any gaps or interruptions in the curtain rods, giving your windows a clean and sophisticated appearance.
- Stylish design options: Curtain rod elbow connectors come in various designs, allowing you to select one that adds a touch of elegance and style to your room. From decorative finials to modern and sleek finishes, these connectors can become a focal point and elevate the overall aesthetic of your space.
- Harmonious coordination: With the right choice of curtain rod elbow connector, you can coordinate the window treatments with the rest of your room’s decor. Whether you want the connectors to blend in seamlessly or make a bold statement, there are options available to help you achieve the desired look.
- Increased visual impact: Using a curtain rod elbow connector can help create a visually appealing display for your curtains. By allowing for unique angles and positioning, these connectors add depth and dimension to the overall look of the room, making it more visually interesting and inviting.
- Versatile functionality: Curtain rod elbow connectors not only enhance the aesthetic of your room but also offer functional benefits. By ensuring the proper hang and positioning of your curtains, these connectors contribute to the overall ambiance and atmosphere, allowing you to create a space that is both stylish and cozy.
Advantages Of Using A Curtain Rod Elbow Connector
The curtain rod elbow connector offers numerous advantages, including enhanced flexibility for various window configurations, increased stability and durability, and effortless installation for hassle-free curtain hanging. It’s a convenient solution that ensures smooth and seamless drapery functionality.
Versatile Design For Different Window Configurations
- The curtain rod elbow connector boasts a versatile design that can accommodate various window configurations.
- It is compatible with bay windows, corner windows, and other unconventional window types, allowing you to hang curtains with ease.
- The adjustable angles of the connector ensure a perfect fit for any angle or curve in your window layout.
- Whether you have a wide window, an angled window, or a combination of both, the curtain rod elbow connector can adapt to your needs.
Creates A Seamless And Polished Look
- Using a curtain rod elbow connector helps create a seamless and polished look for your window treatments.
- With this connector, there are no gaps or uneven spaces between curtain rods, giving your curtains a smooth and uninterrupted appearance.
- The clean lines and sleek design of the connector contribute to an overall cohesive look in your space.
- Say goodbye to unsightly gaps and hello to a professional and elegant finish.
Easy To Adjust And Reposition Curtains
- The curtain rod elbow connector offers the convenience of easy adjustment and repositioning of curtains.
- If you decide to change the position or height of your curtains, simply loosen the connector and adjust accordingly.
- This feature allows you to experiment with different curtain lengths, styles, or even switch curtains between windows effortlessly.
- You can easily achieve the desired drape and positioning of your curtains without the need for additional hardware or tools.
The curtain rod elbow connector provides several advantages when it comes to window treatments. Its versatile design accommodates different window configurations, creating a seamless and polished look. Additionally, the connector allows for easy adjustment and repositioning of curtains, providing flexibility and convenience.
Upgrade your window treatments with the curtain rod elbow connector for an elegant and hassle-free solution.
Factors To Consider When Choosing A Curtain Rod Elbow Connector
Choosing the right curtain rod elbow connector is crucial for a seamless and sturdy window treatment. Factors to consider include the rod’s material, length, design, and compatibility with your existing curtain rods.
A curtain rod elbow connector plays a crucial role in ensuring the stability and functionality of your curtain rod. When selecting the right connector for your curtain rod, there are several key factors to consider. Here, we’ll explore the type of curtain rod material, weight-bearing capacity, and length and width of the connector:
Type Of Curtain Rod Material:
- Steel: Known for its durability, steel curtain rods are strong and long-lasting. They can support heavy curtains and are ideal for larger window treatments.
- Wood: Wood curtain rods offer a classic and elegant look. They are versatile and suitable for various curtain styles. However, they may not have the same weight-bearing capacity as steel rods.
- Plastic: Plastic curtain rods are lightweight and affordable. They are perfect for lightweight curtains or children’s rooms. However, they may be less sturdy and not as suitable for heavier drapes.
Weight-Bearing Capacity:
- Consider the weight that your curtain rod needs to bear. Heavier curtains, such as those made of velvet or thick fabric, will require a sturdier connector with a higher weight-bearing capacity.
- Check the specifications provided by the manufacturer to ensure that the curtain rod elbow connector can handle the weight of your curtains without sagging or causing damage.
Length And Width Of The Connector:
- Measure the distance between the curtain rod and the wall to determine the required length of the connector. It should be long enough to provide a secure connection between the rod and the wall.
- The width of the connector should match the diameter of your curtain rod for a proper fit. Ensure that the connector is wide enough to accommodate the rod without any wobbling or instability.
Choosing the right curtain rod elbow connector is essential for the overall functionality and appearance of your window treatments. Consider factors such as the type of curtain rod material, weight-bearing capacity, and the length and width of the connector to ensure a secure and balanced installation.
By carefully evaluating these considerations, you can select a connector that will enhance the overall look and performance of your curtains.
How To Install A Curtain Rod Elbow Connector
Learn how to easily install a curtain rod elbow connector in just a few simple steps for a secure and stylish curtain hanging solution.
Gather The Necessary Tools And Materials:
- Curtain rod
- Elbow connector
- Curtain rod brackets
- Level
- Measuring tape
- Pencil
- Screwdriver
- Wall anchors (if required)
- Screws
- Hammer (if required)
Measure And Mark The Desired Placement:
- Begin by determining the desired height and width for your curtain rod placement.
- Use a measuring tape to measure the distance between the floor and the desired height of the curtain rod.
- Use a pencil to mark the measurements on the wall.
- Measure the width from one end of the window frame to the other, and mark it on the wall.
Install The Curtain Rod Brackets:
- Use a level to ensure the marks made for the height and width are straight.
- Attach the curtain rod brackets to the marked areas on the wall.
- If using wall anchors, drill holes into the wall at the marked spots and insert the anchors.
- Place the brackets over the anchors or directly onto the wall.
- Secure the brackets in place using screws and a screwdriver or hammer.
Secure The Elbow Connector To The Brackets:
- Insert one end of the curtain rod into the elbow connector.
- Slide the other end of the curtain rod into the opposite bracket.
- Ensure that the elbow connector is securely attached to both the curtain rod and the brackets.
- Double-check that the curtain rod is level and secure.
Hang The Curtains And Adjust As Needed:
- Slide the curtain rings onto the curtain rod.
- Hang the curtains onto the rings, ensuring they are evenly distributed along the rod.
- Adjust the curtains as necessary to achieve the desired appearance and symmetry.
- Step back and check for any adjustments needed in terms of height, alignment, or draping.
- Make any necessary adjustments to ensure the curtains hang properly and look their best.
Remember to step back and admire your newly installed curtain rod elbow connector. By following these simple steps, you can confidently install a curtain rod elbow connector and enhance the appearance of your window treatments.
Step-By-Step Guide To Installing A Curtain Rod Elbow Connector
Learn how to easily install a curtain rod elbow connector with this step-by-step guide. No more struggling with awkward angles – follow these simple instructions for a seamless and professional-looking curtain rod installation.
Step 1: Measure And Mark The Desired Placement
- Measure the width of your window or the area where you want to hang your curtains.
- Mark the desired placement of the curtain rod elbow connector on both sides of the window or wall.
- Use a measuring tape to ensure accuracy in your measurements.
- Take note of any obstructions such as window frames or furniture that may affect the placement.
Step 2: Install The Curtain Rod Brackets
- Start by determining the height at which you want to hang your curtain rod brackets.
- Use a level to ensure that the brackets will be installed straight.
- Mark the locations for the brackets, keeping in mind the placement of the curtain rod elbow connector.
- Use a drill and screws to securely attach the brackets to the wall or window frame.
Step 3: Attach The Elbow Connector To The Brackets
- Slide the curtain rod elbow connector onto the brackets from one side.
- Make sure it is securely in place and level with the other side of the connector.
- Use a screwdriver or Allen wrench to tighten any screws or hardware that secure the elbow connector to the brackets.
- Double-check that the elbow connector is stable and can support the weight of the curtains.
Step 4: Hang The Curtains And Adjust As Needed
- Slide the curtains onto the curtain rod and make any adjustments for length or spacing.
- Gently hang the curtain rod onto the elbow connector, ensuring it is seated properly.
- Adjust the curtains as needed, making sure they hang evenly and align with the desired placement.
- Take a step back to check the overall appearance and adjust any wrinkles or unevenness.
Remember, installation may vary depending on the type of curtain rod elbow connector and brackets you’re using. Always refer to the manufacturer’s instructions for the specific product you have purchased.
With a simple step-by-step guide, you can easily install a curtain rod elbow connector to add functionality and aesthetic appeal to your windows. So go ahead and elevate your curtains with this easy installation process.
Tips For A Successful Curtain Rod Elbow Connector Installation
Achieve a successful installation for your curtain rod elbow connector with these useful tips. Ensure a seamless setup by following these guidelines for a hassle-free experience.
Curtain Rod Elbow Connector: Tips For A Successful Installation
Installing a curtain rod elbow connector can be a simple and effective way to achieve that perfect curtain rod configuration. Whether you’re creating an L-shaped window treatment or need to go around a corner, these tips will ensure a successful installation.
Ensure Proper Alignment And Levelness:
- Before beginning the installation process, carefully measure and mark the desired positions for your curtain rod and elbow connectors.
- Use a level to ensure that your marks are straight and level, as this will greatly impact the overall appearance of your curtains.
- If needed, make adjustments to ensure proper alignment and levelness before proceeding with the installation.
Double-Check The Weight Capacity Of The Connector:
- Different curtain rod elbow connectors have varying weight capacities. It’s crucial to double-check the specifications provided by the manufacturer to ensure that the connector can support the weight of your curtains.
- Exceeding the weight capacity could result in a failed installation or damage to your curtains and wall. Safety should always be a priority.
Use Anchors For Added Stability And Support:
- Anchors are essential for providing additional stability and support, especially when installing curtain rod elbow connectors.
- Determine the appropriate size and type of anchor based on your wall type (drywall, plaster, etc.) And the weight of your curtains. The anchor package should provide weight specifications for reference.
- Drill pilot holes for the anchors following the manufacturer’s instructions, ensuring they are properly aligned with your marks.
- Insert the anchors into the holes and tap gently to secure them in place. Then, attach the connector brackets to the anchors according to the manufacturer’s guidelines.
Remember, a successful curtain rod elbow connector installation requires proper alignment, knowledge of weight capacities, and the use of anchors for stability and support. These tips will help you achieve the desired result while ensuring the longevity and functionality of your curtain setup.
Maintenance And Care For Curtain Rod Elbow Connectors
Proper maintenance and care are essential for curtain rod elbow connectors. Regular cleaning and inspection will ensure their longevity and proper functioning, allowing for smooth and seamless curtain installations. Stay attentive to keep your curtains in place with these simple maintenance tips.
Regularly clean and dust the connectors:
- Gently wipe down the connectors with a soft cloth or duster to remove any accumulated dust or dirt.
- Use a mild detergent or soap and water solution to clean stubborn stains or spots. Be sure to rinse thoroughly and dry completely.
Check for any signs of wear or damage:
- Inspect the connectors for any visible signs of wear or damage, such as cracks or rust.
- Look for any loose or missing screws or fittings that may need to be replaced.
Tighten any loose screws or fittings:
- Use a screwdriver or appropriate tool to tighten any loose screws or fittings on the connectors.
- Ensure that all connections are secure and stable, as loose parts can affect the functionality and appearance of the curtain rod.
Remember to:
- Avoid using abrasive cleaners or harsh chemicals that may damage the connectors.
- Regularly inspect the connectors for any signs of wear and tear, and replace if necessary.
- Follow the manufacturer’s instructions for proper installation and care of the curtain rod elbow connectors.
By following these simple maintenance and care tips, you can prolong the lifespan and functionality of your curtain rod elbow connectors, ensuring they continue to serve their purpose effectively. Regular cleaning, checking for wear or damage, and tightening loose screws or fittings will help keep your connectors in optimal condition, providing you with a stylish and reliable curtain rod setup for years to come.
Credit: www.thecurtainrodshop.com
Cleaning And Maintenance Tips For Curtain Rod Elbow Connectors
Discover essential cleaning and maintenance tips to keep your curtain rod elbow connectors in top condition. Keep them looking great and functioning properly with these easy-to-follow suggestions.
Curtain rod elbow connectors are an essential component for ensuring the stability and functionality of your curtain rod setup. To ensure their longevity and optimum performance, regular cleaning and maintenance are necessary. Here are some tips to help you keep your curtain rod elbow connectors in top shape:
Use A Soft Cloth Or Brush To Remove Dust:
- Gently dust off your curtain rod elbow connectors regularly with a soft cloth or brush. This will help keep them clean and free from any surface dirt or debris that may affect their performance.
Avoid Using Harsh Cleaners Or Abrasive Materials:
- Harsh cleaners and abrasive materials can cause damage to the finish of your curtain rod elbow connectors. It is best to avoid using them when cleaning the connectors. Instead, opt for mild soap and water solution to wipe them down gently.
Inspect The Connectors For Any Signs Of Rust Or Corrosion:
- Periodically inspect your curtain rod elbow connectors for any signs of rust or corrosion. If you notice any, take immediate action to prevent further damage. Here’s what you can do:
- Use a rust remover: If you spot rust on the connectors, apply a rust remover as per the manufacturer’s instructions to dissolve the rust and prevent it from spreading.
- Apply a rust-resistant coating: Once the rust is removed, consider applying a rust-resistant coating on the connectors to protect them from future corrosion.
- Replace if necessary: If the rust or corrosion has significantly affected the connectors’ structural integrity, it may be best to replace them altogether to ensure a safe and secure curtain rod setup.
By following these cleaning and maintenance tips, you can extend the lifespan of your curtain rod elbow connectors and maintain the overall functionality and appeal of your window treatments. Regularly inspecting, cleaning, and addressing any issues promptly will help prevent further damage and ensure smooth operation.
Frequently Asked Questions Of Curtain Rod Elbow Connector
What Is A Curtain Rod Elbow Connector Used For?
A curtain rod elbow connector is used to join two curtain rods at a 90-degree angle, allowing you to create a corner or bay window curtain setup. It provides stability and support for your curtains, ensuring they hang properly and stay securely in place.
How Do I Install A Curtain Rod Elbow Connector?
To install a curtain rod elbow connector, simply insert the ends of the two curtain rods into the connector and tighten the screws or fasteners to secure them in place. Make sure the connector is positioned correctly, with the rods forming a 90-degree angle.
Use a level to ensure the connector and curtain rods are straight.
Can A Curtain Rod Elbow Connector Be Used With Any Type Of Curtain Rod?
Yes, most curtain rod elbow connectors are designed to be compatible with a variety of curtain rod styles and materials, including metal, wood, and plastic. However, it’s always a good idea to check the product specifications or consult the manufacturer to ensure compatibility with your specific curtain rod.
Conclusion
The curtain rod elbow connector is a must-have accessory for anyone looking to achieve a stylish and functional window treatment setup. Its sturdy construction and easy installation make it an ideal choice for both residential and commercial use. With its ability to seamlessly connect curtain rods at a desired angle, this connector provides additional flexibility and options for designing the perfect window display.
Its sleek design and range of finishes ensure a seamless integration with any decor style, adding a touch of elegance to any space. By using a curtain rod elbow connector, you can create a polished and tailored look that enhances the overall aesthetic of your room.
So, whether you are renovating your home or revamping your office space, don’t forget to consider the benefits of including a curtain rod elbow connector in your window treatment solution.